Are you staring at that old towel rack stuck to your bathroom wall, wondering how to remove it without leaving a mess? You’re not alone.
Taking down a towel rack might seem simple, but it can quickly turn into a frustrating task if you don’t know the right steps. Imagine peeling it off cleanly, without damaging your wall or creating extra work for yourself. In this guide, you’ll discover easy, practical tips to get that towel rack off your wall smoothly and safely.
Keep reading—your bathroom makeover starts here.
Tools Needed
Removing a towel rack from the wall needs the right tools. These tools help you work safely and easily. Prepare them before starting. This saves time and avoids damage to your wall.
Basic Tools Checklist
- Screwdriver (flathead or Phillips)
- Putty knife or scraper
- Utility knife
- Measuring tape
- Step stool or small ladder
- Soft cloth or rag
These basic tools cover most towel rack removals. The screwdriver removes screws holding the rack. A putty knife helps to pry off covers or plates. Use a utility knife to cut any paint or caulk around the rack.
Optional Tools For Stubborn Racks
- Drill with screwdriver bits
- Heat gun or hair dryer
- WD-40 or lubricant spray
- Plastic pry tools
- Safety gloves
Some towel racks resist easy removal. A drill speeds up screw removal. Heat softens adhesive under covers. Lubricant loosens stuck screws or parts. Plastic pry tools avoid wall damage. Gloves protect your hands during tough work.

Credit: diy.stackexchange.com
Preparing The Area
Preparing the area is the first step to remove a towel rack safely. It helps avoid damage and keeps the process smooth. Taking time here saves effort later.
Clearing The Workspace
Remove all towels and items near the towel rack. Clear the floor space below the rack to avoid tripping. This gives you room to work freely. A clean area helps you see screws and tools easily.
Protecting The Wall Surface
Place painter’s tape around the towel rack base. This prevents scratches during removal. Use a soft cloth or small cardboard piece between tools and wall. Protecting the wall keeps it ready for repairs or new fixtures.
Identifying Mounting Type
Removing a towel rack from the wall starts with identifying its mounting type. This step helps you choose the right tools and method. Different racks attach to walls in various ways. Knowing the mounting type prevents damage and saves time. Here is a guide to common mounting types.
Screw-mounted Racks
Screw-mounted racks use screws and anchors to hold the rack firmly. Look for visible screw heads or small covers hiding them. These racks need a screwdriver or drill for removal. Unscrew carefully to avoid wall damage. After removal, small holes remain that you can fill.
Adhesive-mounted Racks
Adhesive-mounted racks stick to the wall with glue or tape. These leave no holes but require careful peeling. Gently pull the rack to loosen the adhesive. Use heat or a plastic scraper to soften glue if needed. Avoid strong force to protect paint or drywall.
Combination Mounts
Combination mounts use both screws and adhesive for extra strength. Check for screws first, then test if the rack feels glued. Removing these racks needs both unscrewing and careful peeling. Take your time to separate adhesive without breaking the rack or wall.
:max_bytes(150000):strip_icc()/how-to-remove-towel-bar-5221017-03-4873175f190548228b867ee5a3dec733.jpg)
Credit: www.thespruce.com
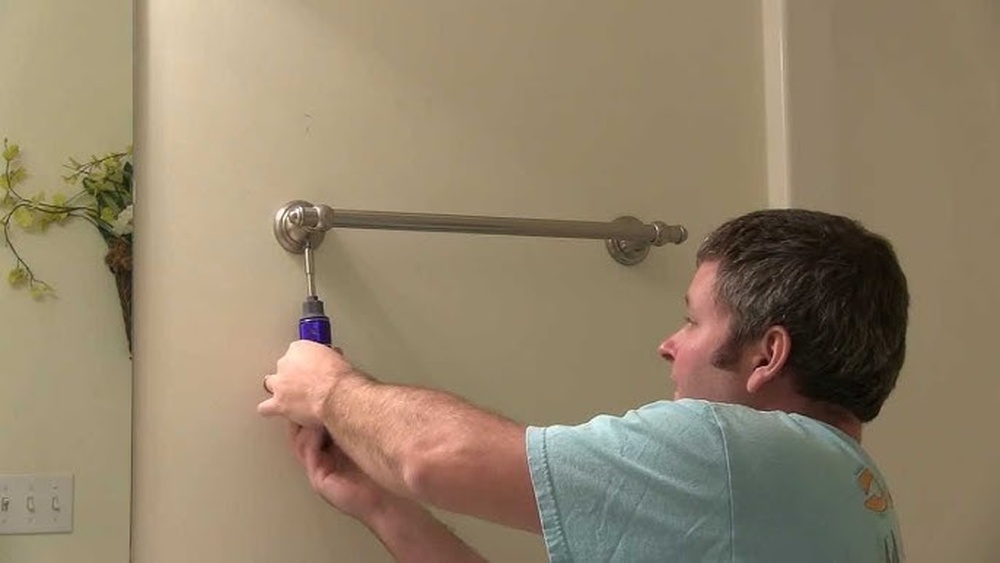
Removing Screw-mounted Racks
Removing a screw-mounted towel rack from the wall requires care and patience. These racks are fixed with screws that hold them tightly. Taking them off without damaging the wall is possible by following simple steps. The process starts by finding the screws, then unscrewing them gently. Sometimes, anchors are used, which need special attention.
Locating Screws
Look closely at the towel rack to find the screws. Screws are usually visible on the mounting brackets. Some racks hide screws under decorative covers. Use a flat tool to lift the covers and reveal the screws. Knowing the screw locations helps in removing the rack smoothly.
Unscrewing Carefully
Use a screwdriver that fits the screw heads well. Turn the screwdriver counterclockwise to loosen the screws. Apply steady pressure to avoid stripping the screws. Remove each screw fully before pulling the rack away from the wall. Keep the screws safe for future use or disposal.
Handling Anchors
Check if plastic or metal anchors hold the screws. Anchors keep the rack stable but stay in the wall after removal. Gently pull anchors out with pliers if loose. Push anchors inside the wall if they stick tightly. Fill holes with spackle to prepare the wall for repainting.
Removing Adhesive-mounted Racks
Removing adhesive-mounted towel racks requires care to avoid wall damage. These racks stick firmly, making quick removal risky. Follow simple steps to soften the glue and peel the rack gently. Clean the remaining adhesive to leave a smooth surface for new installations.
Softening Adhesive
Heat helps loosen adhesive on the towel rack. Use a hair dryer on low heat. Hold it a few inches from the rack for about one minute. Move the heat evenly across the adhesive areas. This makes the glue soft and easier to remove.
Peeling Rack Off Gently
Start peeling the rack slowly from one corner. Pull the rack at a low angle. Avoid sudden jerks to prevent wall damage. Use a plastic scraper if needed to lift edges. Work patiently until the rack separates from the wall.
Cleaning Residual Adhesive
Sticky residue often remains after rack removal. Dab a cloth with rubbing alcohol or adhesive remover. Rub gently to dissolve the leftover glue. Wipe the wall clean with a damp cloth. Let the wall dry before applying anything new.
Fixing Wall Damage
Removing a towel rack often leaves holes or marks on the wall. Fixing this damage restores the wall’s smooth look. It also prepares the surface for painting or wallpapering. Repairing the wall is simple with a few basic steps.
Filling Holes And Cracks
Start by cleaning the holes and cracks. Remove any loose paint or debris. Use a putty knife to apply spackling or wall filler. Press the filler into the holes firmly. Smooth the surface and let it dry fully. Drying time depends on the product used.
Sanding And Smoothing
Once dry, sand the filled spots gently. Use fine-grit sandpaper for best results. Sand until the surface is even with the wall. Wipe away dust with a clean cloth. A smooth wall helps paint stick better.
Touching Up Paint
Match the paint color before starting. Use a small brush or roller to apply paint over repairs. Apply thin layers to avoid drips. Let each coat dry before adding another. Proper painting hides the repairs well.
Preventing Future Damage
Removing a towel rack may leave marks or holes on your wall. Preventing damage during and after removal saves time and repair costs. Taking simple steps helps keep your walls clean and smooth. Proper mounting and protection reduce wear and tear. These tips ensure your wall stays in great shape for future use.
Choosing The Right Mounting Method
Select a mounting method that suits your wall type. Drywall needs anchors or toggle bolts for strong support. Tiles require special drill bits and anchors to avoid cracks. Avoid heavy racks on weak walls. Use adhesive strips or suction cups for light towel racks. These options reduce wall damage and make removal easier.
Using Protective Pads
Place soft pads between the rack and the wall. Felt or rubber pads prevent scratches and dents. They also reduce pressure on the wall surface. Pads absorb vibrations when you hang towels. This helps stop paint from peeling or chipping. Replace pads regularly to maintain protection.
Credit: www.reddit.com
Frequently Asked Questions
How Do I Safely Remove A Towel Rack From Drywall?
Use a screwdriver to remove screws holding the rack. Gently pull the rack from the wall. Patch any holes with spackle and sand smooth.
What Tools Are Needed To Remove A Towel Rack?
You need a screwdriver, putty knife, spackle, sandpaper, and possibly a drill for anchors. These tools help you remove and repair the wall.
Can I Reuse The Towel Rack After Removal?
Yes, if the rack is undamaged. Clean it thoroughly and check screw holes. Reinstall with new anchors if needed.
How To Avoid Wall Damage When Removing A Towel Rack?
Remove screws slowly and pull the rack gently. Use a putty knife to loosen stuck edges. Repair holes with spackle for a smooth finish.
Conclusion
Removing a towel rack from the wall is easier than it seems. With the right tools and a bit of care, you can do it safely. Take your time and follow each step carefully. Avoid damage to your wall by working gently.
Now, you can prepare the wall for a new rack or a fresh look. Small fixes make a big difference. Your bathroom will look neat and tidy again. Simple tasks like this save money and boost your home’s comfort. Give it a try today!