Are you looking to upgrade your home security without the hassle of complicated wiring? Installing a non-wired video doorbell could be the perfect solution for you.
Imagine being able to see and talk to visitors right from your phone, no matter where you are. This guide will walk you through each simple step, making the process easy and stress-free. By the end, you’ll have a fully working video doorbell that keeps your home safer and more connected.
Ready to get started? Let’s dive in!

Credit: www.youtube.com
Choosing The Right Doorbell
Choosing the right non wired video doorbell is important for your home’s security and convenience. This choice depends on what features you need and how you want to use the doorbell. Understanding the types, features, and power options helps you pick the best fit. Let’s explore these aspects in detail.
Types Of Non Wired Video Doorbells
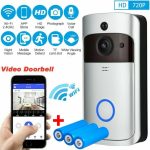
Non wired video doorbells come in many styles. Some have simple cameras with motion detection. Others include two-way audio for talking to visitors. Certain models offer cloud storage for video recordings. Some doorbells work well with smart home devices. Pick a type that matches your security needs.
Key Features To Consider
Look for clear video quality, usually HD or better. Night vision is helpful for low light conditions. Motion detection alerts you when someone approaches. Two-way audio lets you speak with visitors remotely. Easy installation and app control add to convenience. These features improve safety and user experience.
Battery Life And Power Options
Battery life varies widely among models. Some doorbells last months on one charge. Others need frequent battery changes or recharging. Solar-powered options reduce the need for manual charging. Choose a power option that suits your lifestyle and location. Reliable power keeps your doorbell active at all times.
Preparing For Installation
Preparing for installation is the first step to ensure a smooth setup of your non-wired video doorbell. Proper preparation saves time and avoids common mistakes. It helps you set up the device correctly and enjoy its features right away.
Start by gathering all necessary items and checking your home’s Wi-Fi. Then, choose the best spot for your doorbell. These steps create a strong foundation for a hassle-free installation.
Tools And Materials Needed
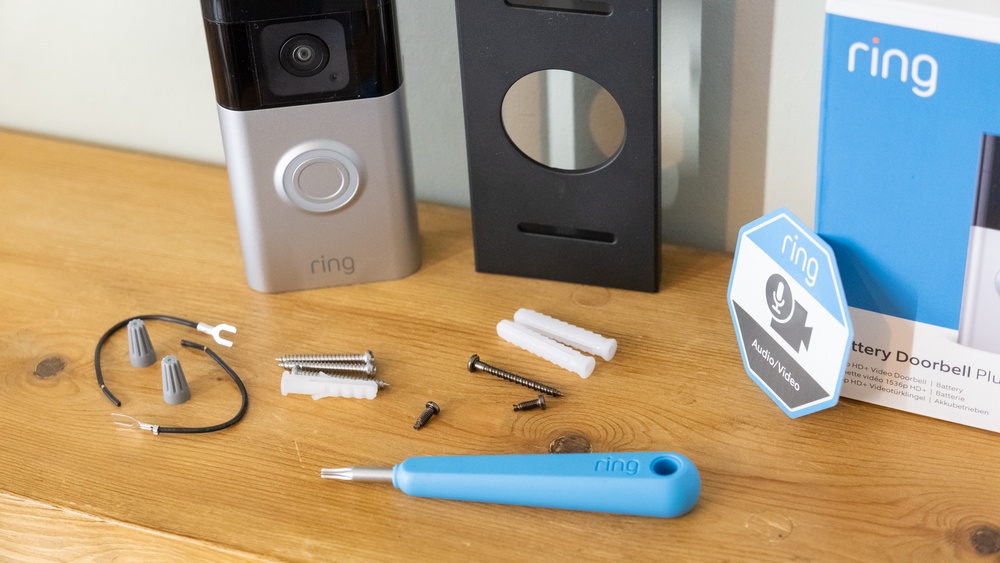
Collect all tools before starting. You will need a drill, screwdriver, and mounting screws. Have the video doorbell and its mounting plate ready. Also, keep a level handy for straight installation. Some doorbells include adhesive strips for easy mounting. Have batteries or a charger if your model requires them.
Checking Wi-fi Connectivity
Test your Wi-Fi signal near your door. A strong signal ensures the doorbell works well. Use a phone or tablet to check internet speed. Weak signals cause delays or dropped connections. Consider a Wi-Fi extender if the signal is poor. Confirm your network supports the doorbell’s frequency (2.4 GHz or 5 GHz).
Selecting The Installation Location
Pick a spot where visitors clearly appear on camera. The doorbell should cover the main entry door. Avoid areas with direct sunlight or heavy rain. Mount the device at eye level, about 4 to 5 feet high. Make sure the location is within Wi-Fi range. Keep it easy to reach for maintenance.
Mounting The Doorbell
Mounting the video doorbell is an important step for a secure and clear view. Proper mounting ensures the device works well and stays safe. This section guides you through simple steps to mount your non-wired video doorbell correctly.
Marking Drill Points
Start by holding the mounting bracket against the wall. Use a pencil to mark where the screws will go. Make sure the doorbell will face the right direction. Check the marks twice before drilling. This helps avoid mistakes and saves time.
Attaching The Mounting Bracket
Drill holes at the marked points carefully. Insert wall anchors if needed for extra support. Align the mounting bracket with the drilled holes. Use screws to fix the bracket tightly to the wall. Make sure it does not wobble or move.
Securing The Doorbell Unit
Place the doorbell unit onto the mounting bracket. Press or twist it until it locks in place. Check that the unit is firmly attached. Test by gently pulling to confirm it is secure. Proper attachment protects your doorbell from falling.
:strip_icc()/BHG-how-to-install-video-doorbell-6833360-part-01-step-05_30445-c97141832b6541158a12194e97fccded.jpg)
Credit: centromedicoloira.com
Setting Up The Software
Setting up the software is a key step for your non-wired video doorbell. It lets you control the doorbell from your phone. This way, you can see who is at your door anytime. Follow these simple steps to get started quickly.
Downloading The App
Start by finding the app for your video doorbell. Search the app store on your phone. The app name is usually on the product box or manual. Download and install it. The app helps you view live video and receive alerts.
Creating An Account
Open the app after installation. You need to create a new account. Use an email address and a strong password. This keeps your doorbell secure. Follow the app’s instructions to finish setting up your account.
Connecting To Wi-fi
Next, connect the doorbell to your Wi-Fi network. Make sure your phone is on the same network. Choose your Wi-Fi in the app. Enter your password carefully. This connection allows video and alerts to reach your phone.
Configuring Doorbell Settings
Configuring your non-wired video doorbell settings is essential for a smooth experience. It helps you control how the doorbell reacts to visitors and alerts you. Proper setup improves security and convenience.
Focus on three key areas: motion detection, notification preferences, and testing video and audio. Each step ensures your doorbell works exactly as you want. Let’s explore these settings in detail.
Adjusting Motion Detection
Start by setting the motion detection sensitivity. Choose a level that picks up real movement but avoids false alarms. You can usually adjust the detection zones too. This helps focus on important areas like your front porch.
Try different settings and check for false triggers. Fine-tuning motion detection saves battery life and reduces unnecessary alerts. It keeps the doorbell more reliable.
Setting Notification Preferences
Next, decide how and when you want to get notifications. You can receive alerts on your phone or tablet. Choose sounds and vibration patterns that catch your attention.
Set quiet hours if needed. This stops alerts during your sleep time. Tailoring notifications helps you stay informed without being overwhelmed.
Testing The Video And Audio
Finally, test the video and audio quality. Make sure the camera view is clear and covers the right angle. Speak into the doorbell and listen to the speaker sound.
Check the live feed on your device. Ensure the audio is loud and clear. Testing confirms your doorbell works perfectly before everyday use.

Credit: www.esseg.eu
Maintenance Tips
Maintaining your non-wired video doorbell keeps it working well for a long time. Regular care helps avoid problems and ensures clear video and sound. Simple steps can keep your device in top shape.
Battery Replacement And Charging
Check the battery level often. Replace the battery when it runs low. Some models use rechargeable batteries. Charge them fully before reinstalling the doorbell. Avoid letting the battery die completely to keep it healthy.
Cleaning The Lens And Sensors
Wipe the lens gently with a soft cloth. Remove dust and dirt that block the camera view. Clean the sensors carefully to keep motion detection accurate. Avoid harsh cleaners that can damage the lens or sensors.
Updating Firmware Regularly
Check for firmware updates in the app or website. Updates fix bugs and improve performance. Install updates as soon as they are available. Keep your doorbell’s software current for better security and features.
Frequently Asked Questions
What Tools Are Needed To Install A Non-wired Video Doorbell?
You only need a drill, screwdriver, and a level for installation. Most kits include mounting screws and anchors. A smartphone is required to set up the app. No electrical wiring tools are necessary, simplifying the process for beginners.
How Do I Mount A Non-wired Video Doorbell Securely?
Choose a flat surface near your door at eye level. Use the included screws and anchors to fix the mounting plate. Ensure the device is stable and angled for a clear view. Follow manufacturer instructions for best placement.
Can I Install A Non-wired Video Doorbell Myself?
Yes, installation is simple and designed for DIY. No electrical knowledge is needed since it operates on batteries. Just mount the device and connect it to Wi-Fi via the app. This saves time and professional costs.
How Long Do Batteries Last In A Non-wired Doorbell?
Battery life typically ranges from 6 months to a year. Usage frequency and temperature affect battery performance. Most models use rechargeable or replaceable batteries. Always check your specific model’s details for accurate battery life.
Conclusion
Installing a non-wired video doorbell is simple and quick. You only need a few tools and steps. This device helps you see who visits without opening the door. It runs on batteries, so no wires are needed. Make sure to place it where the camera has a clear view.
Test it after installation to check the connection. Enjoy added security and convenience at your doorstep. This small change brings peace of mind every day.