Are you ready to add a stunning touch to your wreath that will catch everyone’s eye? Making a decorative bow is easier than you think, and it can instantly transform your wreath from simple to spectacular.
Imagine your front door welcoming guests with a beautiful, handcrafted bow that shows off your style and creativity. In this guide, you’ll discover step-by-step how to create the perfect bow that fits your wreath and personality. Keep reading—you’re just moments away from mastering a skill that will make your decorations truly unforgettable.
Materials Needed
Gather ribbon, scissors, and floral wire to start making a decorative bow. A ruler or measuring tape helps to cut the ribbon evenly. These simple tools make the process easy and fun.
Ribbon
Choose a ribbon that matches your wreath’s style and colors. Wired ribbon works best. It holds shape well and is easy to bend.
Scissors
Use sharp scissors for clean cuts. Dull scissors can fray the ribbon edges and make shaping harder.
Floral Wire
Floral wire secures the bow to the wreath. Thin, green wire blends well with greenery and is easy to twist.
Measuring Tape Or Ruler
Measure ribbon length precisely for balanced loops. Consistent loop size makes the bow look neat.
Optional: Hot Glue Gun
A hot glue gun helps attach ribbon ends or add decorations. Use it carefully to avoid burns.
Gathering these materials prepares you well for crafting a beautiful decorative bow. Each item plays a key role in the final look. Simple tools and supplies make the process smooth and fun.

Credit: inmyownstyle.com
Choosing The Right Ribbon
Choosing the right ribbon is key to making a beautiful bow for your wreath. The ribbon sets the style and mood. It must match the wreath’s theme and colors. Picking the best ribbon makes your bow stand out and look neat.
Material Matters
Ribbon comes in many materials like satin, burlap, and velvet. Satin ribbons give a smooth, shiny look. Burlap adds a rustic feel. Velvet ribbons feel soft and rich. Choose a material that fits your wreath’s style.
Width And Length
Wide ribbons create big, bold bows. Thin ribbons work for small, delicate bows. Make sure the ribbon is long enough to make loops and tails. Always buy extra ribbon to avoid running short.
Color And Pattern
Pick colors that match or contrast your wreath. Solid colors work well for simple designs. Patterns like stripes or polka dots add fun and texture. Avoid too many patterns to keep the bow elegant.
Ribbon Stiffness
Stiff ribbons hold their shape better. They make your bow look full and neat. Soft ribbons are easy to tie but may droop. Check ribbon stiffness before buying to match your bow style.
Preparing The Ribbon
Preparing the ribbon is the first step to making a beautiful bow for your wreath. A well-prepared ribbon looks neat and holds its shape better. This part of the process needs care and attention to detail. The right length and clean edges make a big difference. Follow these simple steps to get your ribbon ready.
Measuring And Cutting
Start by measuring the ribbon length you need. The size depends on the bow style and wreath size. Use a ruler or tape measure for accuracy. Cut the ribbon with sharp scissors. Clean cuts help the ribbon look smooth and avoid fraying. Cut slowly to keep the edges straight.
Sealing The Edges
Seal the edges to stop the ribbon from fraying over time. Use a lighter or candle flame carefully. Hold the ribbon edge near the flame for a second. Do not touch the flame directly. The heat melts the ribbon fibers and seals the edge. Let the ribbon cool before touching it. This step keeps your bow neat and lasting longer.
Credit: kippiathome.com
Creating The Loops
Creating the loops is a key step in making a decorative bow for your wreath. Loops give the bow its shape and fullness. A well-made loop makes the bow look neat and attractive. You will start with one loop and then add more to build the bow’s size. Take your time and keep the loops even. This helps the bow look balanced and pretty.
Forming The First Loop
Cut a length of ribbon about 12 inches long. Hold one end of the ribbon firmly. Bring the ribbon around to form a loop. The size of this loop will set the bow’s overall size. Make the loop smooth and round. Pinch the base of the loop tightly. This is where you will hold all loops together later.
Adding Additional Loops
Make the next loop the same size as the first. Bring the ribbon back to the center and pinch it. Add one loop on each side to keep the bow balanced. Keep the loops flat, not twisted. Repeat until you have enough loops for your bow. Usually, six loops look full and nice. Finish by cutting the ribbon end at an angle.
Securing The Bow
Securing the bow is a key step in wreath making. It holds the shape and keeps the bow firm. A loose bow can fall apart or look messy. Focus on tying the center tightly and adjusting the loops carefully. This ensures the bow stays perfect and looks beautiful on your wreath.
Tying The Center
Start by gathering all the ribbon loops in the middle. Use a strong wire or a piece of floral tape to wrap around the center. Pull the wire tight to hold the loops together firmly. Twist the wire ends to secure the bow in place. This step keeps the bow from coming undone.
Adjusting The Loops
After tying the center, spread each loop evenly. Fluff the loops by pulling them gently outward. Make sure the loops are round and balanced on all sides. Adjust the size of the loops for a full, even look. This step gives the bow a polished, professional appearance.
Shaping The Tails
Shaping the tails of your decorative bow gives it a polished and stylish look. Tails add length and flow to the bow. They make the wreath feel complete and balanced. Properly shaped tails catch the eye and add charm.
Cutting The Ends
Cut the ribbon ends neatly for a clean finish. Use sharp scissors for smooth edges. Cut the ends at an angle to make a pointed tip. Or cut a V-shape by folding the ribbon in half and cutting from the fold. This method adds a classic look to the tails.
Curling The Ribbon
Curling the ribbon gives the tails movement and flair. Use the edge of a pair of scissors or a pencil. Hold the ribbon firmly and pull it across the blade quickly. The ribbon will curl naturally. Test on a small piece before curling the whole tail.
Attaching The Bow To The Wreath
Attaching the bow to the wreath is an important step. It secures the bow and keeps the wreath looking neat. A well-fixed bow adds charm and style to the wreath. This step requires some care but is easy to do with the right tools and tips.
Using Floral Wire
Floral wire is the best tool to attach the bow. Cut a piece of wire about 12 inches long. Wrap the wire around the center of the bow tightly. Next, place the bow on the wreath where you want it. Twist the wire ends behind the wreath branches to hold the bow firmly. Make sure the wire is tight so the bow will not fall off. Trim any extra wire to keep the back neat.
Placement Tips
Choose a spot on the wreath that stands out. The bottom center is classic and eye-catching. The top left or right corners work well for a modern look. Check that the bow faces outward and does not hide the wreath’s decorations. Adjust the bow and wire until it feels secure. Step back and look at the wreath to see if the bow fits nicely.
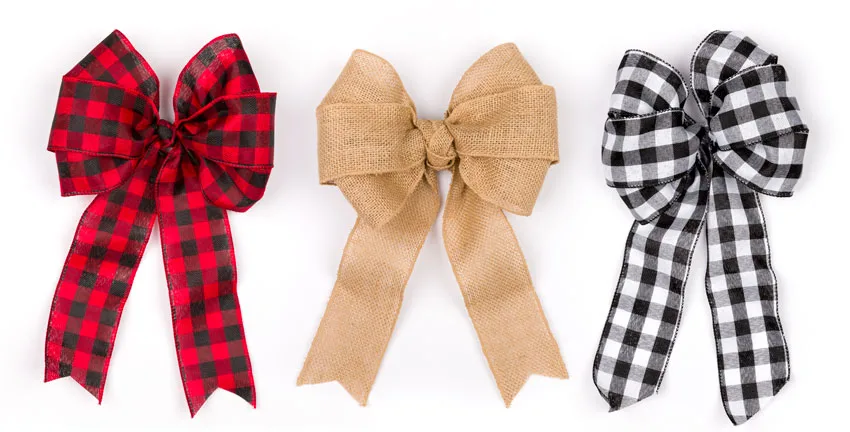
Tips For Different Styles
Decorative bows come in many styles. Each style brings a unique look to your wreath. Choosing the right style can make your wreath stand out. Below are tips for making three popular bow styles. These tips help you create beautiful, neat bows every time.
Classic Bow
The classic bow is simple and timeless. Use a wide ribbon for the best effect. Cut two equal lengths of ribbon. Fold each into loops and cross them in the center. Pinch the middle tightly and secure with floral wire. Fluff the loops for a full, round shape.
Looped Bow
The looped bow has many loops, adding volume and texture. Start with a long ribbon. Make several loops, keeping them the same size. Hold the center tightly as you add loops. Tie the center with wire or ribbon. Spread each loop out to create fullness.
Layered Bow
The layered bow uses different ribbon widths or colors. Begin with a large looped or classic bow as the base. Add smaller bows or ribbons on top for depth. Secure all layers in the center with wire. Adjust each layer to show colors and patterns clearly.

Credit: www.youtube.com
Frequently Asked Questions
How Do I Choose Ribbon For A Wreath Bow?
Select ribbon based on color, width, and texture. Choose a ribbon that complements your wreath’s style and theme. Wired ribbons work best for shaping and durability. Consider seasonal colors for a festive touch or neutral tones for year-round use.
What’s The Easiest Way To Make A Decorative Bow?
Use the loop and pinch method for simple bow-making. Create several loops, pinch them together, and secure with wire. Fluff and adjust loops for fullness. This method is quick and works well for wreath bows of any size.
How Do I Attach A Bow To A Wreath Securely?
Use floral wire or hot glue to attach bows firmly. Wrap wire around the wreath frame and bow’s center. Hot glue adds extra hold but may damage delicate ribbons. Ensure the bow is centered and stable before display.
Can I Reuse Wreath Bows For Different Seasons?
Yes, reusing bows is eco-friendly and cost-effective. Choose neutral or versatile colors for multiple seasons. Store bows carefully to maintain shape and prevent damage. Add seasonal embellishments to customize reused bows easily.
Conclusion
Making a decorative bow for your wreath adds a special touch. It is simple and fun to do. You only need a few basic supplies and some practice. Each bow can look unique and fit your style. Try different colors and sizes to match your wreath.
Enjoy the process and be creative. Your wreath will look fresh and inviting. This skill helps decorate for many occasions. Start today and see how beautiful your wreath can become.