Are you tired of towels cluttering your bathroom or dripping on the floor? Installing a towel rack is a simple way to keep your space organized and stylish.
But if you’re unsure where to start, don’t worry—you’re in the right place. This guide will walk you through easy steps to install a towel rack yourself, saving you time and money. By the end, you’ll enjoy a neat bathroom and the satisfaction of a job well done.
Ready to transform your bathroom? Let’s get started!

Credit: www.youtube.com
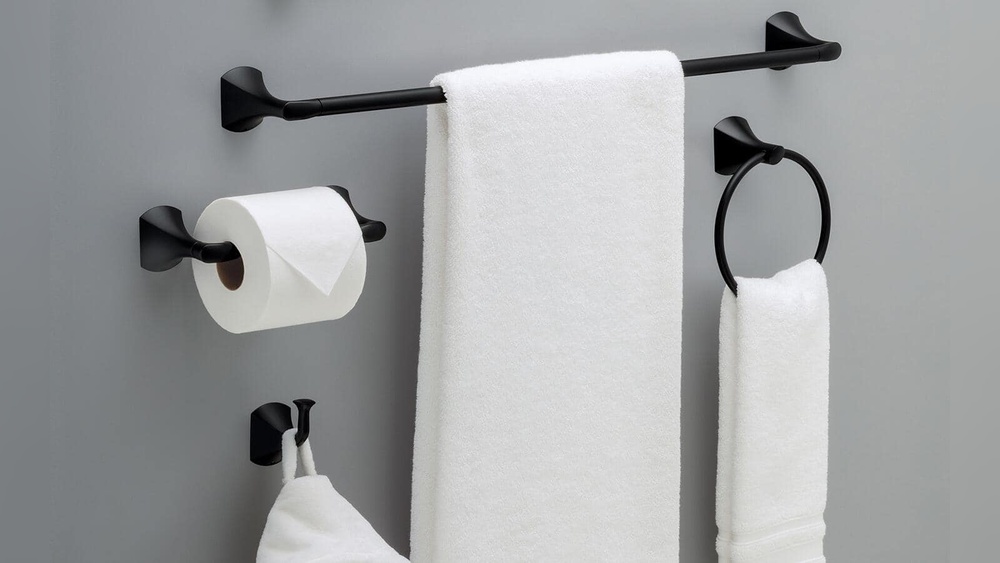
Choosing The Right Towel Rack
Choosing the right towel rack makes a big difference in your bathroom’s look and function. It helps keep towels dry and organized. Picking the best type, size, and material ensures it fits your space and style. This guide shows key points to consider before buying and installing a towel rack.
Types Of Towel Racks
Towel racks come in many styles. Wall-mounted racks save floor space and keep towels within reach. Freestanding racks can be moved easily and add style. Over-the-door racks fit on bathroom doors without drilling holes. Some racks have bars, others have hooks or rings. Choose one that fits your bathroom layout and towel needs.
Materials And Finishes
Materials affect durability and look. Stainless steel resists rust and suits modern bathrooms. Chrome finishes shine and are easy to clean. Wood racks add warmth but need protection from moisture. Plastic racks are budget-friendly but less sturdy. Pick a finish that matches your bathroom fixtures and stays strong in humid air.
Size And Placement Considerations
Measure your space before buying. The rack should fit without crowding your bathroom. Place racks near the shower or sink for easy access. Leave enough space between bars for towels to dry well. Avoid blocking doors or cabinets. Proper size and placement keep towels handy and your bathroom neat.

Credit: www.youtube.com
Gathering Necessary Tools And Materials
Before starting to install a towel rack in your bathroom, gather all necessary tools and materials. Having everything ready saves time and prevents frustration. It also helps to complete the job smoothly and safely. This section lists the essential tools and hardware you need.
Essential Tools
Start with basic tools. A drill is needed to make holes in the wall. Use a screwdriver to fasten screws securely. A tape measure helps to place the rack evenly. A level ensures the towel rack is straight. Pencil marks the drill points on the wall. A stud finder locates studs behind the wall for strong support. Safety goggles protect your eyes during drilling. A hammer may be required for anchors.
Hardware And Accessories
Choose the right towel rack hardware. Screws and wall anchors are essential to fix the rack firmly. Anchors prevent the rack from falling off drywall. Select screws matching the towel rack’s mounting holes. Some racks include mounting brackets for extra support. Check if the towel rack package contains all necessary parts. If not, buy matching hardware separately. A small level or mounting template may come with the rack for easy installation.
Preparing The Installation Area
Preparing the installation area is the first step to a successful towel rack setup. This stage ensures the rack is secure and looks neat in your bathroom. Taking time to prepare helps avoid mistakes and saves effort later.
Selecting The Installation Spot
Choose a spot near the shower or sink for easy access. The rack should be within arm’s reach for convenience. Avoid places where water splashes directly to keep towels dry. Check the height to suit all users, usually about 48 inches from the floor.
Marking Drill Points
Use a pencil to mark where the screws will go. Hold the towel rack in place and mark the holes through its mounting brackets. Double-check the marks for even spacing and level alignment. Accurate marks make drilling easier and keep the rack straight.
Checking Wall Structure
Identify the wall type before drilling. Drywall needs anchors for support, while studs provide strong hold. Use a stud finder to locate studs behind the wall. Avoid drilling into pipes or electrical wires by checking carefully. Proper wall checks prevent damage and ensure safety.

Credit: diy.stackexchange.com
Installing The Towel Rack
Installing a towel rack in your bathroom is a simple task that anyone can do. With the right tools and steps, the rack will be sturdy and look great. This section explains how to install the towel rack properly. Follow these steps for a secure fit and neat finish.
Drilling Holes And Anchoring
Start by marking the spots where the rack will go. Use a pencil to mark the wall. Check the marks with a level to keep them straight. Use a drill with the correct bit size for your anchors.
Drill holes carefully at the marked points. Insert wall anchors into the holes. Anchors provide strong support, especially in drywall. Tap anchors gently with a hammer until flush with the wall.
Mounting The Rack
Align the towel rack brackets with the anchors. Hold the rack firmly against the wall. Insert screws into the anchors through the bracket holes. Tighten screws using a screwdriver. Make sure the rack feels secure but do not over-tighten.
Securing And Leveling
Check the rack with a level again. Adjust screws if the rack is not straight. Tighten all screws fully once the rack is level. Test the rack by gently pulling on it. It should hold firm without moving.
Finishing Touches
After installing your towel rack, focus on the finishing touches. These small steps make your bathroom look neat and ensure the rack lasts long. Proper care at this stage saves time and effort later.
Cleaning Up
Remove dust and debris from the installation area. Use a soft cloth to wipe the rack gently. Clean any smudges or fingerprints on the rack surface. Clear the floor and dispose of leftover screws or packaging.
Testing Stability
Push the towel rack lightly to check its hold. Hang a towel to see if it supports weight well. Tighten screws if the rack feels loose. Make sure it does not wobble or shift during use.
Maintenance Tips
Wipe the rack regularly to prevent dust buildup. Use mild soap and water for cleaning. Avoid harsh chemicals that can damage the finish. Check screws every few months and tighten as needed. Keep the rack dry to prevent rust or corrosion.
Frequently Asked Questions
How Do I Choose The Right Towel Rack Size?
Select a towel rack size based on your bathroom space. Measure the wall area and towel dimensions. Choose a rack that fits comfortably without overcrowding. Consider the number of towels you need to hang. This ensures functionality and aesthetic balance.
What Tools Are Needed To Install A Towel Rack?
You’ll need a drill, level, measuring tape, screwdriver, wall anchors, and screws. These tools help ensure proper alignment and secure mounting. Having the right tools makes installation easier and safer.
Can I Install A Towel Rack On Tile Walls?
Yes, but use a masonry drill bit for tile. Mark the spots carefully and drill slowly to avoid cracking. Use wall anchors designed for tile to secure the rack firmly.
How High Should A Towel Rack Be Installed?
Install the towel rack about 48 inches from the floor. This height is accessible and practical for most users. Adjust slightly for children or specific user needs to enhance convenience.
Conclusion
Installing a towel rack in your bathroom is simple and quick. You only need a few tools and clear steps to follow. Choose the right spot for easy reach and good support. Take your time to measure and mark carefully.
Secure the rack firmly to avoid any accidents. Enjoy a neat and organized bathroom space. Small changes like this make daily routines easier. Try it yourself and see how handy it becomes. A well-placed towel rack adds both style and function.