If you want to give your pet the freedom to come and go without constantly opening the door, cutting a pet door into your metal door is a smart solution. But you might be wondering how to do it safely and correctly without damaging your door or making it look messy.
In this guide, you’ll discover clear, step-by-step instructions that make the process simple—even if you’re not a DIY expert. By the end, you’ll have the confidence to install a pet door that fits perfectly and lasts for years. Ready to make life easier for both you and your furry friend?
Let’s get started.
Credit: www.lowes.com
Tools And Materials Needed
Cutting a pet door into a metal door needs the right tools and materials. This step is important for safety and to make sure the door fits well. Preparing properly saves time and avoids mistakes. Here is what you need for the job.
Essential Tools
Start with a power drill for making holes. A jigsaw with a metal blade helps cut the door smoothly. Use a metal file to smooth sharp edges. A tape measure and pencil mark the area to cut. Safety gear like gloves and goggles protect your hands and eyes. A clamp keeps the door steady while you work.
Choosing The Right Pet Door
Select a pet door size that fits your pet comfortably. Look for models made for metal doors to ensure easy installation. Check if the door has a secure frame and weatherproof seals. A flap with magnets helps keep out wind and rain. Consider doors with a lock for added security.
Credit: www.petdoors.com
Preparing The Metal Door
Preparing the metal door is an important step before cutting a pet door. Proper preparation makes the cutting process safe and accurate. It helps avoid mistakes and damage to the door. Follow clear steps to get ready for the job.
Measuring And Marking
Start by measuring the size of the pet door carefully. Use a tape measure to get exact dimensions. Mark the door with a pencil or marker where you will cut. Double-check the marks before cutting to avoid errors. Make sure the pet door will fit well in the chosen spot.
Safety Precautions
Wear safety glasses to protect your eyes from metal shards. Use gloves to protect your hands from sharp edges. Work in a well-ventilated area to avoid breathing dust. Keep a fire extinguisher nearby in case sparks start a fire. Take your time and stay focused during the cutting process.
Cutting The Opening
Cutting the opening for a pet door in a metal door requires care and precision. This step shapes the space where the pet door will fit. Follow the right process to avoid mistakes and keep the door safe.
Start by marking the area clearly. Check measurements twice. This helps to ensure the cut will be exact and the pet door will fit well.
Drilling Starter Holes
Begin by drilling starter holes at each corner of the marked area. Use a drill bit suitable for metal. These holes make it easier to insert the cutting tool. Drill slowly and steadily to prevent metal damage. Keep the drill straight for clean holes.
Using The Cutting Tool
Use a jigsaw or an angle grinder with a metal-cutting blade. Insert the blade into a starter hole. Cut along the marked lines carefully. Move the tool slowly to avoid rough edges. Wear safety goggles and gloves to protect yourself. Smooth the edges with a metal file after cutting for a clean finish.
Installing The Pet Door
Installing the pet door is the step that brings your project to life. This part needs care and patience. The pet door must fit well and stay secure. A tight fit keeps out drafts and keeps your pet safe.
Follow the steps closely to make sure the door works smoothly. Take your time fitting and securing the frame. This makes the pet door durable and easy to use.
Fitting The Frame
Place the pet door frame into the cut-out space. Check if it fits snugly without gaps. The frame should sit flush against the metal door. Adjust it gently if needed. Use a rubber mallet to tap the frame lightly. This helps the frame settle evenly.
Make sure the door swings freely inside the frame. The flap should open and close without sticking. Test this before moving to the next step.
Securing With Screws
Use screws that come with the pet door kit. Align the screw holes on the frame with the metal door. Insert screws one by one. Tighten each screw firmly but do not over-tighten. Over-tightening can bend the frame or strip the holes.
Check the frame again after securing. The frame should feel solid and stable. Test the flap’s movement once more. Your pet door is now ready for use.
Sealing And Finishing Touches
Sealing and finishing touches are crucial after cutting a pet door into a metal door. They protect the door from weather and improve the pet door’s durability. Proper sealing stops water and air from entering your home.
Finishing touches also make the pet door look neat and professional. They help the door last longer and keep your pet safe and comfortable.
Weatherproofing Edges
Start by applying a weatherproof sealant around the pet door edges. Use a silicone or rubber-based sealant for best results. This stops rain and wind from leaking inside. Press the sealant firmly to fill all gaps. Let it dry completely before moving on.
Next, add weatherstripping tape along the door frame. This creates a tight barrier against drafts. Choose a tape that sticks well to metal surfaces. Cut the tape to fit the pet door edges precisely. Press it down firmly to ensure strong adhesion.
Testing The Pet Door
Check the pet door operation by opening and closing it several times. Make sure the flap moves smoothly without any resistance. Watch for gaps or loose areas around the edges.
Place your pet near the door and observe if they can use it easily. Ensure the door seals tightly after each use. If you notice leaks or drafts, apply extra sealant or weatherstripping.
Maintenance Tips
Maintaining your pet door in a metal door is important for its long life and smooth use. Regular care keeps the door safe and working well. Simple steps can help avoid big problems later.
Cleaning The Door
Clean the pet door often to stop dirt buildup. Use a soft cloth with mild soap and water. Wipe the edges and flap gently. Avoid harsh chemicals that can damage the metal or plastic parts. Dry the door fully to stop rust or water damage.
Remove dust and debris from the hinges and frame. This keeps the flap moving smoothly and quietly. A clean door looks good and works better for your pet.
Checking For Wear And Tear
Look at the pet door parts regularly. Check the flap for cracks or holes. See if the hinges are loose or rusty. Tighten screws if needed. Replace any broken parts quickly to keep the door safe.
Inspect the metal around the pet door. Watch for scratches or rust spots. Fix small rust areas with rust remover and paint to stop spread. Early care saves you money on repairs later.

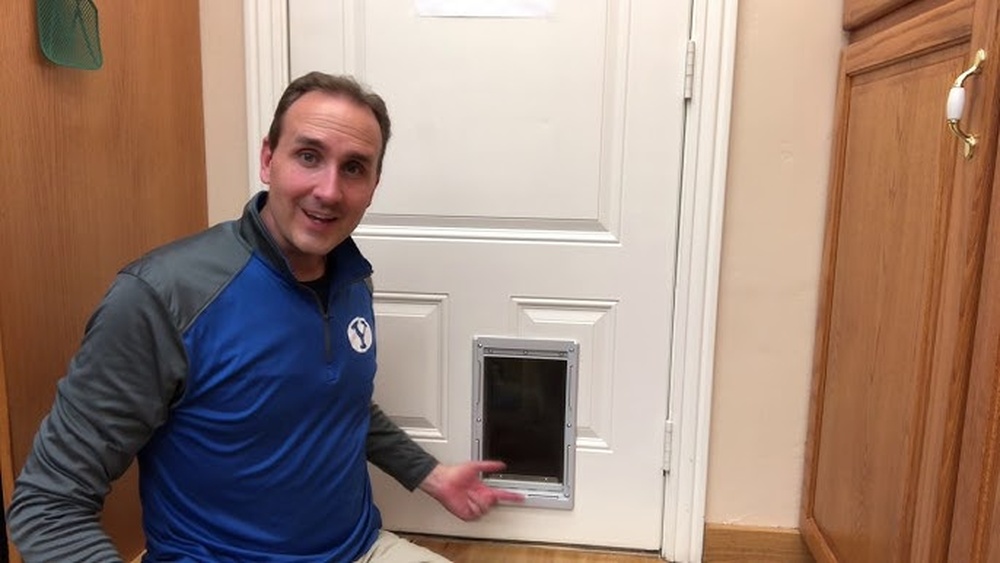
Credit: www.youtube.com
Frequently Asked Questions
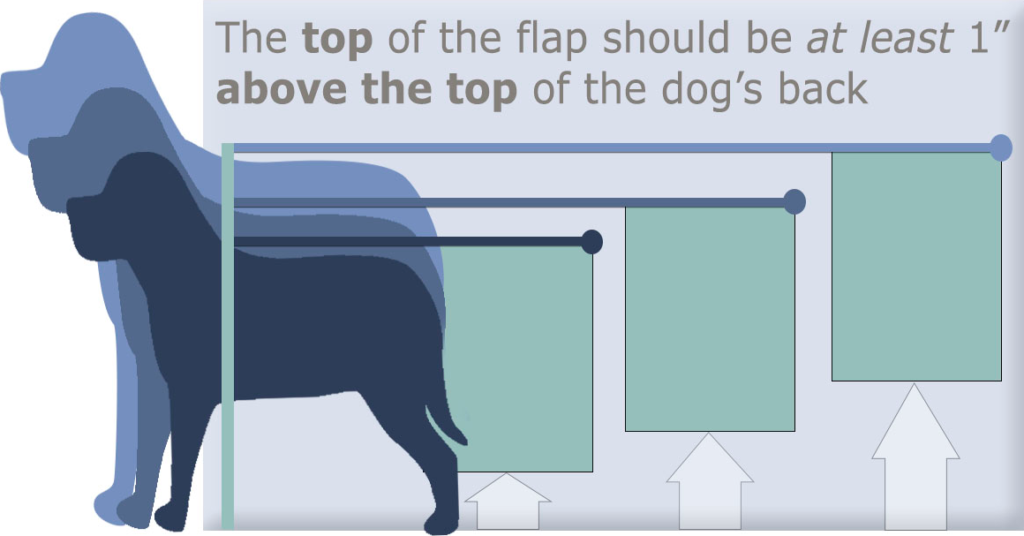
How Do I Measure For A Pet Door In Metal Doors?
Measure your pet’s height and width at shoulder level. Mark the door accordingly to ensure proper fit and comfort.
What Tools Are Needed To Cut A Pet Door In Metal?
You’ll need a drill, jigsaw with metal blade, metal file, tape measure, and safety gear for precise cutting.
Can I Install A Pet Door On A Metal Door Myself?
Yes, with basic tools and careful measurements, you can install a pet door on a metal door safely.
How To Prevent Sharp Edges After Cutting Metal For Pet Door?
Use a metal file or sandpaper to smooth edges, ensuring your pet’s safety and preventing injuries.
Conclusion
Cutting a pet door into a metal door can be simple with the right steps. Measure carefully and use proper tools for safety and accuracy. Take your time to avoid mistakes and ensure a good fit. A well-installed pet door gives your pet freedom and keeps your home secure.
With patience and care, you can do this project yourself. Enjoy the convenience and comfort it brings to you and your pet.