Are you ready to boost your home security with a second Nest Video Doorbell? Installing another doorbell might seem tricky, but it’s easier than you think.
With the right steps, you can keep an eye on every entrance and feel safer at all times. In this guide, you’ll find simple instructions that make the process quick and hassle-free. Keep reading, and soon you’ll have your second Nest Video Doorbell up and running without any stress.
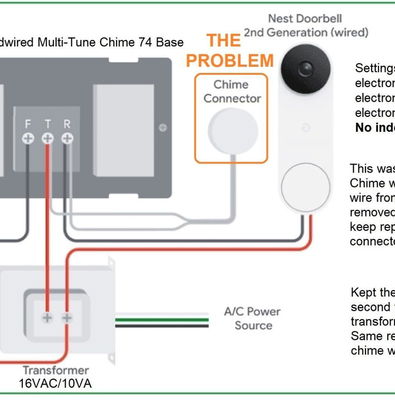
Credit: www.youtube.com
Prepare For Installation
Preparing for the installation of your second Nest Video Doorbell ensures a smooth and quick setup. This step is important to avoid surprises during installation. Taking time to prepare helps you work efficiently and safely.
Check Compatibility
Start by confirming that your home system supports the second Nest Video Doorbell. Check your existing doorbell’s wiring and voltage. Make sure your Wi-Fi signal is strong near the door. Compatibility prevents installation issues and poor device performance.
Gather Tools And Materials
Collect all tools before starting. You will need a screwdriver, drill, and possibly wire strippers. Keep the Nest Video Doorbell and mounting kit close. Having everything ready saves time and keeps the process smooth.
Review Safety Precautions
Turn off power at the circuit breaker before working on wires. Use a voltage tester to confirm no electricity flows. Wear safety glasses to protect your eyes from dust. Following safety steps avoids accidents and damage.
Credit: fundacioninbursa.org
Remove Existing Doorbell
Removing your old doorbell is the first step to install the second Nest Video Doorbell. This process needs care and attention. It ensures safety and prepares the area for the new device. Follow the steps below to remove the existing doorbell properly and safely.
Turn Off Power
Start by turning off the power to your doorbell. Locate the circuit breaker that controls the doorbell’s electricity. Switch it off to avoid any electric shock. Use a voltage tester to check if the power is truly off. Safety first.
Detach Old Doorbell
Next, remove the old doorbell from the wall. Unscrew it carefully. Keep the screws in a safe place in case you need them later. Gently pull the doorbell away from the wall. Be careful not to damage the wires behind it.
Inspect Wiring
Look closely at the wiring behind the old doorbell. Check for any signs of damage or wear. The wires should be intact and clean. If they look damaged, consider replacing them. Good wiring is important for your new Nest Video Doorbell to work well.
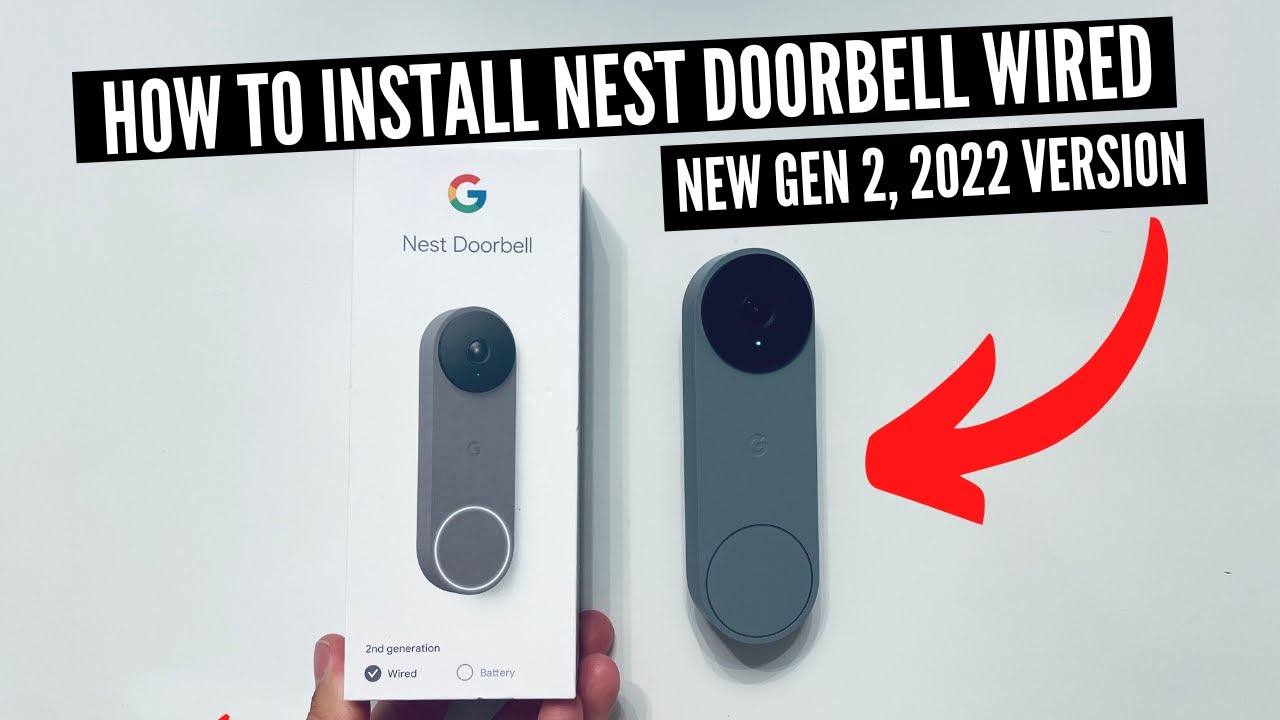
Set Up The Second Nest Doorbell
Setting up the second Nest Video Doorbell is simple and quick. Follow these steps to get your device ready for use. This guide helps you through charging, app installation, and account creation.
Charge The Device
Start by fully charging your Nest Video Doorbell. Use the included USB cable and connect it to a power source. A full charge ensures smooth setup and operation. Charging usually takes a few hours. Avoid unplugging before the battery is full.
Download Nest App
Next, download the Nest app on your smartphone or tablet. The app is available on both iOS and Android platforms. Search “Nest” in your app store. Install the app to begin the setup process. The app controls all Nest devices in one place.
Create A Nest Account
Open the Nest app and create a new account. Enter your email and set a secure password. This account helps you manage your doorbell and other Nest products. Follow the on-screen instructions to verify your email. Once done, log in to start adding your device.
Credit: vicentetorns.com
Install The Doorbell Hardware
Installing the hardware for your second Nest Video Doorbell is a key step to secure your home. This process involves attaching the mounting plate, connecting the wires, and securing the doorbell to the wall. Each step is simple and can be done with basic tools.
Attach Mounting Plate
Start by placing the mounting plate against the wall. Use a pencil to mark the screw holes. Drill holes where you marked. Insert wall anchors if needed. Finally, screw the mounting plate tightly to the wall.
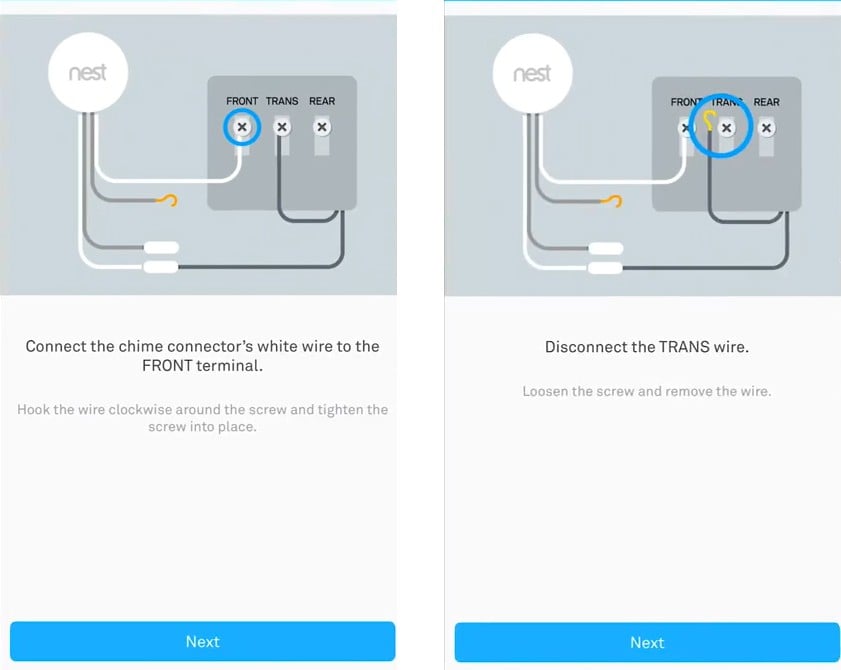
Connect Wires
Turn off the power to your doorbell circuit. Pull the existing doorbell wires through the mounting plate. Connect each wire to the terminals on the back of the Nest doorbell. Tighten the screws to hold the wires firmly.
Secure The Doorbell
Align the doorbell with the mounting plate. Push the doorbell gently until it clicks into place. Use the provided security screws to lock the doorbell. Check that the device is firmly attached and does not move.
Configure The Doorbell In The App
Configuring your Nest Video Doorbell in the app is the next key step after installation. This setup allows you to control and monitor your doorbell from anywhere. The app guides you through connecting the device and testing its features. Follow these steps to get started quickly and easily.
Add New Device
Open the Nest app on your smartphone. Tap the plus (+) icon to add a new device. Select “Nest Video Doorbell” from the list. The app will prompt you to scan the QR code on your doorbell or enter the setup key manually. This links the doorbell to your app account.
Connect To Wi-fi
Next, choose your home Wi-Fi network from the app. Enter your Wi-Fi password carefully. The doorbell will connect to the internet using this network. Wait a few moments while the connection completes. A strong Wi-Fi signal ensures smooth video and audio streaming.
Test The Video Feed
Once connected, open the live video feed in the app. Check the video quality and camera angle. Press the doorbell button to test notifications and alerts. Make sure the audio works both ways. This step confirms your doorbell is ready for use.
Adjust Settings And Preferences
After installing your second Nest Video Doorbell, adjusting the settings is the next step. Customizing these options helps the device work best for your home. It also reduces false alerts and improves security.
Focus on motion zones, notifications, and face detection. Each setting makes your doorbell smarter and more useful.
Set Motion Zones
Motion zones let you choose areas to watch closely. You can avoid alerts from busy streets or sidewalks. Open the Nest app and select your doorbell. Tap “Motion Zones” and draw the zones on the screen. Save your settings. This helps you get alerts only from important areas.
Customize Notifications
You can control how and when you get alerts. Choose to receive push notifications or emails. Set quiet hours to avoid alerts at night. In the Nest app, go to “Notifications.” Turn alerts on or off for motion, sound, or person detection. Tailor notifications to your daily routine.
Enable Familiar Face Detection
This feature recognizes people you know. It reduces false alarms and tells you who is at the door. To enable, open the Nest app and find “Familiar Face Detection.” Turn it on and allow the app to learn faces. It uses machine learning to improve over time. This makes your home safer and smarter.
Troubleshooting Tips
Troubleshooting your Second Nest Video Doorbell can help solve common problems fast. Simple checks often fix most issues. It saves time and avoids frustration.
This section covers common installation issues, Wi-Fi problems, and how to reset your doorbell. Follow these tips to get your device working smoothly again.
Common Installation Issues
Loose wires can stop your doorbell from working. Check all connections carefully. Use a screwdriver to tighten screws if needed.
Make sure the mounting plate is level. An uneven setup may cause poor video quality. Use a small level tool for accuracy.
Power supply is crucial. Verify the doorbell gets enough power. Check your home’s transformer and wiring compatibility.
Wi-fi Connectivity Problems
Weak Wi-Fi signals cause video lag or loss. Move your router closer to the doorbell if possible. Avoid thick walls between them.
Restart your router to refresh the connection. This often fixes slow or dropped Wi-Fi.
Use the Nest app to check signal strength. A strong signal shows green bars. Less than two bars means weak connection.
Resetting The Doorbell
Reset your doorbell if it still does not work. Press and hold the reset button for 10 seconds. The doorbell will reboot automatically.
Resetting clears minor errors and restarts the system. It will not delete your settings or videos.
After reset, reconnect the doorbell to Wi-Fi. Follow the app instructions for setup. This step often solves persistent problems.
Frequently Asked Questions
How Do I Install A Second Nest Video Doorbell?
First, power off your existing doorbell wiring. Connect the second Nest doorbell wires to your doorbell transformer. Mount the device securely. Follow the Nest app prompts to complete setup and connect to Wi-Fi. Test the doorbell to ensure it works properly.
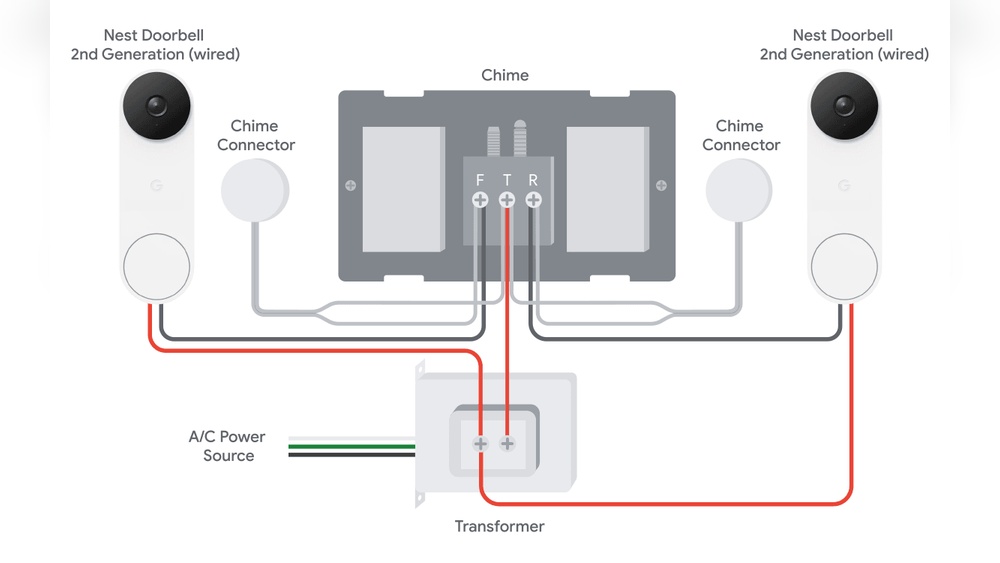
Can I Use The Same Transformer For Two Nest Doorbells?
Yes, you can use one transformer if it supports sufficient voltage and current. Nest doorbells typically require 16-24V AC and 10-40VA power. Check your transformer’s specifications to confirm it can handle both devices simultaneously without overloading.
Will My Nest App Support Two Video Doorbells?
Yes, the Nest app allows multiple devices on one account. You can view and manage both doorbells separately. Each doorbell will have its own live feed, notifications, and settings within the app for easy control.
Do I Need Additional Wiring For The Second Nest Doorbell?
Usually, no extra wiring is needed if you have existing doorbell wires near the second door location. If wiring is unavailable, you may need to run new wires or use a battery-powered Nest doorbell model instead.
Conclusion
Installing a second Nest Video Doorbell adds extra security to your home. The process is simple if you follow the steps carefully. Make sure to check your Wi-Fi connection and power supply before starting. Test the doorbell after installation to confirm it works well.
Enjoy better monitoring and peace of mind with two cameras. This setup helps you see more areas around your house easily. Keep your home safe without much effort or cost. Now, you are ready to protect your home better.