If you want to boost your home security with a smart, easy-to-use device, the Ring Video Doorbell 2nd Generation is a great choice. But how do you get it up and running without hassle?
You’re about to learn simple, step-by-step instructions to install your new doorbell quickly and correctly. By the end of this guide, you’ll feel confident and ready to enjoy the peace of mind that comes with knowing who’s at your door—anytime, anywhere.
Keep reading, and let’s make your home smarter and safer together.
Ring Video Doorbell 2nd Gen Features
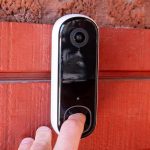
The Ring Video Doorbell 2nd Generation offers many helpful features. It makes home security simple and effective. This doorbell lets you see and speak to visitors from anywhere.
It works well with your smartphone and sends alerts instantly. The design is sleek and fits most door frames. The setup is easy and does not take much time.
1080p Hd Video And Night Vision
See clear video of your front door in full color. The 1080p HD camera captures sharp images day and night. Night vision helps you see visitors even in darkness.
Two-way Talk
Talk to visitors using your phone or tablet. The built-in microphone and speaker deliver clear sound. No need to open the door to communicate.
Motion Detection
The doorbell detects motion near your door. It sends alerts to your device right away. You can customize motion zones to focus on important areas.
Easy Installation
Install the doorbell yourself with simple tools. It works with existing doorbell wiring or battery power. The package includes all needed parts for quick setup.
Wi-fi Connectivity
Connect the doorbell to your home Wi-Fi network. This allows live video streaming and instant notifications. The connection is secure and reliable.
Tools And Materials Needed
Before starting the installation of your Ring Video Doorbell 2nd Generation, gather the right tools and materials. Having everything ready makes the process faster and easier. You will need a few common tools and the parts that come with the doorbell.
Check the list below to prepare. Each item plays an important role in setting up your device correctly and safely.
Tools Required For Installation
A screwdriver is essential for opening the mounting bracket and securing the doorbell. A drill with a small bit helps create holes in hard surfaces like brick or wood. Use a level to keep your doorbell straight. A pencil is useful for marking where to drill.
Materials Included In The Ring Video Doorbell Package
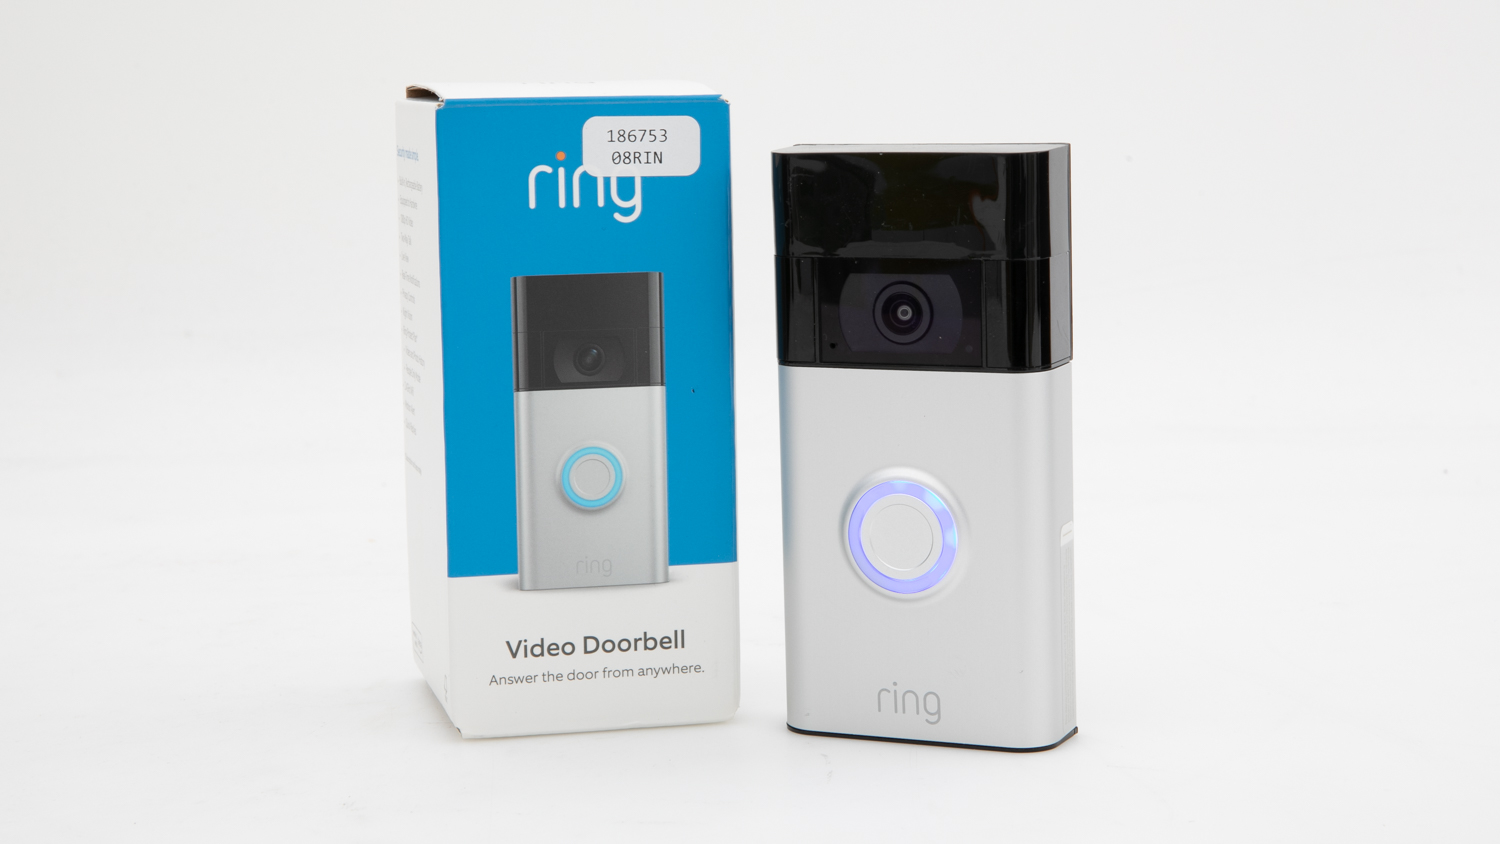
The package includes the doorbell unit, a mounting bracket, screws, and wall anchors. It also has a quick-release battery pack. These are all needed to install and power your doorbell without extra purchases.
Optional Tools For Easier Installation
A tape measure helps place the doorbell at the right height. You might want safety glasses when drilling. A power drill with different bit sizes can be helpful if you face varying wall materials. A ladder or step stool might be needed for high doorways.
Prepare Your Doorbell
Preparing your Ring Video Doorbell 2nd Generation is an important first step. It helps you avoid problems during installation. Follow these simple tasks before mounting the doorbell. This ensures the device works perfectly from the start.
These steps include charging the battery, downloading the app, and creating an account. Each step is easy and quick. Let’s begin with charging the battery.
Charge The Battery
Take the rechargeable battery from the box. Use the provided USB cable to connect it to a power source. Charge the battery fully before installation. A full charge takes about 5 hours. Avoid installing the doorbell with a low battery. This prevents interruptions during setup and use.
Download The Ring App
Find the Ring app in your phone’s app store. It is available for both iOS and Android devices. Download and install the app on your smartphone. The app controls your doorbell and sends alerts. Having it ready speeds up the setup process.
Create A Ring Account
Open the Ring app after installation. Follow the on-screen instructions to create a new account. You will need an email and a password. This account links your doorbell to your phone. It also keeps your device secure and personal.
Credit: vicentetorns.com
Remove Old Doorbell
Removing your old doorbell is the first step to install the Ring Video Doorbell 2nd Generation. Take your time and be careful during this process. It helps ensure safety and prepares the area for the new device. Follow these simple steps to remove your old doorbell properly.
Turn Off Power
Safety first. Turn off the power to your doorbell at the circuit breaker. This stops any electrical current and prevents shocks. Double-check by pressing the old doorbell button. If it does not ring, the power is off.
Unscrew Existing Doorbell
Use a screwdriver to remove the screws holding your old doorbell. Keep the screws in a safe place. Gently pull the doorbell away from the wall. Avoid pulling hard to protect the wires behind it.
Disconnect Wires
Look for the wires connected to the doorbell. Use a screwdriver to loosen the screws holding the wires. Carefully disconnect the wires. Do not let the wires touch each other or the wall. Tuck them safely back into the wall to keep them neat.
Mount The Ring Doorbell
Mounting the Ring Video Doorbell 2nd Generation is a key step in installation. It ensures your device stays secure and works properly. Follow these simple steps to mount your doorbell with ease. Each part of the process helps your doorbell function well and look neat on your wall.
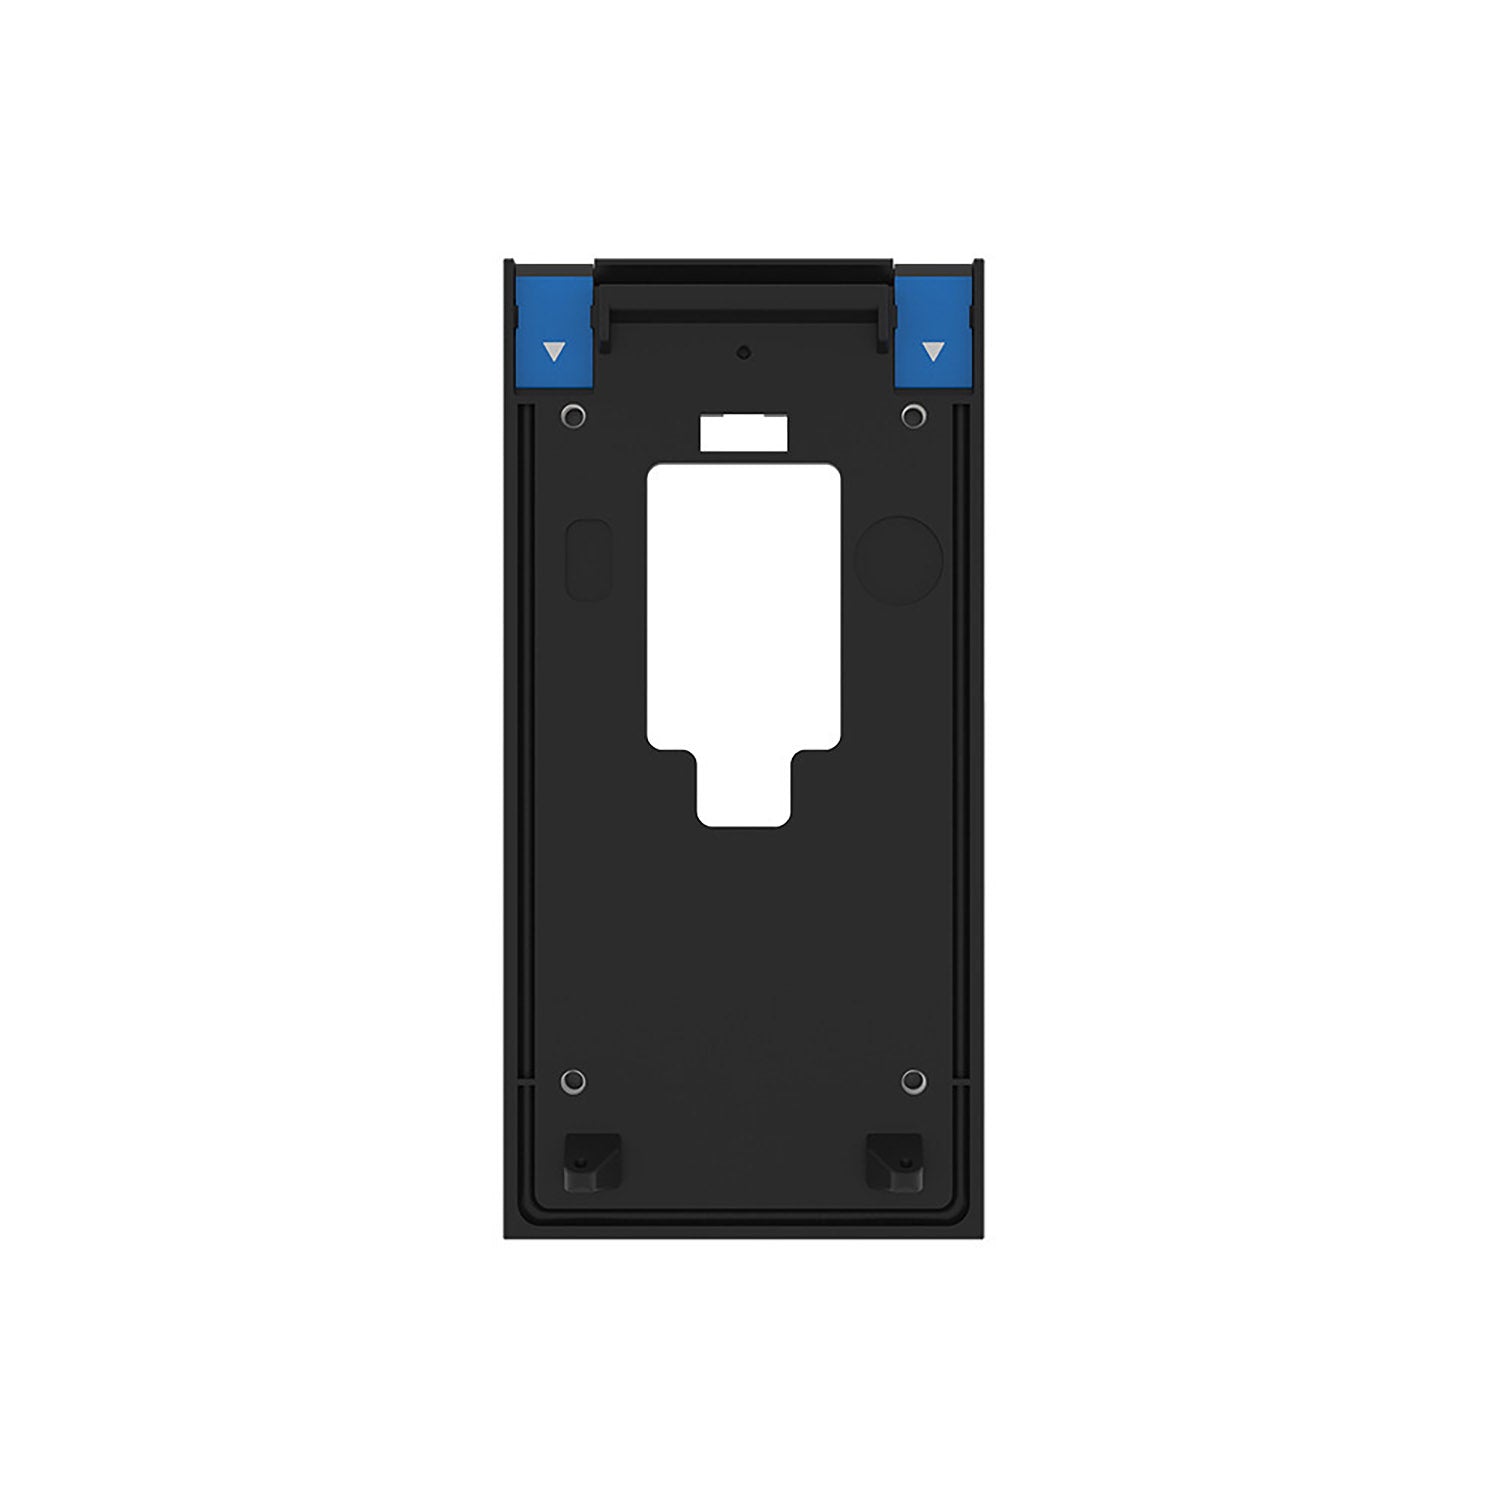
Attach Mounting Bracket
Start by placing the mounting bracket where you want the doorbell. Use a pencil to mark the screw holes. Drill holes in the marked spots for the anchors. Insert the anchors to hold screws firmly. Screw the mounting bracket tightly to the wall or door frame.
Connect Wires To Ring Doorbell
Turn off power at the breaker to avoid shocks. Connect the doorbell wires to the screws on the bracket. Make sure the wires are tight and secure. If you have old wires, remove any rust or dirt first. Keep the wires straight and not crossed.
Secure Doorbell To Bracket
Line up the doorbell with the mounting bracket. Push the doorbell onto the bracket until it clicks. Use the included security screws to lock the doorbell in place. Tighten the screws with a screwdriver for strong hold. Check that the doorbell is firmly attached and does not move.

Credit: vicentetorns.com
Set Up The Device In App
Setting up your Ring Video Doorbell 2nd Generation through the app is simple. The app guides you through each step. It helps connect your doorbell to Wi-Fi and customize settings. Testing the doorbell ensures everything works correctly. Follow the instructions below to get started quickly.
Connect To Wi-fi
Open the Ring app on your phone. Select your Ring Video Doorbell from the list. Tap on “Set Up a Device.” Choose your home Wi-Fi network. Enter the Wi-Fi password carefully. The doorbell will connect to the internet. Wait for the confirmation message before moving on.
Customize Settings
Adjust motion detection zones for better alerts. Set the motion sensitivity to your preference. Choose notification types and sound alerts. Link the doorbell to other Ring devices. Enable or disable the privacy settings. Save all changes before exiting the menu.
Test Doorbell Functionality
Press the doorbell button to check its sound. View the live video feed in the app. Test motion alerts by walking near the doorbell. Confirm you receive notifications on your phone. Check the audio quality by speaking through the app. Make adjustments if needed for best performance.
Troubleshooting Tips
Installing the Ring Video Doorbell 2nd Generation can sometimes bring small problems. These issues can stop your doorbell from working well. Troubleshooting helps fix these problems quickly. It keeps your doorbell running smoothly. Here are some common issues and easy tips to solve them.
Wi-fi Connectivity Issues
Check your Wi-Fi signal near the doorbell. A weak signal can cause connection problems. Move your router closer or use a Wi-Fi extender. Restart your router to refresh the connection. Make sure your Wi-Fi password is correct in the app. Avoid interference from other devices like microwaves or cordless phones.
Power Problems
Confirm the doorbell battery is fully charged. Low battery stops the doorbell from working properly. Charge the battery with the provided charger. Check the wiring if your doorbell uses existing doorbell wires. Loose or damaged wires can cause power failure. Replace old wires if needed to ensure steady power.
App Notifications Not Working
Verify notifications are enabled in the Ring app settings. Check your phone’s notification settings to allow alerts from Ring. Restart your phone to refresh the app. Update the Ring app to the latest version. Log out and log back into the app to fix syncing issues.
Credit: ring.com
Maintenance And Updates
Maintaining your Ring Video Doorbell 2nd Generation helps it work well for a long time. Regular care keeps the video clear and the device responsive. Updates improve features and fix issues quickly. Simple steps keep your doorbell ready to protect your home.
Battery Replacement
The battery lasts several months but needs replacing. Open the front cover to find the battery. Press the release button and slide the battery out gently. Charge the battery fully before placing it back. Use only the battery made for your Ring doorbell. This keeps your device powered and working without interruptions.
Software Updates
Ring sends updates to improve security and features. Your doorbell updates automatically when connected to Wi-Fi. Check the Ring app to see if the update is done. Restart the doorbell if updates do not start. Keeping software current protects your device from bugs and adds new functions.
Cleaning Tips
Clean your doorbell often for clear video and sound. Use a soft cloth dampened with water. Avoid harsh chemicals that can damage the surface. Wipe the camera lens gently to remove dirt or dust. Regular cleaning keeps your doorbell looking good and working well.
Frequently Asked Questions
How Do I Install Ring Video Doorbell 2nd Generation?
Start by charging the battery fully. Next, attach the mounting bracket using screws. Then, connect the doorbell to Wi-Fi and follow the Ring app setup instructions.
What Tools Are Needed For Installation?
You will need a drill, screwdriver, level, and the provided mounting screws. A power drill helps in making holes faster and easier.
Can I Use Existing Doorbell Wiring?
Yes, Ring Video Doorbell 2nd Generation supports existing doorbell wiring for continuous power. Alternatively, you can use the rechargeable battery option.
How Do I Connect Ring Doorbell To Wi-fi?
Open the Ring app, select your device, and follow the on-screen prompts. Choose your Wi-Fi network and enter the password to connect.
Conclusion
Installing the Ring Video Doorbell 2nd Generation is simple and quick. Follow each step carefully for the best results. Test the doorbell to ensure it works properly. Enjoy the added security and convenience it brings to your home. Stay safe and keep an eye on your front door at all times.
This device helps you see visitors clearly and talk to them easily. A smart choice for any home looking for extra protection.