Are you ready to make your home smarter and safer? Setting up a Nest Hello Video Doorbell might sound tricky, but it’s easier than you think.
Imagine seeing who’s at your door from your phone, even when you’re not home. You’ll never miss a visitor or package again. In this guide, you’ll discover simple steps to get your Nest Hello up and running quickly. By the end, you’ll feel confident and in control of your home’s security.
Let’s dive in and make your front door work for you!

Credit: staceyoniot.com
Nest Hello Features
The Nest Hello video doorbell comes packed with useful features. These features help keep your home safe and make it easy to see who is at your door. It works smoothly with your smart devices. Let’s explore some key features of Nest Hello.
Video Quality And Field Of View
Nest Hello offers high-definition video with clear images. The 160-degree field of view captures a wide area. You can see visitors’ faces and packages on the ground clearly. Night vision helps you see even in the dark. This ensures you never miss a visitor, day or night.
Smart Alerts And Notifications
Receive smart alerts straight to your phone. Nest Hello can tell the difference between people and objects. It sends notifications when someone is at your door. You can also get alerts for packages or motion. These smart notifications keep you informed in real time.
Integration With Google Home
The doorbell works well with Google Home devices. You can ask Google Assistant to show the doorbell camera on your smart display. This lets you see who is there without using your phone. The integration adds convenience and makes your home smarter.
What You Need
Before installing the Nest Hello Video Doorbell, gather everything you need. Proper preparation saves time and avoids frustration. Knowing the tools, materials, and technical needs helps the setup go smoothly.
Check your home’s systems and network. This ensures the doorbell works well and connects without issues. Ready? Let’s see what you need.
Tools And Materials
Have a screwdriver set handy, including Phillips and flathead types. A drill with drill bits helps for mounting on walls. Use a voltage tester to check power safely. You will also need the Nest Hello doorbell kit, which includes screws and wall anchors. A ladder might be necessary for high doorways. Keep a smartphone or tablet ready for setup and app use.
Compatibility Check
Make sure your existing doorbell system is compatible. Nest Hello needs a wired doorbell with 16-24 volts AC. Check the doorbell chime inside your home; it must support Nest Hello. Older systems or wireless doorbells usually do not work. Confirm your home’s electrical setup matches Nest’s requirements. This step avoids costly mistakes and ensures smooth installation.
Wi-fi Requirements
Strong Wi-Fi signal is essential for video and alerts. Nest Hello works best on 2.4 GHz or 5 GHz networks. Check your Wi-Fi strength near your door. Weak signals cause delays or disconnections. Your internet upload speed should be at least 2 Mbps. Secure Wi-Fi with WPA2 or higher encryption keeps your data safe. Prepare your Wi-Fi password for the setup process.
Before You Begin
Before installing your Nest Hello video doorbell, some important steps need your attention. These steps prepare your home and device for a smooth setup. Taking time now helps avoid issues later. Follow the simple guide below.
Turn Off Power
Safety comes first. Locate your home’s circuit breaker. Switch off power to your current doorbell. This prevents electric shock during installation. Use a voltage tester to confirm power is off. Never skip this step.
Remove Old Doorbell
Unscrew your old doorbell carefully. Disconnect wires with gentle pulling. Keep wires straight and clean for new setup. Remove mounting bracket and any leftover parts. Clear the area for your Nest Hello.
Charge The Nest Hello
Charging your Nest Hello before installation is key. Connect it to a power source with the included cable. Let it charge fully to avoid interruptions. A fully charged device works better during setup.
Credit: www.excelcare24.co.uk
Wiring The Doorbell
Wiring the Nest Hello video doorbell is a key step in setting up your device. This step makes sure your doorbell gets power and works correctly. Careful wiring helps avoid problems later. Follow the steps closely for a smooth setup.
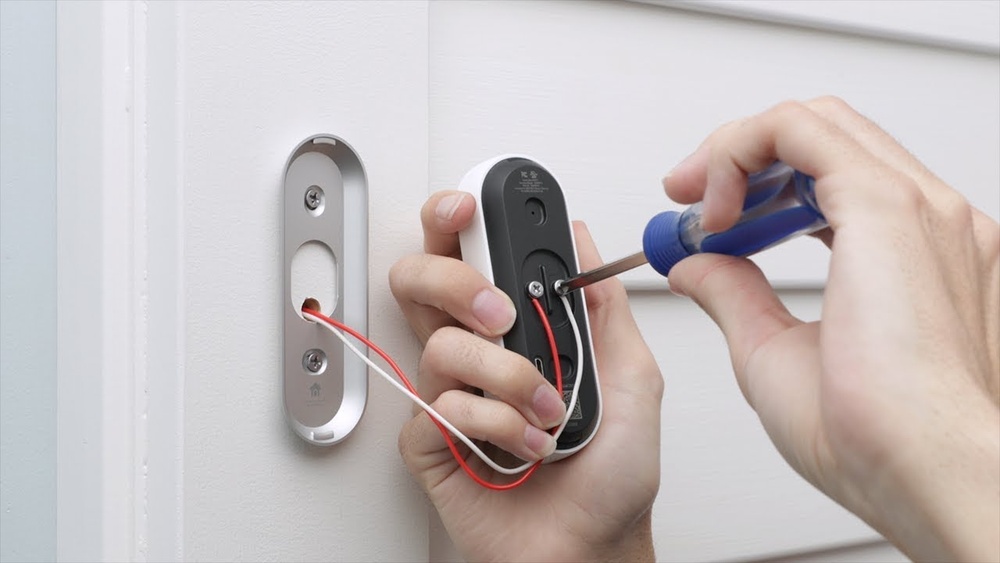
Connect Wires To Nest Hello
Start by turning off power at the breaker. This keeps you safe while working. Remove your old doorbell and find the two wires inside the wall. Connect these wires to the Nest Hello terminals. It does not matter which wire goes to which terminal. Tighten the screws to hold the wires firmly. Make sure no wire strands stick out.
Mounting The Bracket
Next, place the mounting bracket where you want the doorbell. Use a level to keep it straight. Mark the spots for the screws on the wall. Drill holes in the marked spots. If your wall is brick or concrete, use anchors. Attach the bracket with the screws. Check it is secure before moving on.
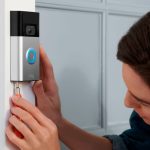
Securing The Doorbell
Finally, attach the Nest Hello to the bracket. Align the doorbell with the bracket hooks. Push the doorbell until it clicks in place. This click means it is locked. Use the provided security screw at the bottom. Tighten it with the screwdriver to stop theft. Restore power and test your doorbell.
Setting Up The App
Setting up the app is the first step to use your Nest Hello Video Doorbell. The app lets you control the doorbell and see who is at your door. You will need a smartphone or tablet to complete this process. Follow these simple steps to get started quickly and easily.
Download Nest App
Go to the App Store on iPhone or Google Play on Android. Search for “Nest” in the search bar. Find the official Nest app and tap “Download” or “Install.” Wait for the app to finish downloading before opening it. The app is free and small in size.
Create Or Sign In Account
Open the Nest app after downloading. You will see options to create an account or sign in. Tap “Create Account” if you do not have one. Enter your email and create a password. If you already have a Nest or Google account, tap “Sign In” and enter your details. This account will store your settings and video history securely.
Add New Device
Once signed in, tap the “+” icon to add a new device. Select “Nest Hello Video Doorbell” from the list. Follow the on-screen instructions to connect the doorbell to your Wi-Fi network. The app will guide you through each step. Name your device to identify it easily later. Your Nest Hello is now ready to use with the app.
Connecting To Wi-fi
Connecting your Nest Hello Video Doorbell to Wi-Fi is a key step. It lets the doorbell send video to your phone. It also enables smart features like alerts and live streaming. The process is quick and easy. Follow these simple steps to get online.
Select Network
First, open the Nest app on your phone. The app will ask you to choose a Wi-Fi network. Look for your home Wi-Fi name on the list. Tap the correct network to select it. Make sure it is the 2.4 GHz band for better range.
Enter Password
Next, enter your Wi-Fi password carefully. Use the same password you use for other devices. Check for typos before continuing. The app will hide the password for security. Press the connect button to proceed.
Test Connection
The app will test the connection after you enter the password. It checks if the doorbell can reach your network. Wait a few moments for the test to finish. If successful, your doorbell is now online. If not, recheck the password and try again.
Customizing Settings
Customizing the settings of your Nest Hello Video Doorbell helps you make it work just right. You control what the doorbell detects and how it alerts you. This section explains how to adjust motion zones, set notification preferences, and link the doorbell with other smart devices.
Adjusting Motion Zones
Motion zones let you choose specific areas for the doorbell to watch. This reduces false alerts from cars or passing animals. Open the Nest app and select your doorbell. Tap on “Motion” and draw zones on the screen. Save your changes. Now, the doorbell focuses only on these areas.
Setting Notification Preferences
Notifications tell you when someone is at the door or motion is detected. You can choose how and when to get alerts. In the Nest app, go to “Notifications.” Turn on or off alerts for people, motion, or sound. Set quiet hours to pause notifications during certain times. This keeps your phone from ringing all day.
Linking With Other Devices
Your Nest Hello works well with other smart home devices. Connect it to Google Home for voice control. Use the Nest app to add compatible devices. You can see your doorbell camera on smart displays. Automate actions like turning on lights when motion is detected. Linking devices creates a smarter, safer home.
Troubleshooting Tips
Troubleshooting your Nest Hello Video Doorbell can save time and stress. Problems may occur during setup or use. Understanding common issues helps you fix them fast.
Below are simple tips to solve typical problems. Follow each step carefully to get your doorbell working smoothly.
Common Installation Issues
Check the wiring carefully before installation. Loose wires cause the doorbell to fail. Use the right tools for mounting the device firmly.
Make sure your existing doorbell system supports Nest Hello. Voltage problems can stop the doorbell from working. Verify power is on at the breaker box.
Wi-fi Connectivity Problems
Ensure your Wi-Fi signal reaches the doorbell location. Weak signals cause video lag or no connection. Try moving your router closer or use a Wi-Fi extender.
Enter the correct Wi-Fi password in the app. Typing errors block the connection. Restart your router if the doorbell cannot connect.
Resetting The Doorbell
Resetting can solve many errors. Press and hold the reset button for 10 seconds. Wait for the light to flash, then release.
After reset, set up the doorbell again through the app. This clears old settings and fixes bugs. Keep your phone near the doorbell during setup.

Credit: www.youtube.com
Frequently Asked Questions
How Do I Install A Nest Hello Video Doorbell?
First, turn off your doorbell’s power. Remove the old doorbell and mount the Nest Hello plate. Connect wires, attach the doorbell, and restore power. Download the Nest app to complete setup and connect to Wi-Fi.
What Tools Are Needed For Nest Hello Installation?
You will need a screwdriver, drill, level, and wire extenders if necessary. The Nest Hello package includes mounting screws and a wedge for angled installation.
How Do I Connect Nest Hello To Wi-fi?
Open the Nest app, select your device, and follow prompts to connect to your 2. 4GHz or 5GHz Wi-Fi network. Ensure your signal is strong for reliable video streaming.
Can I Use Nest Hello With Existing Doorbell Wiring?
Yes, Nest Hello works with most 16-24V doorbell systems. It requires continuous power, so confirm your transformer is compatible before installation.
Conclusion
Setting up your Nest Hello Video Doorbell is simple and quick. Follow each step carefully for the best results. Once installed, enjoy clear video and easy access to your door. This device helps keep your home safer every day. Regular checks ensure it works perfectly.
Start with a strong Wi-Fi signal for smooth operation. Now, you can see visitors anytime, anywhere. A small effort brings big peace of mind. Easy to set up. Easy to use.