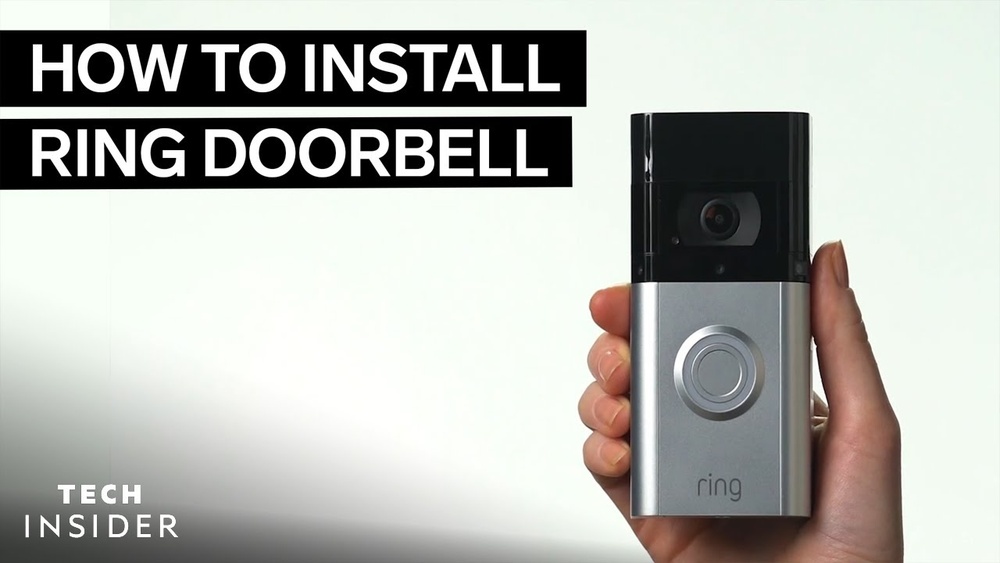
Imagine knowing exactly who’s at your door without leaving your seat. Installing a wireless video doorbell can give you that peace of mind and a new level of home security.
If you’ve ever thought about upgrading your front door but felt unsure about the process, this guide is made just for you. You’ll discover simple steps to set up your wireless video doorbell quickly and easily—no tech skills needed. Keep reading, and you’ll be surprised how effortless it is to add this smart device to your home.
Choosing The Right Doorbell
Choosing the right wireless video doorbell is important for your home’s security and convenience. The perfect doorbell fits your needs and works well with your home setup. This section helps you understand different types, key features, and how to check compatibility.
Types Of Wireless Doorbells
Wireless doorbells come in many forms. Some have a simple button and chime. Others include video cameras and motion sensors. You can find doorbells that connect to your smartphone. Some models work with smart home systems. Pick a type based on what you want to do.
Key Features To Consider
Look for clear video quality. Night vision helps see visitors in the dark. Two-way audio lets you speak with guests. Check battery life for longer use. Motion detection alerts you to movement. Easy installation saves time and effort.
Compatibility With Your Home
Check if the doorbell works with your Wi-Fi. Some need a strong signal to function well. Make sure it fits your door frame and outdoor space. Consider if it connects to your phone or smart devices. Compatibility ensures smooth operation and better security.
Credit: www.younghouselove.com
Preparing For Installation
Preparing for installation is the first step to set up your wireless video doorbell. It helps make the process smooth and fast. Planning ensures you have everything needed and choose the best place for the device.
Good preparation avoids common problems later. Check your tools, Wi-Fi signal, and the spot for mounting. This saves time and frustration.
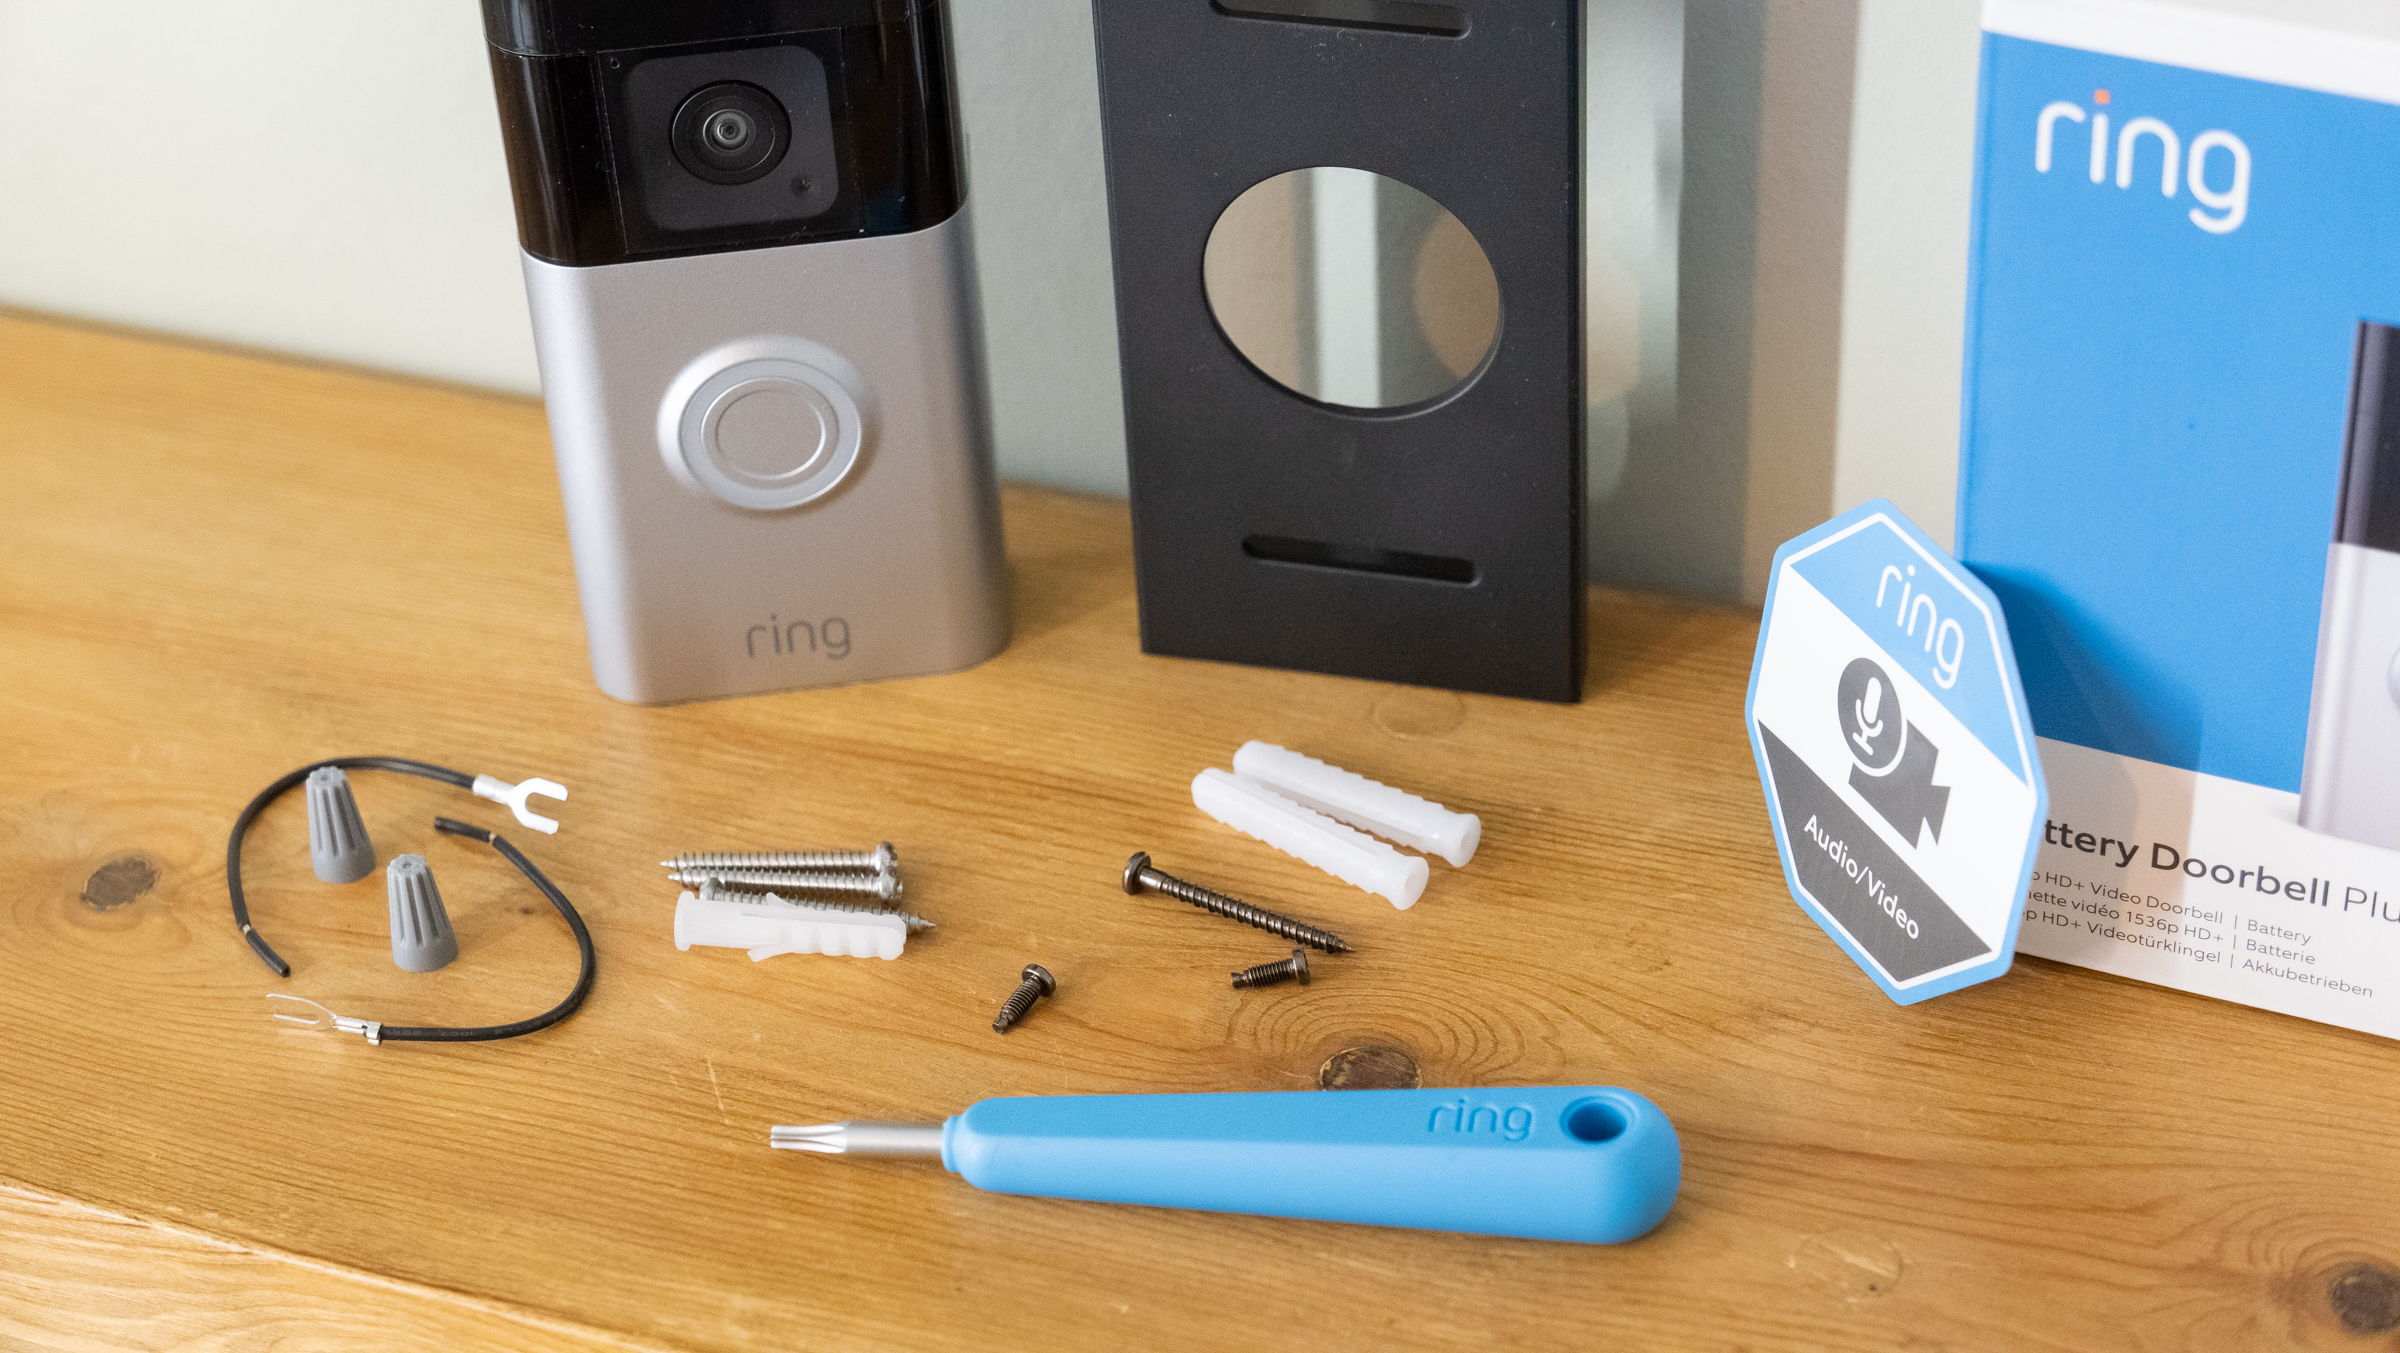
Tools And Materials Needed
Gather all tools before starting. You will need a drill, screwdriver, and screws. Some doorbells come with mounting brackets and anchors. Have a measuring tape and pencil for marking spots. Keep the doorbell and its batteries ready. A ladder might help if the door is high.
Checking Wi-fi Signal Strength
Your video doorbell needs a strong Wi-Fi signal to work well. Test the signal near your door using a phone or tablet. If the signal is weak, move your router closer or use a Wi-Fi extender. A weak signal can cause delays or no video at all. Make sure the connection is stable before installation.
Selecting The Installation Spot
Choose a place with a clear view of your doorstep. The doorbell should be easy to reach for visitors. Avoid placing it where sunlight or rain can damage it. Pick a spot close to your Wi-Fi router for better signal. Make sure the doorbell’s camera covers the main entry area well.
Mounting The Doorbell
Mounting the wireless video doorbell is a key step in the installation process. Proper mounting ensures clear video capture and reliable operation. It also helps protect the device from weather and damage.
Follow simple steps to mount your doorbell securely on the wall or door frame. Accuracy matters to align the camera and sensors correctly.
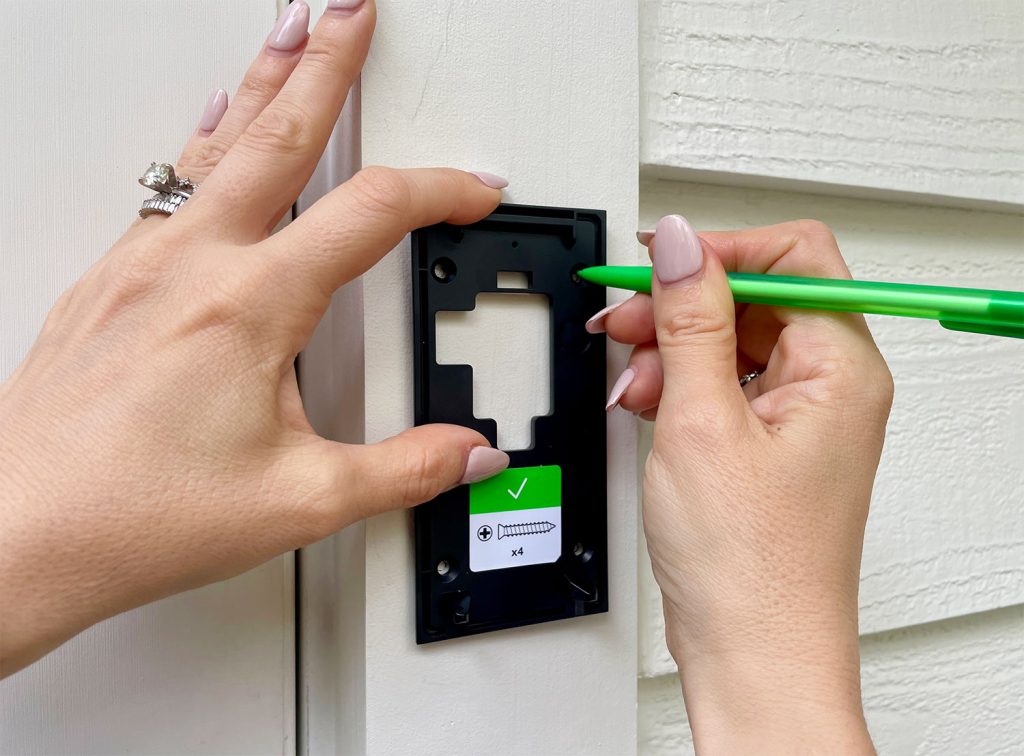
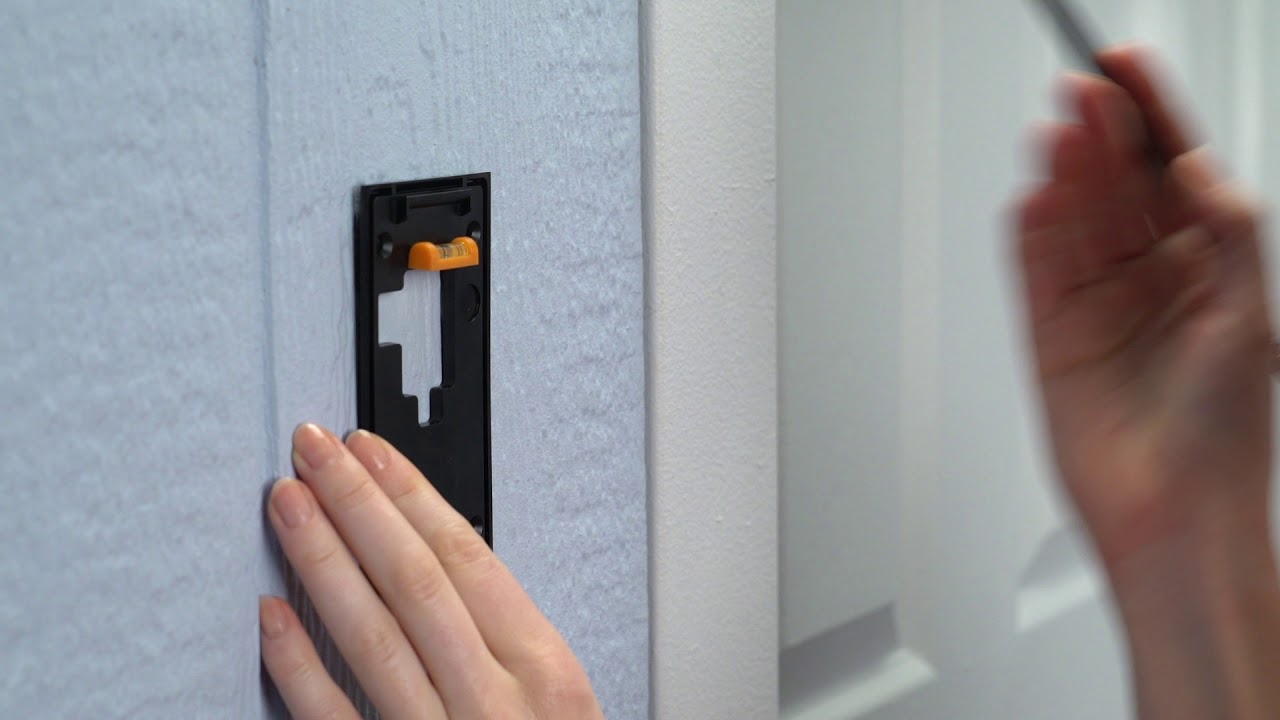
Marking And Drilling Holes
Start by holding the mounting bracket against the wall. Use a pencil to mark holes through the bracket’s screw slots. Double-check the marks are level and spaced correctly. Use a drill with the right bit size to make holes. Drill gently to avoid cracking the wall surface.
Attaching The Mounting Bracket
Place the bracket over the drilled holes. Insert wall anchors if needed for extra support. Screw the bracket tightly using a screwdriver. Make sure the bracket fits flat against the surface. This prevents wobbling and keeps the doorbell steady.
Securing The Doorbell Unit
Align the doorbell unit with the mounting bracket. Slide or snap it into place depending on the model. Check that it locks securely and does not move. Test the doorbell by pressing the button and viewing the camera feed. Adjust if needed for the best angle.
Credit: www.youtube.com
Connecting To Power
Connecting your wireless video doorbell to power is a key step. Without proper power, your doorbell will not work correctly. There are two main ways to power your device: battery or wired connection. Each method has its benefits and setup steps. Understanding these options helps you choose the best power source for your doorbell.
Battery Installation
Most wireless video doorbells come with a rechargeable battery. Start by opening the battery compartment carefully. Insert the battery following the correct polarity signs. Charge the battery fully before first use. Battery power allows you to install the doorbell anywhere without cables. Remember to check battery levels regularly to avoid interruptions.
Wired Power Options
Some wireless video doorbells can connect to existing doorbell wiring. Turn off power at the circuit breaker before starting. Connect the wires from your doorbell to the home’s wiring terminals. Use a voltage tester to ensure safe connections. This method provides constant power without battery changes. It suits homes with old wired doorbells well.
Ensuring Proper Power Supply
Check your doorbell’s power requirements before installation. Use the correct power adapter or transformer. Avoid using damaged cables or loose connections. Test the doorbell after setup to confirm it works. Proper power supply extends device life and improves performance. Keep backup batteries ready for wired setups if possible.
Setting Up The Software
Setting up the software for your wireless video doorbell is a key step to start using it. This process connects your doorbell to your smartphone and Wi-Fi. Follow these steps carefully to get everything working smoothly.
Downloading The App
Start by downloading the doorbell’s app on your smartphone. Use the Google Play Store or Apple App Store. Search the app name shown in the doorbell’s manual. Make sure to download the official app to avoid problems later.
Creating An Account
Open the app after installation. You will see an option to create a new account. Enter your email and choose a strong password. Some apps may ask for phone verification. This step keeps your doorbell secure and private.
Pairing The Doorbell With Wi-fi
Turn on your doorbell and open the app. Find the option to add a new device. Select your doorbell model from the list. The app will ask for your Wi-Fi name and password. Enter these carefully to connect the doorbell to your network.
Wait a few moments while the doorbell links to Wi-Fi. The app will confirm when pairing is complete. Your wireless video doorbell is now ready to use.
Testing The Doorbell
Testing the wireless video doorbell is a key step after installation. It ensures the device works correctly and keeps your home safe. This step helps confirm that video, audio, and motion detection perform well. Testing also reveals any problems early, so you can fix them quickly.
Checking Video And Audio
Start by pressing the doorbell button. Look at the video feed on your phone or monitor. The picture should be clear and in color. Listen to the audio to ensure you can hear the visitor. Test both the speaker and microphone by speaking and listening. Adjust the camera angle if the view is blocked.
Testing Motion Detection
Walk in front of the doorbell to trigger motion sensing. The device should send an alert to your phone. Check if the motion detection covers the right area. Adjust sensitivity settings in the app if needed. This helps avoid false alarms from passing cars or animals.
Troubleshooting Common Issues
If video or audio does not work, check the Wi-Fi connection. Weak signals can cause problems. Restart the doorbell and router to fix connection issues. Make sure the doorbell’s battery is charged or wired properly. Update the device firmware through the app for best performance.
Maintaining Your Doorbell
Maintaining your wireless video doorbell keeps it working well for years. Dirt, dust, and weather can affect its performance. Regular care helps the camera and speaker stay clear. The battery needs checking to avoid sudden power loss. Software updates improve security and add new features. Follow simple steps to keep your doorbell in top shape.
Regular Cleaning Tips
Use a soft cloth to wipe the camera lens gently. Avoid harsh chemicals that may damage the surface. Clean the doorbell housing to remove dust and spider webs. Check the speaker area for dirt that blocks sound. Clean weekly for best video and audio quality. Keep the sensor free from dirt to detect motion well.
Battery Replacement Schedule
Check battery levels often in the doorbell app. Replace batteries every six months or as needed. Use the recommended battery type from the manufacturer. Turn off the doorbell before changing the battery. Dispose of old batteries properly to protect the environment. Keep spare batteries handy to avoid downtime.
Software Updates
Open the doorbell app to check for updates regularly. Updates fix bugs and improve security features. Install updates promptly to keep your doorbell safe. Enable automatic updates if the app offers this option. Restart the doorbell after an update to apply changes. Stay informed about new features through the app.
Credit: vixencomposites.com
Frequently Asked Questions
How Do I Install A Wireless Video Doorbell?
First, choose a suitable location near your door. Mount the bracket using screws. Connect to Wi-Fi and sync with your smartphone app. Follow the manufacturer’s setup guide for final configurations.
What Tools Are Needed For Wireless Doorbell Installation?
You’ll need a drill, screwdriver, level, and mounting screws. Some models include necessary tools. Also, ensure your smartphone is ready for app setup.
Can I Install A Wireless Doorbell Myself?
Yes, most wireless doorbells are designed for easy DIY installation. Follow the instructions carefully. Basic tools and Wi-Fi access are essential for setup.
How Do I Connect My Wireless Doorbell To Wi-fi?
Open the doorbell app on your phone. Follow prompts to select your Wi-Fi network. Enter your password accurately. Ensure the signal is strong for smooth operation.
Conclusion
Installing a wireless video doorbell is simple and quick. Follow the steps carefully for best results. Choose a good spot with a clear view of your door. Make sure the device has a strong Wi-Fi signal. Test the video and sound before finalizing the setup.
Regularly check the battery to keep it working well. Enjoy the extra security and convenience it brings. Stay connected to visitors anytime, anywhere. A wireless video doorbell adds safety and peace of mind.

