Are you ready to upgrade your home with a Larson storm door that includes a pet door? Installing one might seem tricky, but with the right steps, you can do it yourself and enjoy fresh air, extra security, and easy access for your furry friend.
Imagine how convenient it will be to let your pet in and out without you having to open the door every time. This guide will walk you through the process in a simple, clear way—so you can save money, avoid frustration, and get your new door working perfectly.
Keep reading to discover how to install your Larson storm door with a pet door quickly and confidently.

Credit: www.esseg.eu
Choosing The Right Larson Storm Door
Choosing the right Larson storm door is key to a successful installation. The correct door adds style, security, and comfort to your home. It also makes using a pet door easier and more efficient. Think about size, door type, and pet door features before purchasing.
Selecting The Perfect Size
Measure your door frame carefully. Accurate measurements ensure the storm door fits well. A door that is too small or too large can cause gaps. These gaps let air, dust, and bugs inside. Measure height and width, and compare with Larson door sizes. Pick a door that matches these numbers closely.
Types Of Larson Storm Doors
Larson offers several storm door styles. Choose from full-view, ventilating, or retractable screen doors. Full-view doors have a large glass panel for clear views. Ventilating doors feature a screen panel that opens for fresh air. Retractable screen doors hide the screen when not in use. Each type fits different needs and preferences.
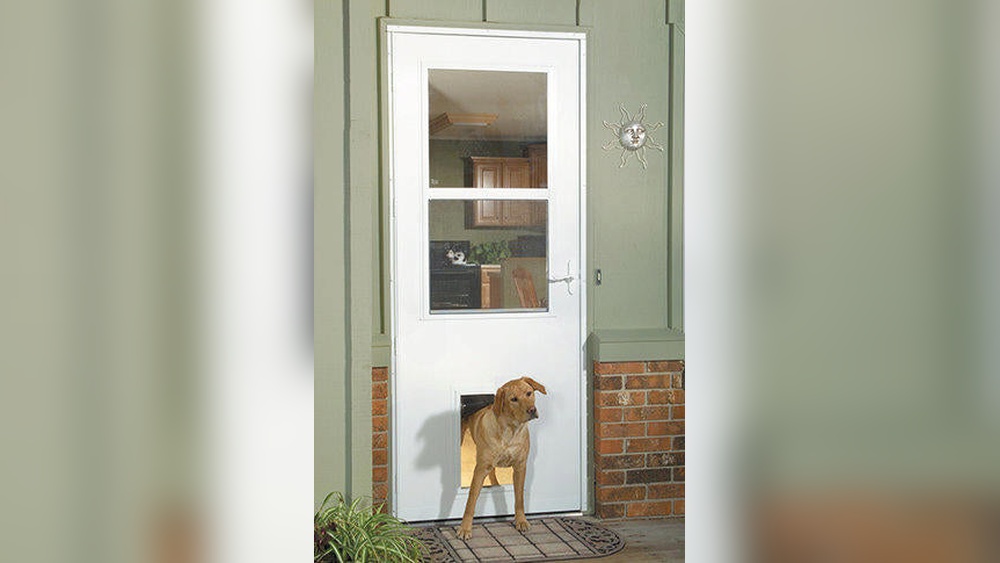
Benefits Of A Built-in Pet Door
A built-in pet door lets pets enter and exit freely. It saves you from opening the door repeatedly. Larson pet doors are secure and weatherproof. They keep your home safe and energy-efficient. Pets enjoy independence, and owners gain convenience. Installing a pet door in the storm door is a smart choice for pet owners.

Credit: ebit.ge
Preparing For Installation
Preparing for the installation of your Larson storm door with a pet door is a key step. It ensures a smooth process and a perfect fit. Taking time to prepare saves frustration and extra work later.
First, gather all tools and materials. Next, measure your door frame carefully. Finally, remove the old door safely. These steps set a good foundation for your new door.
Tools And Materials Needed
Collect all tools before starting. You will need a screwdriver, drill, tape measure, level, and hammer. Also, have screws and shims ready. The Larson storm door and pet door parts must be on hand.
Wear safety glasses and gloves for protection. Prepare a clean workspace near the door. This makes installation easier and safer.
Measuring Your Door Frame
Measure the width and height of your door frame. Take measurements at the top, middle, and bottom. Use the smallest width and height for accuracy.
Check the door frame is square. Use a level to ensure straight lines. Accurate measurements prevent problems during installation.
Removing The Existing Door
Remove the old door carefully. Unscrew the hinges and lift the door off. Have a helper hold the door if it is heavy.
Keep the screws and hardware if you plan to reuse them. Clean the door frame area after removal. Remove any old caulk or nails for a smooth fit.
Installing The Larson Storm Door
Installing the Larson storm door with a pet door can improve your home’s entryway. This process lets you add security, ventilation, and easy pet access. Follow clear steps to ensure proper setup and smooth operation.
Setting Up The Door Frame
Begin by measuring the door opening carefully. Ensure the frame fits snugly inside the space. Place the frame in the doorway and check for level. Use shims to adjust the frame until it is straight. Secure the frame temporarily with clamps to hold it in place.
Attaching The Door To Hinges
Next, align the door with the hinges on the frame. Insert hinge pins carefully to connect the door and frame. Check the door swings smoothly without sticking. Adjust hinge screws if the door does not hang evenly. Make sure the pet door flap moves freely within the main door.
Securing The Door Frame
Once the door fits correctly, fasten the frame firmly to the wall. Use screws designed for your door type and wall material. Tighten screws evenly to avoid warping the frame. Recheck the door swing and pet door operation. Add weather stripping to seal gaps and improve energy efficiency.
Installing The Pet Door
Installing the pet door in your Larson storm door adds convenience for your furry friend. This step requires careful attention to detail. Follow each step closely to ensure a perfect fit and smooth operation. Safety and ease of use matter most.
Choosing The Location For The Pet Door
Select a spot that your pet can reach easily. Consider the height and size of your pet. Avoid areas near the door frame edges or where door locks are placed. The ideal location balances accessibility and door strength.
Cutting The Door Panel
Mark the pet door outline clearly on the door panel. Use a measuring tape and pencil for accuracy. Drill starter holes at corners of the marked area. Then, use a jigsaw to cut along the lines carefully. Smooth rough edges with sandpaper to prevent injury.
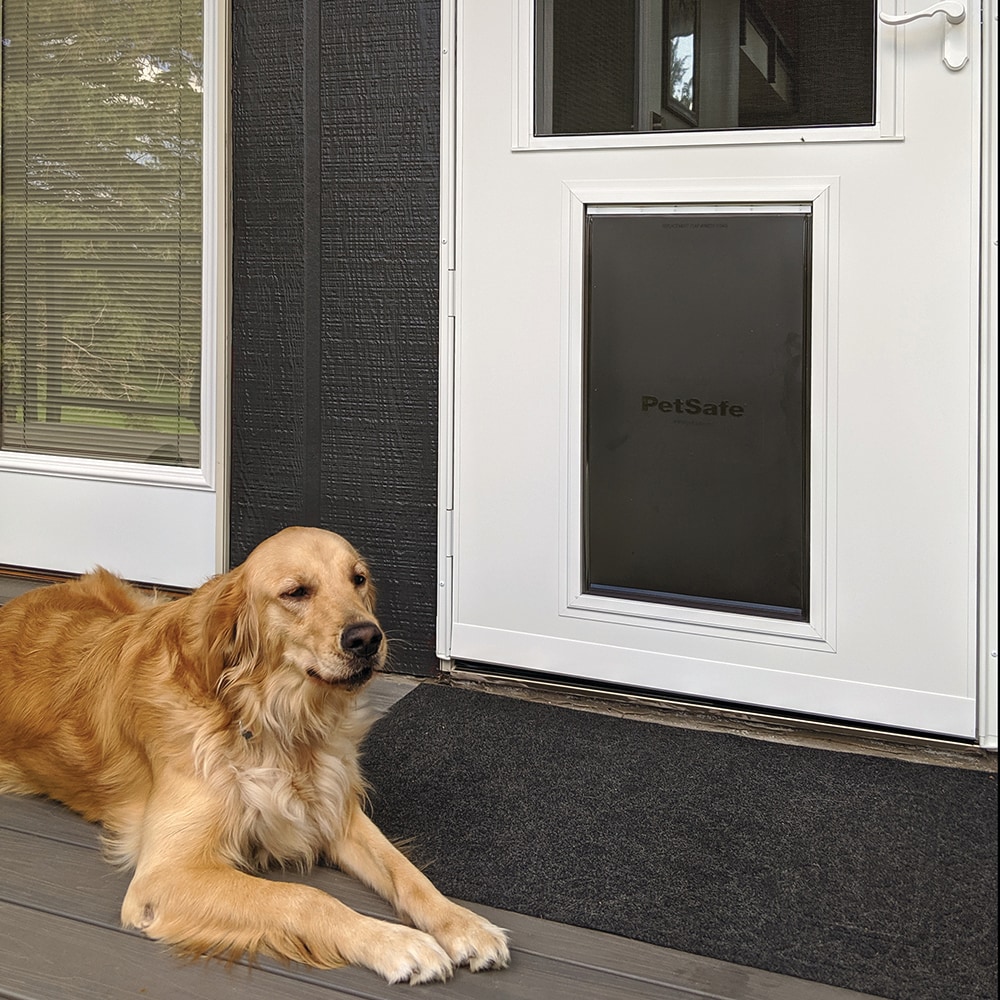
Mounting The Pet Door
Place the pet door into the cut opening. Check that it fits snugly without gaps. Attach the pet door frame using screws provided in the kit. Tighten screws evenly for a secure hold. Test the flap to ensure it swings freely and seals well.
Finishing Touches
Finishing touches make your Larson storm door with pet door work perfectly. These final steps ensure the door fits well, seals tight, and the pet door works smoothly. Take time to check every detail. This will keep your home safe and comfortable.
Adjusting The Door Alignment
Check the door’s position in the frame. It should open and close without sticking. Tighten or loosen the hinges as needed. The door must sit evenly and swing freely. Proper alignment helps the pet door seal correctly.
Installing Weatherstripping
Apply weatherstripping around the door edges. This stops drafts and keeps rain out. Use the right type for your door model. Press the strips firmly for a tight fit. A good seal saves energy and protects your home.
Testing The Pet Door Functionality
Open and close the pet door flap several times. Ensure it swings smoothly and seals well. Watch your pet use it to confirm ease of use. Fix any sticking or gaps immediately. A working pet door keeps pets happy and safe.
Credit: www.esseg.eu
Maintenance Tips
Maintaining your Larson storm door with a pet door keeps it working well for years. Regular care helps avoid damage and costly repairs. Simple steps protect your investment and keep your pet safe and happy.
Cleaning And Lubricating Hinges
Clean door hinges often to remove dust and dirt. Use a soft cloth and mild soap with water. Dry completely before applying lubricant. Use a silicone spray or light oil to keep hinges moving smoothly. This prevents squeaks and ensures easy door operation.
Inspecting Weatherstripping
Check weatherstripping for cracks or wear regularly. Replace damaged strips to keep drafts and moisture out. Good weatherstripping improves energy efficiency and comfort inside your home. Press gently to ensure it seals tightly around the door frame.
Seasonal Care For Longevity
Adjust your storm door seasonally to fit changing weather. Tighten screws and check the pet door seal before winter and summer. Remove debris like leaves or dirt that could block the door. Regular seasonal care extends your door’s life and keeps it working well.
Frequently Asked Questions
How Do I Prepare The Door Frame For Installation?
Clean the door frame thoroughly and remove any old door hardware. Measure the frame to ensure the Larson storm door fits perfectly. Check for level and plumb to guarantee proper door alignment before installation.
Can I Install The Pet Door Myself?
Yes, you can install the pet door yourself with the right tools. Follow the manufacturer’s instructions carefully. Ensure precise measurements for your pet’s size and secure the pet door firmly to avoid drafts.
What Tools Are Needed To Install A Larson Storm Door?
You will need a drill, screwdriver, measuring tape, level, and a pencil. A saw may be required for the pet door cutout. Having these tools ready speeds up the installation process efficiently.
How Long Does It Take To Install A Larson Storm Door?
Typically, installation takes about 2 to 3 hours. This depends on your experience and if a pet door is included. Taking your time ensures a secure and functional storm door setup.
Conclusion
Installing a Larson storm door with a pet door can improve your home’s comfort. It lets fresh air in while keeping pets safe. Follow each step carefully to avoid mistakes. Take your time and measure twice before cutting. Use the right tools for a smooth installation.
Your new door will add convenience and style. Enjoy easy pet access and better airflow every day. Simple changes can make a big difference at home.

