Is your pet door flap torn, cracked, or stuck? Fixing it might seem tricky, but you don’t have to call a professional just yet.
You can save time and money by repairing your pet door flap yourself. Imagine how good it will feel to see your furry friend happily going in and out without any hassle. In this guide, you’ll discover simple steps and handy tips to get your pet door flap working like new.
Ready to make your pet’s day easier? Let’s get started!
Common Pet Door Flap Issues
Pet door flaps face wear and tear over time. Small problems can stop your pet from using the door. Regular checks help keep the flap working well. Fixing issues early saves money and effort.
Common pet door flap problems include tears, loose parts, stiffness, and weather damage. Each issue needs a simple fix to keep the flap safe and easy for pets.
Tears And Rips
Tears in the flap happen from scratching or biting. Small rips let cold air or bugs inside. Use strong tape or patch kits to cover holes. Replace the flap if the damage is large.
Loose Hinges
Loose hinges cause the flap to hang or fall. Check screws and tighten them often. Replace broken hinges with new ones from pet stores. Proper hinge fit keeps the flap steady and safe.
Stiff Movement
A stiff flap is hard for pets to push open. Dirt and debris can block the flap’s movement. Clean the edges and hinges with mild soap and water. Lubricate hinges with a pet-safe oil for smooth action.
Weather Damage
Sun, rain, and cold harm the flap material. UV rays can make plastic brittle and crack. Moisture causes mold or swelling in some flaps. Use weatherproof covers or replace the flap yearly. Protect the flap for longer life.
Tools And Materials Needed
Repairing a pet door flap needs the right tools and materials. Having them ready makes the job easier and faster. You will save time and avoid mistakes. Here is a list of what you need.
Basic Repair Tools
Start with simple tools for most flap repairs. A screwdriver helps remove screws and hinges. Pliers can pull out nails or pins. A utility knife trims damaged parts carefully. A measuring tape ensures correct sizes. Sandpaper smooths rough edges before fixing. A drill may be necessary for new holes or screws.
Replacement Parts
Some pet door flaps need new pieces. Replacement flaps or panels fit broken or worn sections. Hinges or screws come handy if old ones are rusty or loose. Weatherstripping seals gaps to keep drafts out. Check the door model to buy matching parts. Having the right pieces avoids fitting problems later.
Adhesives And Sealants
Strong glue or adhesive bonds broken parts well. Use waterproof glue for outdoor doors. Silicone sealant blocks water and air leaks around the flap. It also keeps the flap flexible and secure. Apply sealant in thin, even layers for best results. Make sure all surfaces are clean before applying adhesives.
Removing The Old Flap
Removing the old pet door flap is the first step in repairing it. This task requires care to avoid damaging the frame. Proper removal helps prepare the door for a new flap. Clean work makes the installation easier and more secure.
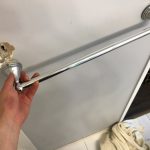
Detaching Hinges Or Screws
Start by checking how the flap is attached. Most flaps have hinges or screws holding them in place. Use a screwdriver to loosen the screws carefully. If there are hinges, gently lift the flap off them. Keep the screws in a safe place for reuse. Avoid forcing the flap, as it may break the frame.
Cleaning The Frame
After removing the flap, clean the frame thoroughly. Dirt and old adhesive can block a proper fit for the new flap. Use a damp cloth to wipe off dust and debris. For sticky residue, apply a mild cleaner and scrub gently. Let the frame dry completely before installing the new flap. A clean frame ensures better sealing and longer flap life.
Credit: www.reddit.com
Fixing Tears And Rips
Fixing tears and rips in a pet door flap is essential to keep it working well. Small holes or cuts let cold air in and dirt get through. Repairing these problems quickly saves money and keeps pets comfortable. There are simple ways to fix tears without replacing the whole flap.
Choose the right method based on the size and type of damage. Some fixes need tools and materials, but many are easy and fast. This guide covers three common ways to repair pet door flaps.
Using Patch Kits
Patch kits are popular for fixing tears in pet door flaps. These kits include a patch and adhesive backing. Clean the flap surface before applying the patch. Cut the patch slightly larger than the tear. Press the patch firmly over the damage. Let it dry for a few hours. Patch kits work best on vinyl or plastic flaps.
Sewing Techniques
Sewing is a strong way to fix fabric or soft flaps. Use thick, durable thread and a needle. Start by trimming loose threads around the tear. Stitch the edges together using small, tight stitches. A backstitch or whipstitch works well. Sewing takes more time but lasts longer than patches. It’s good for large rips and tough materials.
Applying Adhesive Tapes
Adhesive tape is a quick fix for minor tears. Choose strong, weatherproof tape made for outdoor use. Cut a piece bigger than the rip. Stick it on the flap, smoothing out bubbles. Apply tape on both sides if possible. This method is temporary but effective. It helps prevent the tear from growing bigger.
Repairing Or Replacing Hinges
Repairing or replacing hinges is key to fixing a pet door flap. Hinges let the flap swing open and close easily. If they are loose or broken, the flap may not work well. Fixing hinges can save money and time. It also keeps your pet door safe and functional.
Tightening Loose Hinges
Loose hinges cause the flap to hang or stick. Start by checking the screws on the hinges. Use a screwdriver to tighten any loose screws. Tighten until the hinge feels firm but avoid over-tightening. Over-tightening can strip the screw holes. If screws keep loosening, add wood glue or use longer screws. Test the flap by swinging it a few times. It should move smoothly without wobbling.
Installing New Hinges
Old or broken hinges need replacement for proper flap function. Choose hinges that match the size and style of the old ones. Remove the old hinges carefully with a screwdriver. Align the new hinges in the same place as the old ones. Mark screw holes with a pencil for accuracy. Drill small pilot holes to avoid wood splitting. Attach the new hinges with screws and tighten firmly. Check the flap’s movement and adjust if needed. New hinges restore the pet door’s ease and security.

Credit: www.youtube.com
Lubricating And Adjusting The Flap
Lubricating and adjusting the pet door flap helps it open and close easily. A flap that sticks or drags can cause discomfort for your pet. Proper care keeps the door working smoothly for a long time. Simple steps can improve the flap’s movement and extend its life.
Applying Lubricants
Use a silicone-based lubricant for the best results. Avoid oil-based products that attract dirt. Apply a small amount on the flap’s edges and hinges. Spread the lubricant evenly to cover all moving parts. Wipe off any excess to prevent grime buildup. Regular lubrication reduces wear and tear effectively.
Ensuring Smooth Movement
Check the flap’s alignment after lubrication. Make sure it swings freely without sticking. Adjust the screws or hinges if the flap is uneven. Tighten loose parts carefully to avoid damage. Test the flap by pushing it gently from both sides. Repeat adjustments until the flap moves smoothly every time.
Sealing And Weatherproofing
Sealing and weatherproofing your pet door flap is important to keep drafts, rain, and dirt outside. A well-sealed flap helps maintain your home’s temperature and protects your pet from cold or wet weather. Small fixes can make a big difference in comfort and energy savings.
Adding Weather Stripping
Weather stripping creates a tight seal around the pet door flap edges. It blocks air leaks and stops dust from entering. Use foam or rubber strips designed for doors. Measure the flap’s edges and cut strips to fit. Press the strips firmly along the frame. Replace worn or damaged weather stripping to keep the seal strong.
Using Waterproof Sealants
Waterproof sealants stop water from seeping through gaps around the pet door. Silicone sealant works well because it stays flexible and resists weather damage. Clean the area around the door before applying. Squeeze a thin bead of sealant along the edges. Smooth it out with a finger or tool. Let it dry fully to ensure a tight, waterproof seal.

Credit: www.youtube.com
Testing The Repaired Flap
Testing the repaired pet door flap is a key step. It ensures the flap works well and keeps your pet safe. This process helps you spot any problems early. Proper testing saves time and avoids bigger repairs later.
Checking For Proper Operation
Start by opening and closing the flap several times. Watch if it moves smoothly without sticking. Make sure it seals well to keep out drafts and bugs. Try pushing the flap gently from both sides. It should swing freely and return to the closed position. If the flap hangs or sticks, check the hinges and seals again.
Monitoring For Future Issues
Observe the flap during the next few days. Notice if your pet uses it easily and safely. Listen for unusual noises like creaks or squeaks. Check for signs of wear or damage on the flap and frame. Regularly clean the flap to keep it working smoothly. Early detection of issues helps prevent costly fixes later.
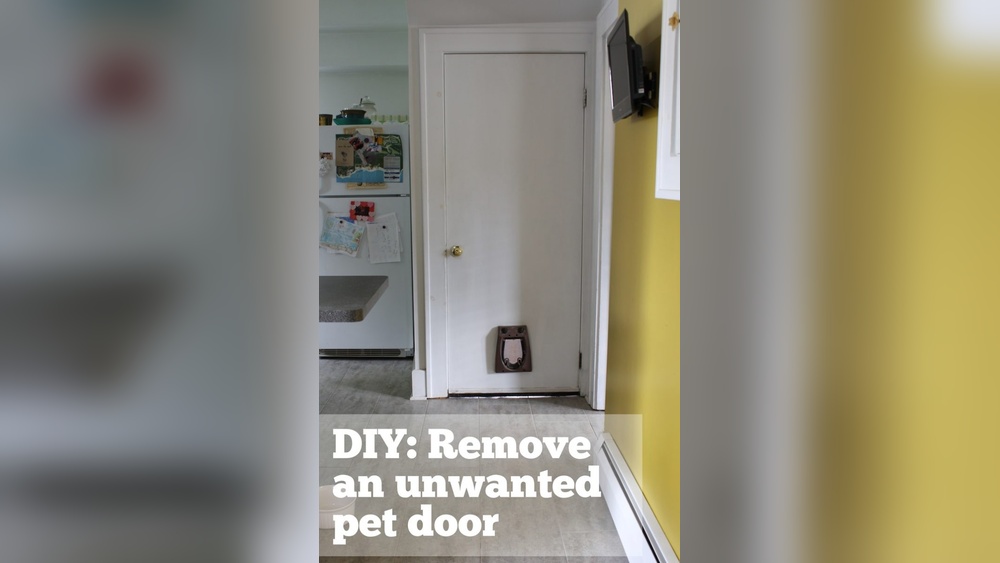
When To Replace The Entire Door
Knowing when to replace the entire pet door is key to keeping your pet safe. Sometimes, fixing the flap is not enough. The door frame or locking system may be too damaged. In such cases, replacing the whole door saves time and effort. It also prevents future problems.
Signs Of Extensive Damage
Look for cracks or breaks in the door frame. Warped or bent parts can stop the door from closing properly. A broken locking mechanism is also a big issue. If water leaks through or the door lets in cold air, the seal might be ruined. These signs mean the door cannot be fixed easily.
Choosing A New Pet Door
Pick a door that fits your pet’s size and your wall or door thickness. Check the material for durability and weather resistance. Some doors have better insulation to save energy. Consider doors with easy-to-use locks for your pet’s safety. Measure carefully before buying to avoid fitting problems.
Frequently Asked Questions
How Do I Fix A Torn Pet Door Flap?
To fix a torn flap, clean the area first. Use strong adhesive or patch material designed for pet doors. For large tears, consider replacing the flap entirely to maintain insulation and durability.
What Tools Are Needed To Repair A Pet Door Flap?
You typically need adhesive, scissors, a screwdriver, and replacement flap material. Some repairs might require a drill or tape for temporary fixes. Always check your pet door model for specific tools.
How Often Should I Replace A Pet Door Flap?
Replace the flap when it shows significant wear, tears, or no longer seals properly. Regular inspection every 6-12 months helps maintain energy efficiency and pet safety.
Can I Repair A Pet Door Flap Myself?
Yes, most flap repairs are simple DIY tasks. Basic tools and materials suffice for small tears or loose hinges. For complex damages, consult a professional to avoid further issues.
Conclusion
Repairing your pet door flap keeps it working well and safe. Small fixes stop bigger problems later. Check the flap often for tears or loose parts. Use simple tools and materials to save time and money. A working pet door helps your pet enjoy freedom safely.
Keep your pet happy and your home secure. Try these steps to fix your flap today. Easy care makes a big difference.