Are you ready to add a personal touch to your home decor? Making your own decorative wreath is easier than you think—and it’s a fun way to show off your creativity.
Imagine welcoming guests with a beautiful, handmade wreath that reflects your style and personality. In this guide, you’ll discover simple steps to create a stunning wreath that stands out. Whether you want something classic, colorful, or seasonal, you’ll find tips and tricks that make the process enjoyable and stress-free.
Keep reading to unlock the secrets of crafting a wreath that turns heads and feels truly yours.
Choosing The Right Base
Choosing the right base is the first step in making a beautiful wreath. The base holds everything together. It gives shape and support to your design. Picking a strong and suitable base makes your wreath last longer and look better.
Types Of Wreath Frames
Wreath frames come in many shapes and materials. Wire frames are light and easy to shape. They work well for fresh or dried flowers. Grapevine frames have a natural look. They add texture and are sturdy. Foam bases are soft and hold pins well. They are perfect for artificial flowers and decorations. Straw bases are traditional and budget-friendly. Each type fits different styles and uses.
Selecting Materials For Durability
Choose materials that match your wreath’s use. For outdoor wreaths, pick weather-resistant bases. Metal or plastic frames last through rain and wind. Indoor wreaths can use delicate bases like foam or straw. Make sure the base is strong enough for heavy decorations. A durable base keeps your wreath looking fresh for a long time.

Credit: www.nationaltrust.org.uk
Gathering Your Supplies
Gathering your supplies is the first step to making a beautiful decorative wreath. Having the right tools and materials helps you work easily. It also makes your wreath look great. Prepare everything before starting. This saves time and keeps your project fun.
Essential Tools And Materials
Start with a wreath base. It can be made from foam, wire, or grapevine. Choose one that fits your style. Next, pick floral wire to attach decorations. Scissors or wire cutters are needed to trim items.
Grab artificial flowers or fresh greenery for a natural look. Ribbon adds color and texture. Hot glue helps secure small pieces firmly. Make sure to have a work surface to keep your area clean.
Creative Additions For Personal Touch
Add pinecones or small ornaments for a festive feel. Use dried fruits like orange slices for a fresh scent. Burlap or lace ribbons give a rustic or vintage look. Small wooden letters can spell a word or name.
Try feathers or beads for extra detail. Personal items or handmade charms make your wreath unique. Choose colors and textures that match your home. These touches make your wreath special and inviting.
Preparing Your Workspace
Preparing your workspace is the first step in making a decorative wreath. A clean and organized area helps you work faster and better. It also keeps your materials safe and easy to find. Setting up a good workspace makes the whole project more fun and less stressful.
Take time to get everything ready before you start. This way, you can focus on creating a beautiful wreath without interruptions.
Organizing Tools And Materials
Gather all the tools and materials you need. Common items include scissors, wire cutters, glue, floral wire, and a wreath base. Also, collect decorations like ribbons, flowers, or leaves.
Arrange everything in small containers or trays. Keep sharp tools separate for safety. Group similar items together for easy access. This saves time and prevents mess while you work.
Setting Up A Comfortable Area
Choose a well-lit space with a flat surface, like a table. Good lighting helps you see details clearly. A comfortable chair with back support is important for long work sessions.
Cover your work surface with newspaper or a cloth. This protects your table from glue and scratches. Keep a trash bin nearby to throw away scraps quickly.
Make sure you have enough room to move your hands freely. Avoid cramped spaces to prevent accidents and damage to your wreath.

Credit: ingeniousgifts.co.uk
Designing Your Wreath
Designing your wreath is the first step to creating something unique and beautiful. It helps guide your choices and brings your vision to life. A well-designed wreath feels balanced and inviting. You get to decide the style, colors, and shapes that best fit your space. This part is fun and lets your creativity shine.
Start by thinking about the mood you want. Should it be bright and cheerful or calm and natural? The design sets the tone and makes your wreath special.
Choosing A Theme And Color Scheme
Pick a theme that matches your season or event. For example, use warm colors for fall or cool tones for winter. A clear theme helps keep your wreath focused. Choose two or three main colors to avoid clutter. Think about how these colors fit with your home decor. Simple color schemes make wreaths look polished and neat. Themes can be classic, rustic, modern, or even whimsical.
Planning The Arrangement
Arrange your materials before attaching them. Lay out branches, flowers, and decorations on a flat surface. Play with placement until it feels balanced. Use larger items first for the base shape. Fill gaps with smaller accents and leaves. Keep the design even but not too symmetrical. Natural shapes often look best with some variation. Planning helps avoid mistakes and saves time during assembly.
Assembling The Base Layer
Assembling the base layer is the first step to create a beautiful wreath. This layer forms the foundation. It gives shape and fullness to your wreath. Using natural greenery makes the wreath look fresh and lively. Choose leaves, branches, or vines that suit your style. Keep your materials close for easy access.
Start by arranging the greenery around your wreath frame. Overlap pieces to cover gaps. The base layer should look even and full. This step sets the tone for the rest of your design.
Attaching Greenery And Foliage
Place small bundles of leaves and branches on the frame. Hold them firmly in place. Work around the circle, layering the greenery. Use a mix of textures and shades for interest. Keep stems pointing in the same direction. This keeps the wreath neat and tidy. Add more bundles until the frame is well covered.
Securing With Wire And Glue
Use floral wire to hold the greenery tightly. Wrap the wire around stems and frame several times. Cut the wire with scissors once secure. For extra hold, apply small drops of craft glue. Glue helps keep delicate pieces from falling off. Be careful not to use too much glue. Let glue dry before moving on to the next step. This keeps your base strong and stable.
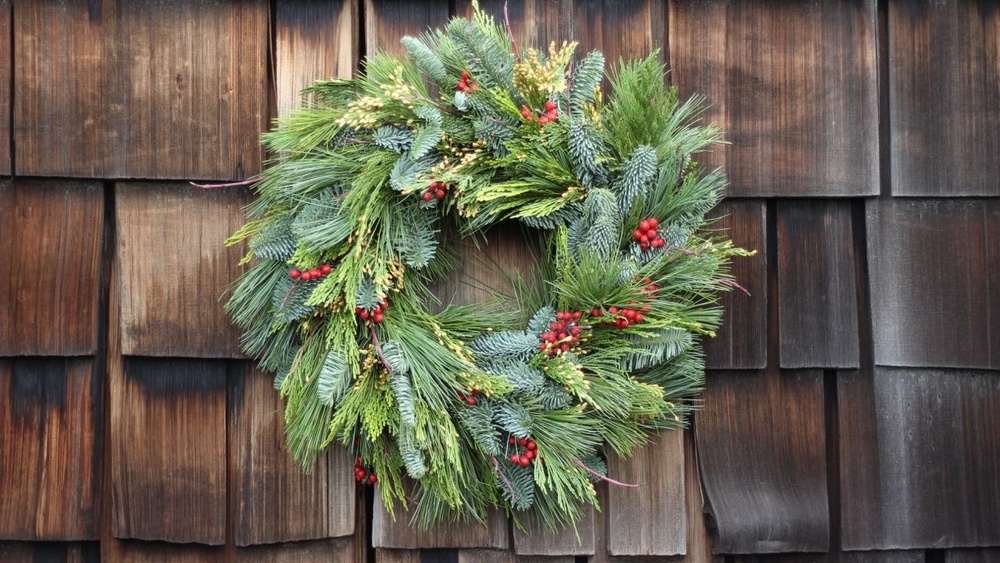
Adding Decorative Elements
Adding decorative elements to your wreath brings it to life. These details make your wreath unique and eye-catching. Choose items that match your style and the season. Small touches can create a big impact.
Think about the mood you want to set. Soft and natural? Bright and festive? Let that guide your choices. Decorating your wreath is a fun chance to be creative.
Incorporating Flowers And Ornaments
Flowers add freshness and color to any wreath. Use real or artificial blooms depending on how long you want it to last. Mix different sizes for interest. Small flowers fill gaps, while big ones create focal points.
Ornaments bring charm and personality. Choose shapes that fit your theme, like stars or pinecones. Attach them securely with wire or hot glue. Cluster ornaments in groups or spread them evenly for balance.
Balancing Colors And Textures
Colors set the tone of your wreath. Combine light and dark shades for contrast. Stick to two or three main colors to keep it simple. Use colors that match your home or event.
Textures add depth and feel. Mix smooth, rough, soft, and shiny materials. Think ribbons, leaves, berries, and twigs. Texture variety makes your wreath more interesting to touch and see.
Finishing Touches
Finishing touches bring your wreath to life. They make it look neat and ready to display. This final step helps your wreath stay beautiful longer. Pay close attention to details. Small changes can make a big difference.
Trimming Excess Material
Cut away any extra leaves, flowers, or wire. Clean edges give a polished look. Use sharp scissors or garden shears for smooth cuts. Remove loose pieces that might fall off. Check all sides of the wreath carefully. Trim little bits that stick out too far.
Adding A Hanging Loop
Create a loop with ribbon, twine, or wire. Attach it securely to the back of the wreath. Make sure the loop is strong enough to hold the weight. Position it in the center for balanced hanging. Test the loop by gently pulling it. Adjust if needed to keep the wreath straight.
Maintaining Your Wreath
Maintaining your wreath keeps it fresh and beautiful for longer. Regular care helps preserve its colors and shape. With simple steps, your wreath can look great through different seasons and holidays.
Cleaning And Storage Tips
Dust your wreath gently using a soft brush or cloth. Avoid using water on delicate materials like dried flowers or paper. For artificial wreaths, wipe leaves and decorations with a damp cloth. Store wreaths in a cool, dry place to prevent damage. Use a large box or wreath storage container to keep its shape. Cover the wreath with plastic or cloth to protect it from dust.
Refreshing For New Seasons
Change small decorations to fit the new season. Add fresh flowers or ribbons to give a new look. Swap out colors to match holidays or weather changes. Keep the wreath base and replace only a few items. This saves time and keeps the wreath looking new. Refreshing your wreath makes it a lovely decoration all year.

Credit: www.virgin.com
Frequently Asked Questions
What Materials Do I Need To Make A Decorative Wreath?
You need a wreath base, floral wire, greenery, flowers, and decorative accents. Choose materials based on your style and season. Basic tools include scissors, wire cutters, and hot glue for assembly.
How Long Does It Take To Make A Decorative Wreath?
Making a wreath usually takes 30 minutes to 2 hours. Time varies by wreath complexity and your crafting experience. Simple designs are quicker, while elaborate ones require more careful assembly.
Can I Reuse Materials From Old Wreaths?
Yes, reusing elements saves money and adds character. Inspect old materials for damage before reuse. Refresh greenery by trimming and rehydrating to keep it looking fresh.
How Do I Hang My Homemade Wreath Securely?
Use a sturdy hook, nail, or wreath hanger to support weight. Avoid thin strings that can break. Ensure your hanging method suits the door or wall surface.
Conclusion
Creating your own decorative wreath is fun and rewarding. You can choose colors and styles that fit your home. It adds a personal touch to any door or wall. Crafting wreaths also helps you relax and enjoy time. Try different materials to see what you like best.
Each wreath you make will be unique and special. Start small, and enjoy the process. Your creativity will shine through every piece you create. Making wreaths brings joy to both you and your guests. Give it a try, and brighten your space today.