Want to add a personal touch to your wreath that stands out? Learning how to make a decorative bow for your wreath is easier than you think—and it can transform your decoration from simple to stunning.
Imagine your guests’ eyes lighting up as they notice the perfect bow, crafted by your own hands. In this guide, you’ll discover simple steps and clever tips to create beautiful bows that match your style. Ready to make your wreath truly unforgettable?
Let’s get started!
Materials Needed
Creating a decorative bow for a wreath needs some basic materials. Choosing the right items makes the process smooth and fun. The right supplies help the bow look neat and last long. Here is what you will need.
Choosing The Right Ribbon
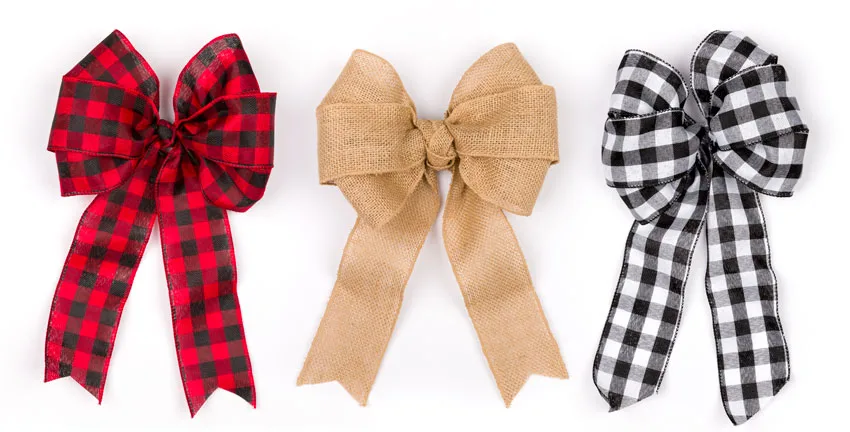
Pick a ribbon that matches your wreath style. Wired ribbons hold shape well and are easier to work with. Satin or velvet ribbons give a soft and elegant look. Consider the ribbon width; wider ribbons create bigger bows. Choose colors that complement your wreath’s theme.
Additional Supplies
Have sharp scissors ready for clean cuts. Floral wire or twist ties help secure the bow tightly. A ruler or measuring tape keeps ribbon lengths accurate. Hot glue can attach the bow firmly to the wreath. Keep some extra ribbon pieces for finishing touches.
Preparing The Ribbon
Preparing the ribbon is the first step in making a decorative bow for your wreath. This step sets the foundation for a neat and beautiful bow. Taking time to measure and cut the ribbon right makes the whole process easier. It also helps the bow look balanced and professional.
After cutting, sealing the ribbon edges is important. It prevents the ribbon from fraying and keeps the bow looking fresh. Small details like this improve the durability of your wreath decoration.
Measuring And Cutting
Start by choosing the right length of ribbon for your bow. Measure the ribbon carefully to avoid waste. Cut the ribbon with sharp scissors for a clean edge. Cut multiple pieces if your bow needs more loops or tails. Keep all pieces even to ensure a balanced bow.
Sealing Ribbon Edges
Seal the edges of the ribbon to stop fraying. Use a lighter or candle flame briefly near the edges. Do this quickly and carefully to avoid burning the ribbon. Alternatively, apply clear nail polish or fabric glue to the edges. Let the seal dry before shaping the bow. This step keeps the ribbon strong and neat.
Creating The Bow Loops
Creating the bow loops is a key step in making a decorative bow for your wreath. This part shapes the bow’s look and style. The loops should be neat and balanced to give a polished finish.
Focus on making each loop similar in size. This will help your bow look symmetrical and pretty. The next step is to secure the loops firmly. This keeps the bow from falling apart.
Forming Even Loops
Start by cutting a long strip of ribbon. Hold the ribbon and fold it into loops. Make sure each loop is the same size. Count the loops to keep them equal on each side.
Use your fingers to pinch the center tightly. This keeps the loops from moving. Even loops make the bow look full and nice.
Securing The Center
After forming the loops, grab a thin wire or string. Wrap it tightly around the center of the loops. Pull the wire or string to hold the loops in place.
Twist the wire or tie the string into a knot. Cut off any extra wire or string. This step locks the bow shape securely for your wreath.
Credit: kippiathome.com
Shaping And Fluffing The Bow
Shaping and fluffing the bow is a key step in making a decorative wreath bow. This step gives the bow a full, attractive look. It helps the bow stand out on the wreath. Proper shaping makes the bow look neat and balanced. Fluffing adds volume and life to the ribbon. The result is a bow that looks rich and inviting.
Adjusting Loop Sizes
Start by looking at each loop of the bow. Check if the loops are the same size or if some are bigger. Pull the ribbon gently to even out the loops. Make the loops bigger or smaller to create balance. Balanced loops make the bow look pretty and tidy. Small loops next to big loops can look messy. Take your time to adjust each loop carefully.
Fluffing For Volume
After adjusting loops, it is time to fluff the bow. Use your fingers to separate each loop. Pull the ribbon slightly outward to add space inside the loops. This creates a fuller look. Fluff the bow on both sides for a round shape. Fluffing gives the bow a soft and puffy feel. Keep fluffing until the bow looks lively and wide.
Attaching Bow To Wreath
Attaching the bow to your wreath is a key step in making it look beautiful and complete. The bow should sit well and stay in place for a long time. This section explains how to pick the best spot for your bow and ways to secure it firmly.
Choosing Placement
Decide where your bow will look best on the wreath. Usually, the bottom center is popular. The top or side can work too. Think about the wreath’s shape and style. Place the bow where it balances the design. Make sure it does not cover important parts of the wreath. Step back and check how it looks from a distance.
Securing Techniques
Use wire or twist ties to attach the bow. Wrap the wire tightly around both the wreath and bow’s center. For extra hold, use hot glue on the bow’s back. Press firmly until it sets. Ribbon tails can be tucked into the wreath for more stability. Avoid loose ties to keep the bow from falling. Check the bow by gently shaking the wreath.
Adding Embellishments
Adding embellishments to your decorative bow makes it stand out. Embellishments add texture, color, and personality to your wreath. They create a more lively and festive look. Small details can make a big difference. Choose embellishments that match your wreath’s theme and colors. Balance is key. Avoid overcrowding the bow. Let the bow shine while the embellishments complement it.
Using Greenery And Flowers
Greenery and flowers bring a natural touch to your bow. Use small sprigs of pine, eucalyptus, or holly for a fresh look. Faux flowers work well too. Pick flowers that match your wreath colors. Attach them gently to avoid damaging the ribbon. Place greenery around the bow’s loops for fullness. Flowers can go in the bow’s center or edges. This adds softness and color. Keep it simple for a clean style.
Incorporating Decorative Accents
Decorative accents add sparkle and charm. Use pinecones, berries, or small ornaments. Glittery picks or tiny bells create a festive feel. Secure accents with floral wire or hot glue. Space them evenly around the bow. Use accents that suit the wreath’s theme. Metallic or wooden pieces add texture. These small touches give your bow character. Avoid using too many accents to keep it elegant.
Tips For Long-lasting Bows
Creating a beautiful bow for your wreath is just the start. Making sure it lasts long keeps your wreath looking fresh and lovely. Proper care helps the bow keep its shape and color over time. Follow these tips to protect your decorative bow and enjoy its charm for many seasons.
Storage Suggestions
Store bows in a cool, dry place away from sunlight. Use a box or container to keep them safe from dust. Avoid crushing the bow by placing it carefully. Hanging bows on hooks helps keep their shape intact. Wrap bows in tissue paper to prevent wrinkles and damage.
Weatherproofing Ideas
Use a spray sealant designed for fabric to protect against rain. Test the spray on a small part of the bow first. Choose waterproof ribbons for outdoor wreaths to resist moisture. Avoid placing bows in direct sunlight for long periods. Cover wreaths with plastic during heavy rain or snow to shield the bow.
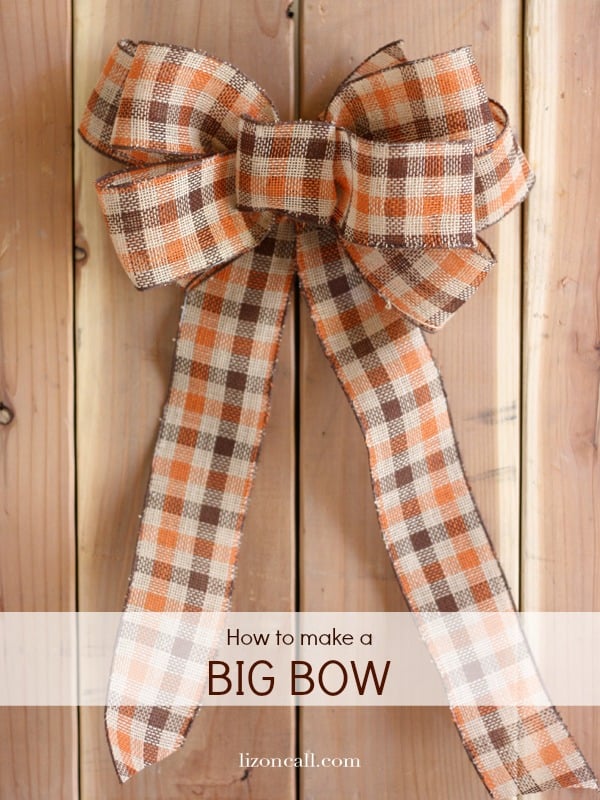
Credit: lizoncall.com

Credit: www.youtube.com
Frequently Asked Questions
How Do You Make A Decorative Bow For A Wreath?
To make a decorative bow, cut ribbon into equal lengths. Fold and pinch the ribbon to form loops. Secure the center with wire. Fluff the loops to shape the bow. Attach it to the wreath with floral wire or glue.
What Type Of Ribbon Is Best For Wreath Bows?
Choose wired ribbon for wreath bows. Wired edges help shape and hold the bow’s form. Opt for weather-resistant material if the wreath is outdoor. Satin, burlap, or velvet ribbons are popular choices for decorative wreath bows.
How Can I Attach A Bow Securely To A Wreath?
Use floral wire or hot glue to attach the bow. Wrap floral wire tightly around the bow’s center and wreath frame. For hot glue, apply generously and press firmly. Ensure the bow is stable and won’t shift or fall off.
Can I Reuse Decorative Bows On Wreaths?
Yes, reusable bows save time and money. Store bows in a cool, dry place to maintain shape. Use wired ribbons as they hold well for multiple uses. Gently reshape loops before reattaching to keep the bow looking fresh.
Conclusion
Creating a decorative bow for your wreath adds charm and style. It takes just a few simple steps to make a beautiful bow. Practice a little, and you will see great results. A well-made bow can brighten any wreath and your home.
Try different ribbon colors and sizes to fit your taste. Enjoy the process and have fun crafting your perfect wreath bow. Your creativity will shine in every decoration you make. Keep making bows to improve your skills and add personal touch.
Crafting is easy and rewarding with simple, clear steps.