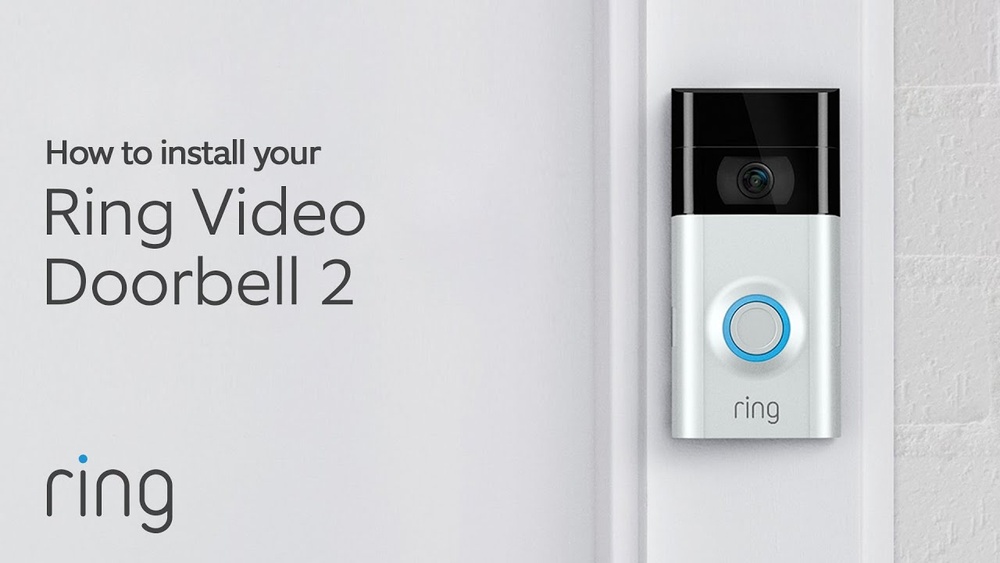
Are you ready to boost your home security with the Ring Video Doorbell 2? Installing this smart device might seem tricky, but you’re closer to having it set up than you think.
Imagine seeing who’s at your door from anywhere, anytime—giving you peace of mind and control. In this guide, you’ll find simple, step-by-step instructions to get your Ring Video Doorbell 2 up and running quickly. Keep reading, and you’ll have your new doorbell working like a pro in no time.
Preparing For Installation
Preparing for the installation of your Ring Video Doorbell 2 is key to a smooth setup. Taking time to get everything ready saves effort later. This step-by-step guide covers what you need before starting.
Gathering Required Tools
First, collect all tools for installation. You will need a drill, screwdriver, and level. A pencil helps mark drill holes. Have the mounting screws and anchors ready. Keep your smartphone nearby for the app setup.
Checking Compatibility
Check if your doorbell works with your home system. The Ring Video Doorbell 2 supports most doorbell wires. Confirm your existing doorbell voltage is compatible. Also, check your Wi-Fi signal strength at the door. Strong Wi-Fi ensures clear video and alerts.
Charging The Battery
Charge the Ring battery fully before installation. Use the included USB charger and cable. A full charge takes about 5 hours. Charging first avoids interruptions during setup. You can monitor the battery level in the app.
Credit: vicentetorns.com
Setting Up The Doorbell
Setting up the Ring Video Doorbell 2 is simple and quick. It only takes a few steps to get your doorbell ready. This section explains how to connect the doorbell to your phone and customize its settings.
Connecting To The Ring App
Start by downloading the Ring app on your smartphone. Open the app and tap “Set Up a Device.” Choose “Doorbells” from the list. Follow the on-screen instructions to connect your doorbell to your Wi-Fi network. Make sure your phone is close to the doorbell during setup. The app will guide you through each step clearly.
Creating An Account
Next, create a Ring account if you don’t have one. Enter your email and create a strong password. Confirm your email to activate your account. This account lets you control the doorbell and view alerts. It keeps your device secure and linked to your phone.
Configuring Device Settings
After connecting, customize your doorbell settings. Adjust motion sensitivity to reduce false alerts. Set up notification preferences to get alerts only when you want. You can also name your device for easy identification. Save your settings so the doorbell works the way you need.
Physical Installation
Physical installation is the key step to set up your Ring Video Doorbell 2. It involves placing the doorbell in the right spot and fixing it securely. This ensures the device works well and captures clear video footage.
Choosing The Installation Location
Pick a spot near your front door for the best view. The doorbell should be 48 inches from the ground. Avoid direct sunlight or bright lights behind the doorbell. This helps the camera capture clear images day and night.
Check the Wi-Fi signal strength in the area. Strong Wi-Fi is necessary for smooth video streaming and alerts. Avoid metal or thick walls that may block the signal.
Mounting The Doorbell
Use the mounting bracket that comes with the doorbell. Hold the bracket against the wall at your chosen spot. Make sure it is straight and level for a neat look.
Mark the screw holes with a pencil. Drill small pilot holes for the screws. This makes the installation easier and prevents damage to the wall.
Securing With Screws
Attach the mounting bracket using the provided screws. Tighten them firmly to keep the bracket stable. Avoid over-tightening, which can crack the wall or bracket.
Snap the Ring Video Doorbell 2 onto the bracket. You should hear a click sound, confirming it is secure. Test the doorbell by pressing the button and checking the app.

Credit: www.youtube.com
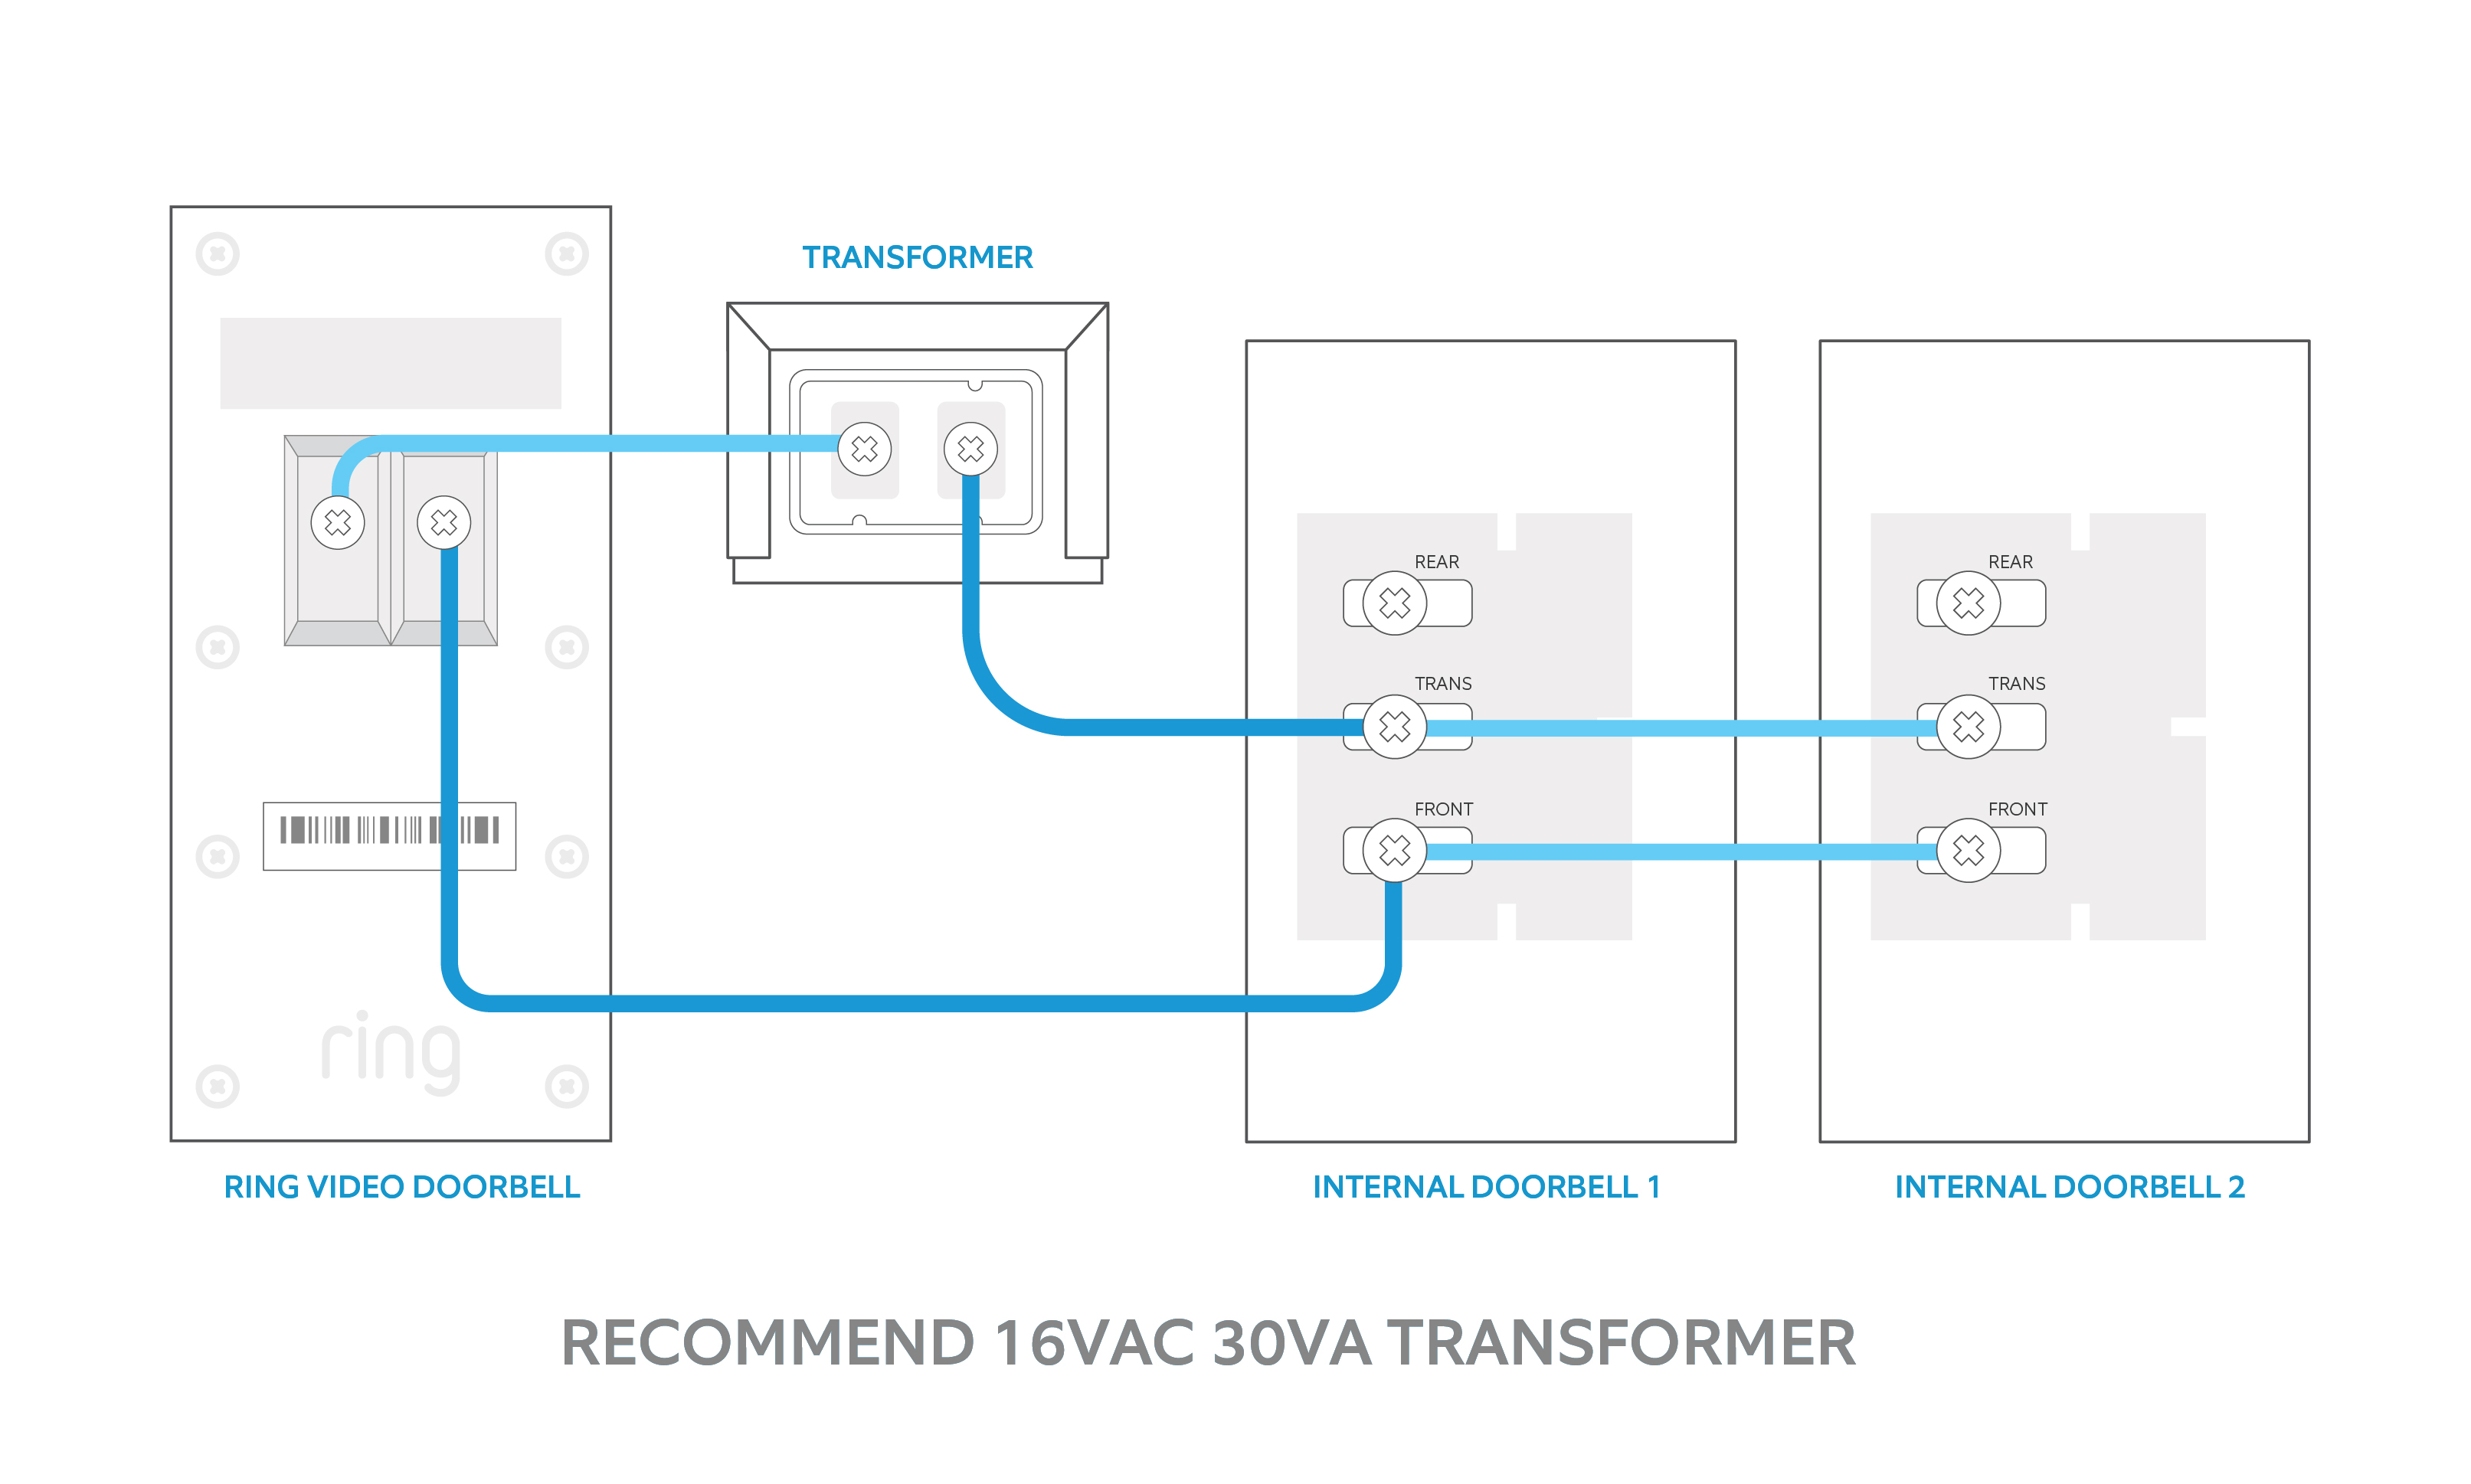
Wiring The Doorbell
Wiring the Ring Video Doorbell 2 is a key step in its installation. It connects the doorbell to your home’s power supply. Proper wiring ensures the device works smoothly and stays charged. Follow clear steps to wire it safely and correctly.
Turning Off Power
Start by turning off power at the circuit breaker. This prevents electric shocks. Use a voltage tester to confirm power is off. Never touch wires while electricity flows. Safety first.
Connecting Wires
Locate your existing doorbell wires. Attach them to the Ring Video Doorbell 2 terminals. The wires do not have polarity, so order does not matter. Tighten screws to secure wires firmly. Check for loose connections.
Testing The Connection
Turn the power back on at the breaker. Press the doorbell button to test it. Listen for the chime inside your home. The Ring app should show the device is powered. Fix any issues before final mounting.
Finalizing Setup
Finalizing the setup of your Ring Video Doorbell 2 is a crucial step. It ensures the device works smoothly and protects your home. Follow these simple tasks to complete the installation.
Restoring Power
After installing the doorbell, restore power to your doorbell circuit. Switch the breaker back on or reconnect the wires. This action powers your Ring Video Doorbell 2. The device should light up, indicating it is receiving power.
Completing App Setup
Open the Ring app on your smartphone or tablet. Follow the on-screen instructions to finish setup. Connect your doorbell to Wi-Fi and test the live video feed. This step syncs your device and app for remote access.
Adjusting Motion Settings
In the app, customize motion detection zones and sensitivity. This helps reduce false alerts from cars or animals. Set the areas you want to monitor closely. Save your settings to start receiving accurate notifications.
Troubleshooting Tips
Troubleshooting your Ring Video Doorbell 2 can save time and effort. Simple problems often stop your device from working correctly. This section helps you fix common issues quickly. Follow the tips to get your doorbell running smoothly.
Common Installation Issues
Many users face connection problems during setup. Weak Wi-Fi signals cause most troubles. Check your network strength near the doorbell. Another issue is incorrect wiring if using a wired setup. Double-check all connections and screws. The doorbell might not mount properly. Ensure the bracket fits tightly on the wall. Lastly, the device might not charge fully. Use the original charger and cable.
Resetting The Device
Resetting the doorbell can fix many glitches. Press and hold the setup button for 15 seconds. The light will flash, signaling a reset. Release the button and wait for the device to restart. After reset, reconfigure the settings in the Ring app. This step clears minor errors and improves performance.
Contacting Support
If problems persist, contact Ring support. Visit their official website or use the app help section. Have your device details ready for faster service. Support can guide you through advanced fixes. They may offer replacement if the device is faulty.
Credit: vidscola.com
Frequently Asked Questions
How Do I Install Ring Video Doorbell 2 Step-by-step?
First, charge the battery fully. Next, mount the bracket using screws. Then, attach the doorbell, connect to Wi-Fi, and complete setup in the app. Finally, test the doorbell to ensure proper installation and functionality.
Can I Install Ring Video Doorbell 2 Without Wiring?
Yes, Ring Video Doorbell 2 supports battery power. Simply charge the battery, mount the doorbell, and connect to Wi-Fi. This wireless installation is quick and easy, with no need for existing doorbell wiring.
What Tools Are Needed For Ring Video Doorbell 2 Installation?
You need a drill, screwdriver, level, and the mounting screws included in the package. These tools help secure the mounting bracket properly and ensure the doorbell is aligned for optimal performance.
How To Connect Ring Video Doorbell 2 To Wi-fi?
Open the Ring app, select your device, and follow the in-app instructions. Enter your Wi-Fi network name and password. The doorbell will connect automatically to complete the setup process.
Conclusion
Installing the Ring Video Doorbell 2 is simple and quick. Follow each step carefully to avoid mistakes. Test the doorbell after installation to ensure it works well. Enjoy the added security and convenience at your front door. Regularly check the device for updates and battery life.
Stay connected with visitors anytime, anywhere. This guide helps you set up your doorbell with ease. Your home feels safer with this smart device in place.
