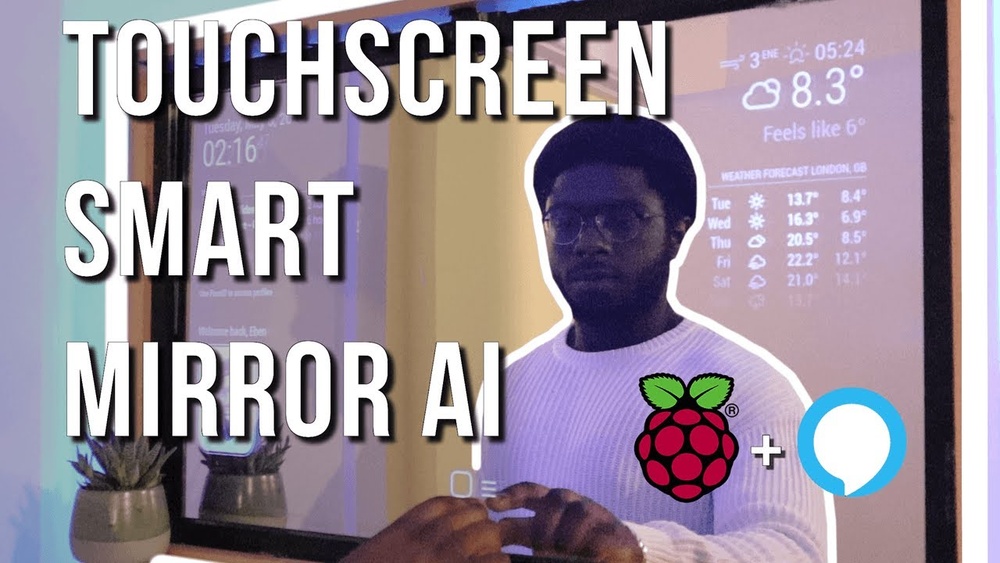
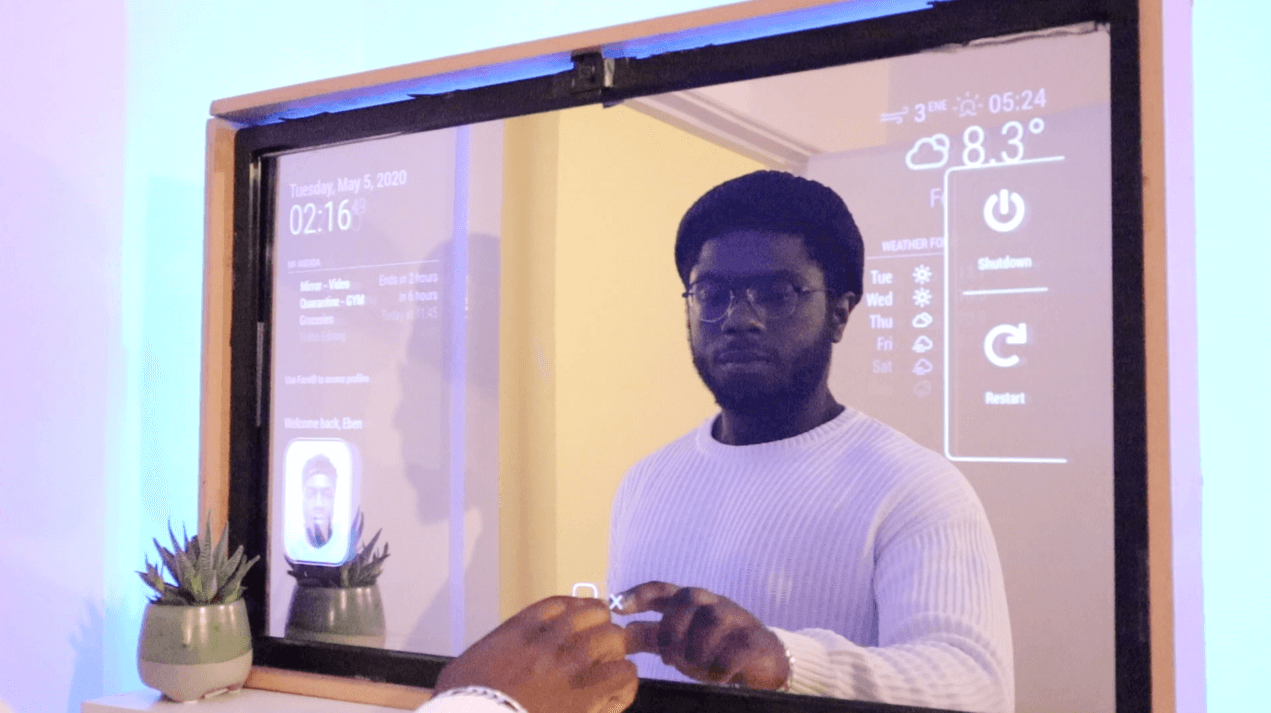
Imagine starting your day by simply glancing at your mirror and instantly seeing the weather, your calendar, or even the latest news—all without lifting a finger. What if your mirror could do more than just reflect your image?
Building a touch screen smart mirror is easier than you think, and it can transform your daily routine in ways you never expected. In this guide, you’ll discover step-by-step how to create your own smart mirror that responds to your touch and keeps you connected.
Ready to bring a touch of the future into your home? Let’s dive in and make it happen.

Credit: www.youtube.com
Choosing The Right Materials
Choosing the right materials is key to building a smart mirror that works well and looks good. Each component affects how the mirror functions and how long it lasts. Picking quality parts helps create a smooth touch experience and clear display. It also makes the mirror sturdy and stylish.
Selecting The Display
The display shows all the information on your smart mirror. A good display is bright and clear. LED or LCD screens work best. Choose a size that fits the mirror frame. Make sure the resolution is high enough for sharp text and images. Avoid displays with glare or poor color. A screen with low power use is a plus.
Choosing The Frame
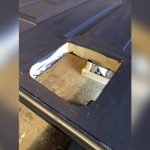
The frame holds everything together and gives the mirror shape. Use materials like wood, metal, or plastic. Wood offers a warm, classic look. Metal frames are strong and modern. Plastic is light and cheap but less durable. Pick a frame that matches your room style. Ensure it is thick enough to support the display and touchscreen.
Picking The Touchscreen Overlay
The touchscreen overlay detects your touch and controls the mirror. Use a clear, responsive overlay that fits the display size. Capacitive touchscreens are smooth and accurate. Resistive ones work with any touch but feel less natural. The overlay must be thin to keep the mirror’s look. It should also resist scratches and fingerprints for easy cleaning.

Credit: www.twowaymirrors.com
Gathering Tools And Components
Building a touch screen smart mirror starts with gathering the right tools and components. This step ensures the project goes smoothly. Having everything ready saves time and avoids frustration. The list below covers what you need to begin.
Essential Tools List
- Screwdrivers (Phillips and flathead)
- Wire cutters and strippers
- Soldering iron with solder
- Measuring tape or ruler
- Hot glue gun or strong adhesive
- Utility knife or box cutter
- Drill with various drill bits
- Multimeter for testing circuits
Electronic Components Needed
- Raspberry Pi or similar mini computer
- Touch screen monitor or panel
- Two-way mirror glass or acrylic
- Power supply for the computer and screen
- HDMI and USB cables
- MicroSD card for software
- Frame materials to hold everything
Additional Accessories
- Bluetooth or Wi-Fi adapter (if not built-in)
- Speakers or microphone for voice commands
- LED lights for backlighting
- Cooling fan to prevent overheating
- Velcro strips or mounting brackets
- Protective case for the computer board
Setting Up The Display
Setting up the display is a key step in building your touch screen smart mirror. The display shows your apps, weather, news, and more. It must work well and look clear. This section guides you through preparing the monitor, installing the touchscreen, and calibrating touch sensitivity. Follow each part carefully for the best results.
Preparing The Monitor
Start with a clean, dust-free monitor. Choose an LED or LCD screen with good resolution. Remove any unnecessary parts like stands or bezels. Make sure the screen fits your mirror frame. Check the display cable and connectors for damage. Keep all parts ready for easy access during installation.
Installing The Touchscreen
Select a touchscreen overlay that matches your monitor size. Clean the monitor surface with a soft cloth. Peel off the protective film from the touchscreen. Carefully place the touchscreen on the monitor, aligning edges perfectly. Press gently to remove air bubbles. Connect the touchscreen to your computer or controller using USB or other cables.
Calibrating Touch Sensitivity
Power on your system and open the calibration tool. Follow on-screen instructions to touch target points. Adjust settings for accuracy and response speed. Test the touch by tapping and swiping across the screen. Repeat calibration if the touch feels off. Proper calibration ensures smooth and precise control of your smart mirror.
Credit: www.akillieviniz.com
Building The Frame
Building the frame is an important step in making a touch screen smart mirror. The frame holds all parts together. It gives the mirror its shape and strength. A good frame makes the mirror look neat and last longer.
Start by choosing the right materials. Wood, metal, or plastic can work. The frame needs to fit the size of your display perfectly. It also must protect the screen and other components.
Cutting And Assembling Materials
Measure the display size carefully before cutting. Use a saw or cutter to cut the materials. Cut straight lines for a clean look. Sand the edges to avoid rough spots.
Assemble the pieces with nails, screws, or glue. Make sure corners are square and tight. This helps the frame stay strong over time. Check that the frame is the right size for the screen.
Mounting The Display
Place the display inside the frame gently. Use brackets or clips to hold it firmly. Avoid pressing too hard on the screen surface. Make sure cables have space and do not bend.
Test the display once mounted to confirm it works. Adjust the frame if the screen is loose or too tight. Proper mounting keeps the screen safe and functional.
Ensuring Stability And Durability
Add support beams or braces inside the frame for extra strength. Use strong screws or bolts to secure parts. Check all connections for tightness before finishing.
Consider weatherproofing if the mirror is for a bathroom or outdoor use. Paint or seal wood to prevent water damage. A stable frame prevents wobbling and damage.
Integrating The Software
Integrating the software is a key step in building your touch screen smart mirror. This phase brings the hardware to life. The right software makes your mirror smart and interactive.
Choosing the right software ensures smooth operation. It controls how your mirror shows time, weather, news, and other info. The software also manages touch responses and apps.
Choosing The Operating System
Select an operating system that works well with your hardware. Popular choices include Raspberry Pi OS, Ubuntu, or Android. Raspberry Pi OS is simple and supports many smart mirror apps. Ubuntu offers more features but needs more power. Android is good for touch screens and supports many apps. Pick one that matches your skills and project needs.
Installing Smart Mirror Software
After choosing the OS, install the smart mirror software. MagicMirror² is a popular open-source option. It shows widgets for weather, calendar, and news. Installation usually involves downloading files and running commands. Follow the official guides carefully to avoid errors. Test the software to ensure all parts work well.
Customizing The Interface
Make the interface match your style and needs. Change colors, fonts, and widget positions. Add or remove modules based on what you want to see. Simple layouts keep the mirror easy to use. You can add voice control or gesture features. Customization improves your experience and makes the mirror unique.
Adding Voice And Gesture Controls
Adding voice and gesture controls transforms your smart mirror into a hands-free device. It makes interaction easier and more fun. You can speak commands or wave your hand to control the mirror. This section explains how to add these controls step by step.
Setting Up Microphones
Start by choosing a good quality microphone. USB microphones work well for smart mirrors. Place the microphone near the user but hidden behind the mirror glass. Connect the microphone to your smart mirror’s computer or controller.
Test the microphone to make sure it picks up your voice clearly. Use software like Google Speech API or open-source tools to recognize your commands. Adjust the sensitivity so it responds only to your voice.
Implementing Gesture Sensors
Gesture sensors detect hand movements near the mirror. Infrared sensors or cameras with motion detection are common choices. Mount the sensor where it has a clear view of your hand movements.
Connect the sensor to your smart mirror system. Use libraries like OpenCV for camera-based gestures or simple infrared sensors with Arduino. Program gestures like swipe left, right, or wave to perform specific actions.
Configuring Commands
Commands link your voice or gestures to actions on the mirror. Start by listing the commands you want, such as “show weather” or “play music.” Program the voice recognition software to listen for these commands.
Map gestures to commands in your code. Test each command to ensure the mirror responds correctly. Keep commands simple and easy to remember for smooth interaction.
Power Management And Wiring
Power management and wiring are key parts of building a touch screen smart mirror. They keep your device running smoothly and safely. Proper wiring helps avoid shorts and keeps everything neat inside the frame. Managing power well ensures your mirror gets the right voltage without overheating or damage.
Organizing Internal Wiring
Start by planning the wire routes inside the mirror frame. Use cable ties to bundle wires together. Keep power and data cables separate to reduce interference. Label each wire for easy troubleshooting later. Avoid tight bends to prevent wire damage.
Power Supply Options
Choose a power supply that matches your screen’s voltage and current needs. Most smart mirrors use 12V or 5V adapters. Use a power supply with enough wattage to support all components. Consider a power switch for easy on and off control. A USB power bank can work for small setups.
Safety Precautions
Always unplug power before working on wiring. Use insulated wires and connectors to prevent shocks. Avoid exposed wires inside the mirror frame. Check connections twice to avoid short circuits. Use a fuse or circuit breaker for extra protection.
Testing And Troubleshooting
Testing and troubleshooting are key steps in building a touch screen smart mirror. They ensure the mirror works smoothly and reacts to your touch. Careful checks help find problems early. Fixes keep the project on track.
Testing covers both hardware and software. Touch sensors must respond well. The software should run without errors. Troubleshooting helps solve issues quickly.
Checking Touch Responsiveness
Start by touching different areas on the mirror. The screen should react instantly. No delay or missed touches allowed. Use a simple drawing app to check accuracy. Draw lines or shapes to test response. Make sure all parts of the screen work.
If some areas fail, clean the screen gently. Check the connection between the touch sensor and the controller. Loose wires cause poor response. Reconnect cables firmly to fix this.
Software Debugging Tips
Run your smart mirror software in debug mode. Look for error messages or warnings. These clues help find bugs quickly. Use logs to track what the software does. Check for crashes or freezes.
Test each feature separately. For example, test weather updates alone. Then test calendar sync. This helps isolate problems. Update software libraries to their latest versions. Old software often causes bugs.
Common Issues And Fixes
Some common problems include unresponsive touch, slow software, or display glitches. Check hardware connections first for touch issues. Restart the software to clear slowdowns. Update drivers for the display screen.
Screen flickering often means loose cables. Tighten connections or replace faulty cables. Software crashes may need a reinstall. Keep backups of your code and settings. This saves time if you must start over.
Enhancing With Additional Features
Enhancing your touch screen smart mirror with extra features makes it more useful and fun. These features bring more value and help the mirror fit better into daily life. Simple additions can turn a basic mirror into a smart home hub.
Adding Smart Home Integration
Connect your smart mirror to home devices like lights, thermostats, and cameras. Use platforms like Google Home or Amazon Alexa for control. This lets you manage your home with voice or touch. It saves time and adds convenience to your routine.
Including Weather And News Widgets
Display real-time weather updates directly on your mirror. Choose local forecasts to plan your day better. Add news widgets to get headlines and important updates fast. These features keep you informed without needing a phone or computer.
Incorporating Custom Notifications
Set up notifications for calendar events, reminders, or messages. Customize alerts to show only what matters most to you. This helps you stay organized and on schedule. Notifications appear quietly, so they don’t interrupt your tasks.
Maintenance And Upgrades
Maintaining and upgrading your touch screen smart mirror keeps it working well and looking great. Regular care extends the mirror’s life and improves its performance. Planning upgrades helps add new features and improve user experience over time.
Cleaning And Care Tips
Use a soft, dry cloth to clean the mirror surface. Avoid harsh chemicals or abrasive materials that can scratch or damage it. Clean gently to keep the touch screen responsive and clear. Wipe the frame and sensors carefully to prevent dust buildup. Check cables and connections regularly for wear or damage.
Updating Software
Keep the smart mirror’s software up to date for best performance. Updates fix bugs and add new features. Check for updates regularly and install them promptly. Use a stable internet connection to avoid errors. Back up important settings before updating to prevent data loss.
Planning Future Enhancements
Think about new functions you want to add over time. Consider adding voice control, new apps, or better sensors. Plan upgrades that fit your budget and skill level. Research compatible hardware and software before buying. Small improvements can make your smart mirror more useful and fun.
Frequently Asked Questions
What Materials Are Needed To Build A Touch Screen Smart Mirror?
To build a touch screen smart mirror, you need a two-way mirror, a touchscreen overlay, a display monitor, a Raspberry Pi or similar, and basic tools. These components work together to create the interactive reflective surface of the smart mirror.
How Do You Install The Touchscreen On A Smart Mirror?
Install the touchscreen overlay directly on the mirror surface. Connect it to the display monitor behind the mirror. Ensure proper calibration for accurate touch response. This setup allows users to interact with the mirror’s smart features seamlessly.
Can A Smart Mirror Display Weather And News Updates?
Yes, a smart mirror can show real-time weather, news, calendar events, and more. This is done by running custom software on the connected computer, fetching data from online sources for convenient daily updates.
What Software Is Best For Smart Mirror Functionality?
Popular smart mirror software includes MagicMirror², which is open-source and customizable. It supports various modules like weather, news, and calendar. This software runs on devices like Raspberry Pi, making it ideal for DIY smart mirrors.
Conclusion
Building a touch screen smart mirror is a fun and useful project. It blends technology with everyday life. You create a mirror that shows more than your reflection. This guide helps you understand each step clearly. Keep your tools ready and follow the instructions carefully.
Test your mirror often to catch mistakes early. Soon, you will enjoy a smart mirror tailored to you. It adds convenience and style to any room. Start today and see what you can build!