If you want to keep your furry friend safe without spending a fortune, building your own pet gate is a smart move. Imagine having a sturdy barrier that fits perfectly in your space, keeps your pet where they belong, and costs just a fraction of store-bought options.
In this guide, you’ll discover simple steps and easy materials to create a low-cost pet gate that works for you and your pet. Ready to save money and protect your home? Let’s get started!

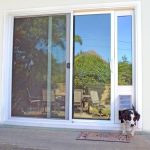
Credit: gatewaypets.org
Choosing Materials
Choosing the right materials is important for building a low-cost pet gate. The materials affect the gate’s strength and look. Picking affordable and easy-to-find items saves money and effort. This section helps you choose wood, recycled options, and hardware that fit your budget and needs.
Affordable Wood Options
Softwoods like pine and fir are cheap and easy to cut. They work well for simple pet gates. These woods are lightweight but still strong. Avoid very thin wood that might break easily. Look for wood with smooth surfaces to avoid splinters. Buying wood from local stores can reduce costs.
Using Recycled Materials
Old furniture parts or pallets can be great for pet gates. They save money and reduce waste. Check for clean, sturdy pieces with no rot or damage. Sand rough edges to make surfaces safe for pets. Recycled wood adds character and a unique look to your gate.
Selecting Hardware And Fasteners
Choose simple hinges and screws that fit your wood size. Basic metal hardware is affordable and easy to install. Use screws instead of nails for better hold and safety. Buy hardware kits if available—they often cost less. Make sure fasteners are rust-resistant to last longer.
Credit: madison.easyvet.com
Measuring Your Space
Measuring your space is the first step to build a low-cost pet gate. Accurate measurements help create a gate that fits well. This step prevents gaps or tight spaces that could harm your pet. Taking time to measure saves money and effort later. Use a tape measure and note down the numbers clearly.
Width And Height Considerations
Measure the width of the space where the gate will go. Measure from one side of the doorway or opening to the other. Take the measurement at the top, middle, and bottom. Use the smallest width to ensure the gate fits everywhere. Next, measure the height from the floor to the top edge. Choose a height that blocks your pet safely.
Allowing For Pet Size And Movement
Think about your pet’s size when measuring. The gate should be tall enough to stop your pet from jumping over. Leave some extra space for pet movement. Your pet needs room to see through and move slightly. A gate that is too small can cause stress or injury. Adding a few extra inches in height and width is helpful.
Cutting And Preparing Pieces
Cutting and preparing pieces is the first step in building a low-cost pet gate. This step helps you get the right shapes and sizes from your materials. Proper preparation makes the assembly process easier and safer.
Taking care during cutting prevents mistakes and accidents. Preparing the pieces well ensures the gate fits perfectly and lasts long.
Safe Cutting Techniques
Wear safety glasses to protect your eyes from dust and debris. Use gloves to keep your hands safe. Always cut on a stable surface to avoid slips. Mark your cutting lines clearly with a pencil before starting. Use a sharp saw to make clean cuts. Keep your fingers away from the blade at all times. Take slow and steady strokes for better control. Stop if you feel unsafe or unsure and check your setup.
Sanding And Smoothing Edges
After cutting, edges can be rough and sharp. Use sandpaper or a sanding block to smooth these edges. Start with coarse sandpaper to remove large splinters. Then use finer sandpaper for a smooth finish. Smooth edges prevent splinters and make the gate safe for pets and people. Check all pieces carefully and sand any rough spots. Clean dust off the pieces before moving to the next step.
Credit: urgentvet.com
Assembling The Gate
Assembling the pet gate is a key step in your DIY project. This process brings all parts together to form a sturdy and functional gate. Follow simple steps to join pieces securely and add hardware for easy use.
Basic Joinery Methods
Start by aligning the wooden pieces to form the gate frame. Use wood glue on the edges to hold parts tightly. Clamp the pieces to keep them steady while drying. Reinforce joints with screws for extra strength. Pre-drill holes to prevent wood from splitting. Make sure corners are square for a neat look. This method creates a strong base for your gate.
Attaching Hinges And Latches
Position the hinges on one side of the gate frame. Mark screw holes with a pencil for accuracy. Attach hinges using screws and a screwdriver or drill. Check that the gate swings smoothly. Next, fix the latch on the opposite side. Align it with the frame or wall for secure closure. Test the latch to ensure it locks and unlocks easily. Proper hardware installation keeps your pet safe and contained.
Finishing Touches
Finishing touches make your pet gate look complete and last longer. These small steps protect the gate and add style. They also keep the gate safe for your pet and family. Focus on painting, sealing, and adding simple decorations.
Painting And Sealing
Choose a paint that works well on wood or metal. Use non-toxic paint safe for pets. Paint helps protect the gate from dirt and water. Apply a thin, even coat for best results. Let the paint dry fully before adding another coat.
After painting, apply a clear sealant. Sealant stops moisture from damaging the gate. It also makes cleaning easier. Use a sealant that is safe around animals. This step increases the gate’s life and durability.
Adding Decorative Elements
Decorate the gate with simple, safe items. Use ribbons, stencils, or stickers to add color. Choose decorations that won’t harm your pet. Avoid small parts that can be chewed or swallowed.
Personalize the gate with your pet’s name. Use paint or adhesive letters for a fun touch. Keep decorations minimal for easy cleaning. A well-decorated gate makes your space warm and welcoming.
Installation Tips
Installing a low-cost pet gate properly is important for safety. A well-installed gate keeps pets safe and prevents accidents. Follow these tips to make sure the gate stays strong and steady. Simple steps can make a big difference in your gate’s performance.
Mounting The Gate Securely
Start by choosing a solid wall or door frame. Use screws and anchors that fit the wall type. Make sure the gate sits at the right height for your pet. Tighten all screws firmly but avoid over-tightening. This helps prevent damage to walls or frames. Check that the gate swings or opens smoothly after mounting.
Adjusting For Stability
Test the gate by pushing it gently from different angles. Adjust the gate’s tension or locking mechanism as needed. Use rubber pads or extra brackets for better grip. Make sure the gate does not wobble or shift. A stable gate keeps pets safe and stops escapes. Regularly check and tighten parts to keep the gate secure over time.
Cost-saving Strategies
Building a pet gate does not have to be expensive. Smart cost-saving strategies can help you make a sturdy gate without spending much money. Simple tips save money and keep quality high. Use these ideas to create a low-cost pet gate that works well for your home.
Where To Find Discounts
Check local hardware stores for clearance sales on wood and screws. Online marketplaces often offer discounted building materials. Thrift shops sometimes have tools and parts for less. Seasonal sales are good times to buy supplies cheaply. Watch for coupons and special deals to lower costs further.
Repurposing Household Items
Look around your home for items that can serve as gate parts. Old baby gates, crib rails, or bookshelf panels work well. Use leftover wood from past projects instead of buying new. Reuse hinges, screws, and hooks from unused furniture. This approach cuts costs and reduces waste.
Safety Considerations
Safety is a key part of building a low-cost pet gate. The gate must protect pets from danger. It should keep pets safe without causing harm. Proper safety checks help avoid accidents and injuries.
Choosing the right materials and design affects safety. The gate must be strong enough to hold pets. It should have no sharp edges or small parts. These precautions make the gate secure and pet-friendly.
Ensuring Pet Safety
Check the gate for gaps where pets can get stuck. Use smooth wood or plastic to avoid scratches. Make sure the gate is tall enough to stop pets from jumping over. Secure the gate firmly to the wall or doorframe. Test the gate’s strength before daily use. Watch your pet’s behavior around the gate for signs of stress or escape attempts.
Childproofing The Gate
Pets and small children often share spaces. The gate should protect both safely. Use locks that are easy for adults but hard for kids. Avoid parts that children can pull off or swallow. Keep the gate stable so it doesn’t tip over. Check regularly for wear and tear to keep it safe.
Frequently Asked Questions
What Materials Are Needed For A Low-cost Pet Gate?
You need wood or PVC pipes, screws, hinges, a latch, sandpaper, and non-toxic paint. These are affordable and easy to find.
How Do I Measure For A Pet Gate?
Measure the width and height of your doorway or area. Add a few inches for clearance and fit.
Can I Build A Pet Gate Without Power Tools?
Yes, you can use hand saws, screwdrivers, and manual drills. It may take longer but is doable.
How Do I Ensure My Pet Gate Is Safe?
Smooth all edges, use pet-safe paint, and securely fasten parts. Check for gaps where pets could get stuck.
Conclusion
Building a low-cost pet gate is simple and practical. You need only a few basic materials. Follow the steps carefully to ensure safety for your pet. This project saves money and custom fits your space. Enjoy peace of mind knowing your pet stays secure.
Try this easy DIY idea for your home today. It’s a smart way to protect your furry friend.