Are you tired of constantly opening doors for your furry friend? Installing a pet patio panel sliding door can make life so much easier for you and your pet.
Imagine giving your pet the freedom to come and go without any hassle, while keeping your home secure and energy-efficient. In this guide, you’ll discover simple steps to install your own pet patio sliding door quickly and correctly. Ready to transform your space and make your pet happier?
Keep reading, and you’ll have it done in no time!
Tools And Materials Needed
Installing a pet patio panel sliding door needs the right tools and materials. Prepare these first to make the process smooth and fast. Having everything ready helps avoid stops and errors during installation.
This list covers essential hand tools, hardware, and safety gear. Each item plays a key role in fitting the door securely and correctly. Using proper tools also protects your home and your pet.
Hand Tools
A tape measure is needed to check door frame size. A screwdriver or drill helps tighten screws and fasten parts. A level ensures the door slides straight without sticking. A hammer may be useful for light taps or adjustments. A utility knife helps open packaging and trim materials if needed.
Hardware And Door Kit
Buy a complete pet patio panel sliding door kit. It includes the door panel, frame, rollers, and tracks. Make sure the kit matches your door opening size. Extra screws and brackets come with the kit to fix the door firmly.
Safety Equipment
Wear safety glasses to protect your eyes from dust and debris. Gloves protect your hands while handling metal or glass parts. Dust masks help avoid inhaling particles during cutting or drilling. Keep a first aid kit nearby for small cuts or scrapes.

Credit: www.youtube.com
Preparing The Door Frame
Preparing the door frame is a crucial step before installing a pet patio panel sliding door. It ensures the door fits well and works smoothly. Taking time to prepare the frame helps avoid problems later.
Measuring The Opening
Start by measuring the height and width of the door opening. Use a tape measure for accuracy. Measure at three points: top, middle, and bottom for width. For height, measure both sides and the center. Write down the smallest measurement. This prevents issues with a door that is too big.
Cleaning And Clearing Space
Remove any dirt, dust, or old paint from the door frame. A clean frame helps the door slide easily. Clear the area around the door to give yourself room to work. Move furniture or objects that might block access. Check for nails or screws sticking out and remove them. This makes the installation safer and smoother.
Assembling The Sliding Door
Assembling the sliding door is the key step in installing your pet patio panel. This process connects all parts to create a smooth and functional door. Careful assembly ensures durability and easy movement for your pet.
Follow each step closely. Take your time to avoid mistakes. A well-assembled door keeps your pet safe and comfortable.
Attaching The Panels
Start by aligning the door panels on a flat surface. Check that the edges match perfectly. Use the screws provided to join the panels firmly. Tighten the screws but avoid overdoing it to prevent damage. Make sure the panels form a straight and sturdy frame.
Double-check the connection points. The panels should feel solid without any gaps. This step creates the foundation for the sliding door’s smooth operation.
Installing The Rollers
Next, attach the rollers to the bottom of the door frame. These rollers allow the door to slide easily along the track. Use the screws to fix the rollers securely in place. Test the movement by sliding the door back and forth.
Adjust the rollers if the door sticks or wobbles. Proper roller installation ensures quiet and smooth sliding. This step helps your pet open and close the door with ease.

Credit: lemanemploi.ch
Installing The Door On The Frame
Installing the pet patio panel sliding door on the frame is a key step. It ensures the door works smoothly and fits well. Proper installation helps keep your pet safe and comfortable. Follow the steps carefully for the best results.
Positioning The Door
Start by lifting the sliding door onto the frame. Hold it steady and check its alignment. The door must sit evenly within the frame edges. Make sure it slides smoothly from side to side. Adjust the door height if it scrapes or sticks. Use a level tool to confirm it is straight. Correct positioning prevents damage and keeps the door working well.
Securing The Tracks
Next, fix the tracks to the frame firmly. Use screws that match the door kit instructions. Tighten them just enough to hold the tracks in place. Avoid over-tightening, which can bend or warp the frame. Ensure the tracks are clean and free of debris. This allows the door to glide easily. Check the door movement after securing the tracks. Make small adjustments for smooth sliding without gaps.
Adjusting And Testing
After installing your pet patio panel sliding door, adjusting and testing are key steps. These ensure the door fits well and works smoothly. Proper adjustment helps prevent damage and keeps your pet safe. Testing confirms the door moves easily without sticking or jamming. Follow these simple steps for best results.
Aligning The Door Panels
Start by checking the door panels’ alignment. Both panels should line up evenly with each other. Use a level tool to check the vertical and horizontal lines. Adjust the rollers or screws to move the panels up or down. Make sure the panels sit flush against the frame. Proper alignment stops gaps where bugs or air can enter. It also helps the door slide properly without resistance.
Checking Smooth Operation
Slide the door panels back and forth several times. The movement should feel smooth and quiet. Listen for any grinding or rubbing sounds. Tighten or loosen the adjustment screws if needed. Check the door tracks for dirt or debris and clean them. Make sure the locking mechanism works without force. Smooth operation means your pet can use the door safely and you avoid repairs later.
Sealing And Finishing Touches
Sealing and finishing touches are key steps after installing your pet patio panel sliding door. They protect your home from drafts, dust, and moisture. These steps also help your door work smoothly and last longer. Plus, they make your pet’s experience safer and more comfortable.
Applying Weather Stripping
Weather stripping stops air leaks around the door edges. It keeps your house warm in winter and cool in summer. Choose a weather stripping type that fits your door frame. Clean the edges before applying the strips. Press the strips firmly for a tight seal. Check for gaps after installation and add more if needed.
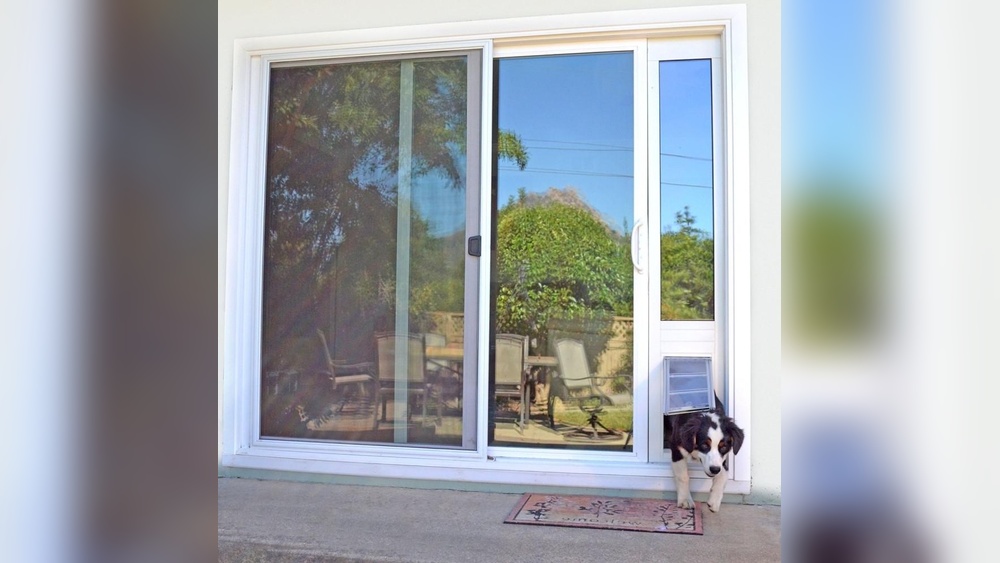
Adding Pet-friendly Features
Pet-friendly features make your door easy and safe for pets. Install a small pet door panel if your pet is small. Use soft, durable materials around the pet door to prevent injuries. Add a secure lock that your pet cannot open. Place a mat inside to catch dirt and protect floors. These features help your pet enjoy the new door comfortably.
Maintenance Tips
Keeping your pet patio panel sliding door in good shape extends its life. Regular care helps the door slide smoothly. It also keeps your pet safe. Simple maintenance tasks prevent costly repairs later.
Cleaning The Tracks
Dirty tracks can block the door from sliding. Remove dust, hair, and debris often. Use a vacuum or a soft brush to clean the tracks. Wipe them with a damp cloth to remove grime. Dry the tracks well to stop rust and mold.
Lubricating Moving Parts
Lubricate the rollers and hinges to keep them moving easily. Use a silicone-based lubricant for smooth operation. Avoid oil-based products that attract dirt. Apply a small amount and wipe off extra. Regular lubrication reduces noise and prevents wear.

Credit: www.youtube.com
Frequently Asked Questions
How Do I Measure For A Pet Patio Panel Sliding Door?
Measure the width and height of your existing patio door frame. Ensure the pet door fits your pet’s size. Accurate measurements prevent installation issues and provide a snug fit for your pet’s safety.
What Tools Are Needed To Install The Pet Patio Door?
You’ll need a drill, screwdriver, measuring tape, level, and utility knife. These tools help you secure the door panels and make precise adjustments for a perfect fit.
Can I Install A Pet Patio Door Myself?
Yes, most pet patio doors are designed for DIY installation. Follow the manufacturer’s instructions carefully. Basic tools and some handyman skills are usually sufficient.
How Do I Maintain My Pet Patio Panel Sliding Door?
Clean the glass regularly and lubricate the sliding tracks monthly. Check seals and locks for wear to ensure smooth operation and energy efficiency.
Conclusion
Installing a pet patio panel sliding door improves your home’s comfort and convenience. It lets pets go outside safely and easily. Follow the steps carefully for a smooth setup. Take your time and check each part as you go. Soon, your pet will enjoy new freedom and fresh air.
Simple tools and clear instructions make the job easier. Enjoy the added space and peace of mind this door brings.