Are you ready to boost your home security with a Ring Video Doorbell but worried about mounting it on your brick wall? Installing your doorbell on brick might seem tricky, but with the right steps, you can do it yourself—quickly and securely.
Imagine never missing a visitor or package again, all while keeping your home safe. Keep reading, and you’ll discover simple, clear instructions that make the whole process easy, even if you’re not a DIY expert. Let’s get your Ring Video Doorbell up and running on your brick wall today!
Tools And Materials Needed
Installing a Ring Video Doorbell on a brick wall needs the right tools and materials. Using the proper items makes the job easier and safer. It helps secure the doorbell firmly on the brick surface. Preparing everything before starting saves time and avoids frustration.
This list covers all essentials for a smooth installation. Each tool and material has a specific role. Knowing what you need helps you plan better. It also ensures the doorbell works well after mounting.
Drill With Masonry Bit
A drill with a masonry bit is crucial. The brick is hard, and a regular bit won’t work. The masonry bit can bore clean holes into brick or mortar. Choose a bit size that matches the wall anchors.
Wall Anchors And Screws
Wall anchors hold the screws tightly in the brick. They prevent the doorbell from loosening over time. Use anchors made for masonry walls. Screws must fit the anchors and the Ring Doorbell bracket.
Screwdriver Or Power Driver
A screwdriver or power driver helps tighten screws easily. It speeds up the installation compared to manual screwing. Pick a driver with the right bit size for your screws.
Level Tool
Use a level tool to keep the doorbell straight. A crooked doorbell looks bad and might affect its sensor. Place the level on the mounting bracket before drilling holes.
Measuring Tape
Measuring tape ensures correct placement of the doorbell. Measure the height and distance from the door frame. Accurate measuring avoids mistakes and repositioning later.
Pencil Or Marker
Mark drill holes with a pencil or marker. Clear marks guide where to drill on the brick. Use a color that shows well on the brick surface.
Safety Gear
Wear safety glasses and gloves during drilling. Brick dust and debris can harm your eyes and hands. Safety gear protects you throughout the installation.
Choose The Best Location
Choosing the best location for your Ring Video Doorbell is important. The right spot improves video quality and motion detection. It also helps you see visitors clearly and keeps your home safe.
Careful placement makes installation easier. It also helps the device work well without frequent adjustments.
Height And Angle Matter
Place the doorbell about 48 inches from the ground. This height captures faces clearly. Tilt the device slightly down to cover the doorstep and walkway.
Avoid Direct Sunlight And Glare
Direct sunlight can cause glare on the camera lens. This reduces video quality. Choose a spot with some shade or indirect light.
Check Wi-fi Signal Strength
The doorbell needs a strong Wi-Fi connection. Test signal strength near your chosen spot. Move the router or doorbell slightly for better connection.
Cover Main Entry Points
Install the doorbell where visitors usually come. This covers your front door or main gate. It helps catch all visitors and deliveries.
Consider Weather Exposure
Brick walls can get cold and wet. Choose a location that shields the doorbell from heavy rain or snow. This helps the device last longer.
Mark Mounting Points
Marking the mounting points is a key step in installing your Ring Video Doorbell on brick. This step ensures the device fits perfectly and stays secure. Take your time to mark the spots clearly before drilling.
Accurate marking helps avoid mistakes and unnecessary holes in the brick. Use the mounting bracket as a guide. Hold it firmly against the brick wall at your chosen height and position.
Use The Mounting Bracket As A Template
Place the bracket flat against the brick surface. Make sure it is straight and level. Check the angle and height before marking. Hold it steady to prevent shifting.
Mark The Screw Holes Clearly
With a pencil or marker, mark the holes through the bracket. Mark each hole center precisely. These marks show where to drill later. Double-check the marks before moving on.
Check Alignment And Spacing
Ensure the marks align with the doorbell’s mounting holes. Confirm the spacing matches the bracket’s screw pattern. This check avoids drilling in the wrong spots.
Use A Level For Precision
Place a level on the bracket to keep it straight. Adjust the bracket until perfectly horizontal. Mark the points again if needed for accuracy.
Drill Into Brick Safely
Drilling into brick requires care and the right tools. Brick is hard and can crack easily. Follow steps to drill safely and avoid damage. Proper drilling keeps your Ring Video Doorbell secure and stable.
Use tools made for brick. Protect yourself during the process. Small mistakes can cause big problems.
Select The Right Drill Bit
Choose a masonry drill bit for brick. These bits have a special tip to cut through stone. Using a regular bit can break or dull quickly. Match the bit size to your mounting screws.
Use A Hammer Drill
A hammer drill combines rotation and pounding. This helps the bit break through brick easily. Normal drills may overheat or stall. Set the drill to hammer mode for best results.
Wear Safety Gear
Wear safety glasses to protect your eyes from dust and chips. Use gloves to avoid hand injuries. Hearing protection is good if drilling takes long. Keep your work area clean and clear.
Insert Wall Anchors
Inserting wall anchors is a key step to secure the Ring Video Doorbell on brick. These anchors provide strong support for screws in hard surfaces like brick. They prevent the screws from loosening or pulling out.
Using the right anchors keeps your doorbell steady and safe. It also helps avoid damage to your brick wall. Follow these simple steps to insert wall anchors correctly.
Choose The Right Wall Anchors
Select anchors made for brick or masonry. Plastic or metal anchors work well. Check the size matches the screws in your Ring doorbell kit. Proper anchors hold tight and last longer.
Drill Pilot Holes In The Brick
Use a drill with a masonry bit. Drill holes where you want to mount the doorbell. The hole size should fit the anchor snugly. Clean out any dust from the holes before inserting anchors.
Insert The Wall Anchors
Push the anchors gently into the holes. Tap lightly with a hammer if needed. Make sure the anchors are flush with the brick surface. Avoid forcing them in to prevent cracking.
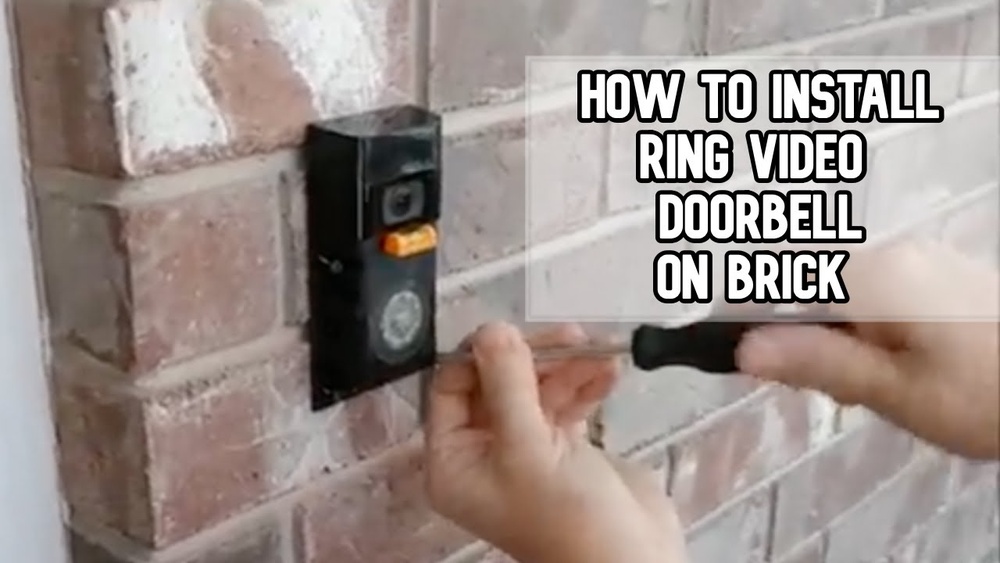
Secure The Doorbell With Screws
Align the doorbell mounting bracket with the anchors. Insert screws through the bracket into the anchors. Tighten screws firmly but do not over-tighten. Your doorbell will now stay fixed securely on the brick.
Attach The Mounting Bracket
Attaching the mounting bracket is a key step in installing your Ring Video Doorbell on brick. This bracket holds the device securely in place. The process requires careful drilling and the right tools to ensure a strong fit. Follow these simple steps to attach the bracket firmly and prepare for the next phase of installation.
Gather The Necessary Tools And Materials
Start by collecting all tools needed for the job. You will need a drill with a masonry bit, anchors, screws, a screwdriver, and a pencil. Having everything ready makes the process faster and smoother.
Mark The Drill Points On The Brick
Hold the mounting bracket against the brick where you want the doorbell. Use a pencil to mark the screw holes on the brick. Double-check the marks to ensure the bracket will be level.
Drill Holes Into The Brick
Use a drill with a masonry bit to make holes where you marked. Drill deep enough for the anchors to fit tightly. Take your time to avoid cracking the brick.
Insert Anchors Into The Holes
Push the plastic anchors into the drilled holes. They help hold the screws firmly in the brick. Tap them gently with a hammer if needed to fit them flush with the surface.
Secure The Mounting Bracket With Screws
Place the bracket over the holes and align it with the anchors. Use screws to fasten the bracket tightly to the brick. Make sure it does not move or wiggle.
Connect The Doorbell Wiring
Connecting the doorbell wiring is a key step when installing the Ring Video Doorbell on brick. Proper wiring ensures your doorbell works correctly and safely. This part requires care and attention to avoid any electrical issues.
Turn Off Power
Always start by turning off the power at your home’s circuit breaker. This stops electricity from flowing to the doorbell wires. Safety is important to prevent shocks or damage. Use a voltage tester to confirm the power is off before touching any wires.
Wire The Doorbell
Locate the existing doorbell wires on your brick wall. Strip about half an inch of insulation from each wire end. Attach the wires to the Ring Video Doorbell’s terminals. Usually, it does not matter which wire goes to which terminal. Tighten the screws to hold the wires firmly in place. Double-check that no bare wire is exposed outside the terminal. This helps avoid short circuits or damage to the device.

Credit: www.youtube.com
Secure The Doorbell
Securing your Ring Video Doorbell on a brick wall is a vital step. It ensures your device stays in place and works properly. A well-secured doorbell resists weather and theft. Follow these steps to keep it safe and steady.
Use The Right Mounting Bracket
Choose the mounting bracket that fits your Ring model. It should match the size and shape of the doorbell. Attach the bracket firmly to the brick with anchors and screws. This gives a strong base to hold the doorbell securely.
Drill Carefully Into The Brick
Mark the spots for screws on the brick. Use a masonry drill bit for the holes. Drill slowly and steadily to avoid cracking the brick. Clean the dust from the holes before inserting anchors. This helps screws fit tightly and hold well.
Install Security Screws
Use security screws to lock the doorbell to the bracket. These screws need a special tool to remove. They stop thieves from easily taking your doorbell. Tighten the screws firmly but do not over-tighten. Proper tightening keeps the doorbell stable.
Check For Stability
After installation, gently shake the doorbell. It should not move or wiggle. If it does, tighten the screws more. A stable doorbell captures clear video and lasts longer. Stability also prevents damage from wind or rain.
Set Up In The Ring App
Setting up the Ring Video Doorbell in the Ring app is the next important step after mounting it on your brick wall. The app connects your doorbell to your phone. This allows you to receive alerts and see visitors from anywhere.
The setup process is simple and fast. The app guides you through each step clearly. You will learn how to connect the doorbell to Wi-Fi and customize settings.
Download And Open The Ring App
Start by downloading the Ring app from the App Store or Google Play. Open the app and create a new account or log in if you already have one. The app’s home screen will guide you to add a new device.
Add Your Ring Video Doorbell
Tap “Set Up a Device” and choose “Doorbells” from the list. The app will ask you to scan the QR code on your Ring doorbell or enter the setup code manually. This links the doorbell to your app.
Connect To Wi-fi
Select your home Wi-Fi network and enter the password. The app will connect your Ring doorbell to the internet. A strong Wi-Fi signal ensures clear video and fast alerts.
Test The Doorbell And Customize Settings
The app lets you test the doorbell’s sound and video. Adjust motion detection zones and notification preferences. Customize alerts so you only get the notifications you want.
Test The Doorbell
Testing your Ring Video Doorbell after installation is important. It ensures the device works correctly and keeps your home safe. This step helps catch any issues early. You can fix problems before relying on the doorbell for security.
Check The Power Supply
Start by pressing the doorbell button. Listen for the chime inside your home. If you do not hear it, the device may not have power. Ensure the battery is charged or the wired connection is secure. A steady power source is key for smooth operation.
Test The Video And Audio
Open the Ring app on your phone. View the live video feed from the doorbell. The image should be clear and sharp. Speak into the app to test the microphone. The person at the door should hear you clearly. Also, listen for their response through the app speaker.
Check Motion Detection
Walk in front of the doorbell. The device should send an alert to your phone. Check if the motion detection area covers the right spots. Adjust the sensitivity settings in the app if needed. Proper motion detection helps catch visitors or deliveries.
Troubleshooting Tips
Installing a Ring Video Doorbell on brick can sometimes come with challenges. Troubleshooting helps solve common problems quickly. This section guides you through easy fixes. You can enjoy your doorbell without delays.
Common Installation Issues
Drilling into brick may cause cracks or dust. Use a masonry drill bit for clean holes. Avoid too much pressure to prevent damage. Check the screws fit tightly for a secure mount. Loose screws can make the doorbell fall. If your doorbell does not turn on, check the battery or wiring. Some bricks have uneven surfaces. Use a mounting plate to level your doorbell. This keeps the camera angle correct and steady.
Wi-fi Connectivity Problems
Ring doorbells need strong Wi-Fi signals to work well. Weak signals cause delayed alerts or no live view. Move your router closer to the doorbell if possible. Avoid walls or metal objects between the router and doorbell. Restart your router and doorbell to reset connections. Check your Wi-Fi password is entered correctly. Use the Ring app to test signal strength. Consider a Wi-Fi extender for better coverage on brick walls.

Credit: www.doorbellmount.com

Credit: www.doorbellmount.com
Frequently Asked Questions
How Do I Mount A Ring Doorbell On Brick?
Use a masonry drill bit to create holes in the brick. Insert anchors and secure the mounting bracket with screws. Attach the Ring Doorbell to the bracket firmly.
What Tools Are Needed For Brick Installation?
You need a drill with a masonry bit, anchors, screws, a screwdriver, a level, and a pencil for marking.
Can I Install Ring Doorbell Without Damaging Brick?
Yes, by drilling small, precise holes and using anchors, you minimize damage. Avoid hammering directly on brick surfaces.
How Do I Ensure My Ring Doorbell Is Level?
Use a small level on the mounting bracket before securing screws. Adjust the bracket until perfectly horizontal for best performance.
Conclusion
Installing a Ring Video Doorbell on brick is simple with the right steps. Use the proper tools and anchors to secure the device firmly. Take your time drilling and attaching to avoid damage. Test the doorbell to ensure it works well after installation.
Enjoy better home security and stay connected with visitors easily. Follow these tips, and your setup will be smooth and safe. Now, your brick wall is ready for smart home technology.