Want to add a new towel rack but worried about it falling off the wall? Installing a towel rack with drill anchors is the best way to make sure it stays secure and holds up over time.
In this guide, you’ll learn simple, step-by-step instructions that anyone can follow—even if you’ve never used a drill before. By the end, you’ll have a sturdy, stylish towel rack ready to use. Keep reading to discover how easy it is to upgrade your bathroom with the right tools and a little know-how.
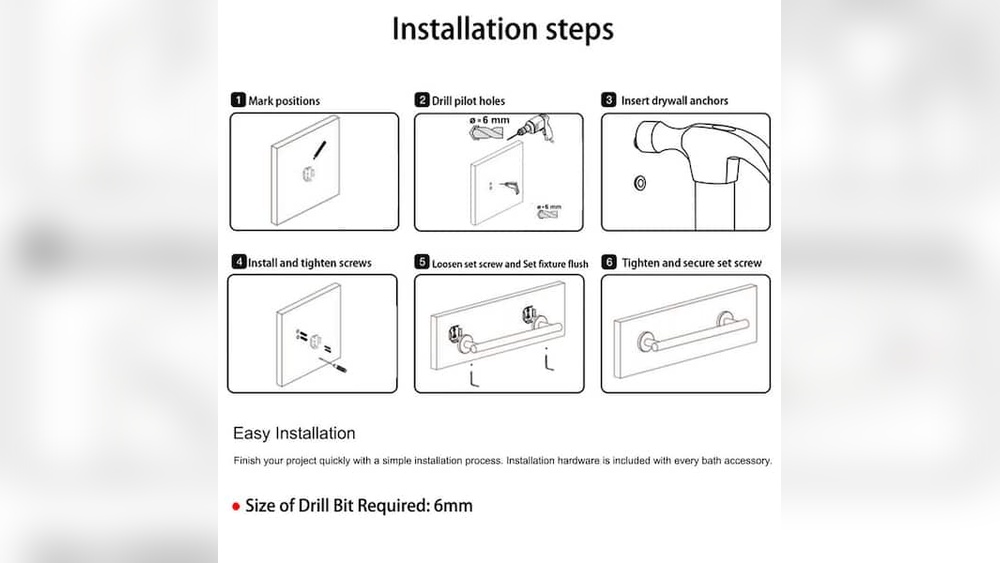
Credit: prettyhandygirl.com
Tools And Materials Needed
Installing a towel rack with drill anchors requires certain tools and materials. Having the right items makes the job easier and safer. It ensures the towel rack stays secure on the wall.
This section breaks down what you need. From choosing the towel rack to picking the right drill anchors and gathering essential tools. Prepare well to get a smooth installation.
Choosing The Right Towel Rack
Select a towel rack that fits your bathroom style and size. Consider the material—metal racks are sturdy, plastic ones are lightweight. Pick a design that matches your decor and meets your towel-hanging needs.
Check the rack’s weight capacity. Heavier racks need stronger anchors. Make sure the size fits the wall space available.
Selecting Drill Anchors
Drill anchors hold the rack firmly in the wall. Choose anchors based on your wall type—drywall, plaster, or tile. Plastic anchors suit light loads, metal or toggle anchors hold heavier racks.
Match anchor size with the screws that come with your towel rack. Proper anchors prevent the rack from falling or loosening over time.
Essential Tools Checklist
Gather these tools before starting:
- Power drill with drill bits
- Measuring tape
- Level to ensure straight installation
- Screwdriver matching the screws
- Pencil for marking drill spots
- Wall anchors and screws (usually included with rack)
- Stud finder (optional but helpful)
Having these tools ready saves time and helps avoid mistakes. It makes the installation process smooth and efficient.
Credit: www.vevor.com
Preparing The Installation Area
Preparing the installation area is the first step to a successful towel rack setup. It ensures the rack will be secure and look good. Taking time to prepare saves effort and prevents damage to your wall.
Finding The Ideal Spot
Choose a spot near the sink or shower for easy access. Avoid places where the rack may get in the way. Check for enough space to hang towels without crowding.
Measuring And Marking
Use a tape measure to find the right height for your towel rack. Mark the spots where you will drill holes. Use a pencil for light, easy-to-remove marks.
Checking Wall Material
Identify the type of wall you have—drywall, tile, or plaster. This helps pick the right drill anchors. Stronger anchors hold better on drywall or plaster walls.
Drilling Holes For Anchors
Drilling holes for anchors is a key step in installing a towel rack. The holes must be the right size and depth. This ensures the anchors fit tightly and hold the rack securely. Careful drilling also protects your wall from damage. Following the correct steps makes the process smooth and safe.
Choosing Drill Bit Size
Select a drill bit that matches the anchor size. The bit should be the same diameter as the anchor’s body. A bit too large makes the hole loose. Too small, and the anchor won’t fit. Check the anchor packaging for the recommended bit size. This step helps the rack stay firmly in place.
Drilling Safely And Accurately
Mark the spot for each hole clearly on the wall. Use a level to keep marks even. Hold the drill straight and steady. Start drilling slowly to avoid slipping. Drill to the depth needed for the anchor. Avoid pressing too hard on the drill. This prevents wall damage and keeps holes clean.
Cleaning Drill Dust
Remove dust from the holes before inserting anchors. Use a small brush or a vacuum to clear debris. Dust can stop anchors from gripping well. Clean holes help anchors fit snugly. This step improves the towel rack’s strength and stability.
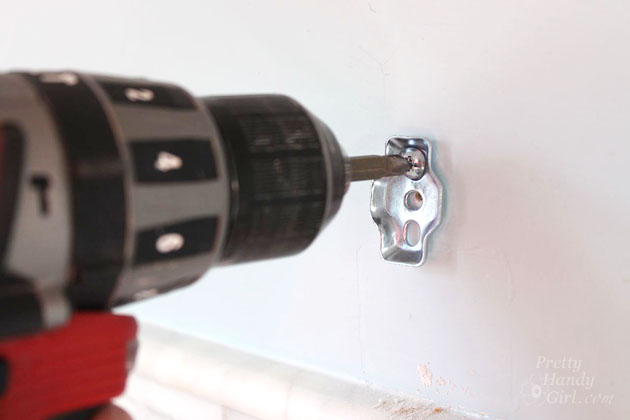
Installing Drill Anchors
Installing drill anchors is a key step to secure your towel rack firmly on the wall. These anchors hold screws tightly in drywall or other hollow surfaces. Proper installation prevents the rack from falling or loosening over time.
Follow simple steps to insert anchors correctly and ensure a strong fit. Avoid common mistakes that can weaken the hold and cause damage.
Inserting Anchors Correctly
First, mark the spot where the towel rack will go. Use a drill bit that matches the anchor size. Drill a hole straight into the wall. Clean out any dust inside the hole.
Push the anchor gently into the hole until it is flush with the wall surface. Do not force it too hard. It should fit snugly but not damage the wall.
Ensuring Secure Fit
Check that the anchor does not move in the hole. Wiggle it slightly to test the grip. If it moves, the hole might be too big or the anchor may be loose.
Insert the screw slowly into the anchor. Tighten until secure but avoid over-tightening. Over-tightening can strip the anchor or damage the wall.
Common Mistakes To Avoid
Do not use an anchor that is too small or too large for the hole. This weakens the hold. Avoid drilling holes too deep or at an angle.
Do not skip cleaning the hole. Dust reduces anchor grip. Avoid pushing the anchor too forcefully; it can break or deform.
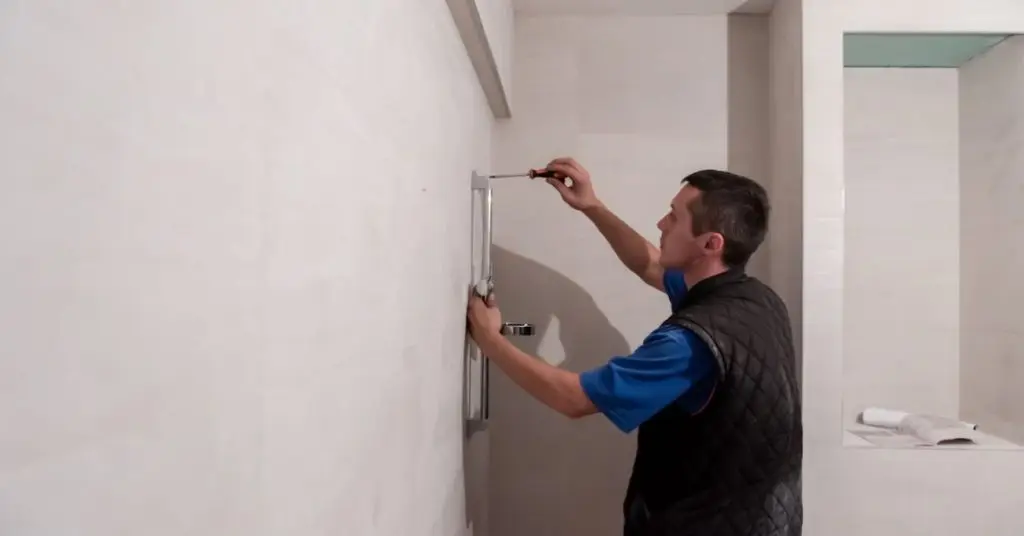
Mounting The Towel Rack
Mounting the towel rack is the key step to finish your project. It ensures your rack stays firm and holds towels safely. Follow each step carefully for the best results.
Aligning With Anchors
Start by matching the towel rack holes with the drill anchors on the wall. Take your time to check the fit. The holes should line up perfectly with the anchors. This helps the rack sit flush against the wall. Misalignment can cause the rack to wobble or fall.
Securing Screws
Next, insert screws through the towel rack holes into the anchors. Use a screwdriver or drill with a suitable bit. Turn the screws slowly and evenly. Tighten them until the rack feels steady. Avoid over-tightening, as it may damage the wall or the rack.
Final Adjustments
Check the towel rack for balance and stability. Adjust screws slightly if needed to level the rack. Make sure it does not move or tilt. A well-mounted towel rack looks neat and lasts longer. Your installation is now ready for use.

Credit: www.youtube.com
Testing Stability And Safety
Testing the stability and safety of your towel rack is essential after installation. It ensures the rack holds towels without falling or loosening. Proper testing prevents damage to walls and avoids accidents. Follow simple steps to check the rack’s strength and fix any issues.
Checking Weight Support
Start by gently pulling the towel rack outward. Apply a small amount of force to see if it stays firm. Hang a few towels and observe if the rack holds their weight. If it moves or feels weak, the anchors may not be secure enough. Test multiple spots along the rack to ensure even support.
Addressing Loose Fixtures
If the rack wiggles or shifts, tighten the screws carefully. Use a screwdriver to secure each screw without over-tightening. Over-tightening can damage the wall or anchors. For persistent looseness, remove the rack and check the drill anchors. Replace any damaged anchors with stronger ones. Reinstall and test again to confirm stability.
Maintenance Tips
Maintaining your towel rack keeps it strong and looking good. Small care steps help it last longer. Follow simple tips to avoid damage and wear.
Cleaning The Rack
Use a soft cloth and mild soap to clean the rack. Avoid harsh chemicals that can damage the finish. Wipe the rack regularly to stop dust and grime build-up. Dry it with a clean towel to prevent water spots.
Inspecting Anchors Periodically
Check the drill anchors every few months. Make sure they are tight and not loose. Loose anchors can cause the rack to fall. Tighten screws gently if needed. Replace damaged anchors to keep the rack stable and safe.
Frequently Asked Questions
What Tools Are Needed To Install A Towel Rack With Drill Anchors?
You need a drill, drill anchors, screws, a screwdriver, a level, and a measuring tape. These tools ensure secure and accurate installation.
How Do Drill Anchors Improve Towel Rack Stability?
Drill anchors provide a strong grip in drywall or plaster. They prevent the towel rack from loosening or falling off over time.
Can I Install A Towel Rack Without Wall Studs?
Yes, drill anchors allow installation without studs. They distribute the towel rack’s weight evenly for a secure hold.
What Size Drill Bit Should I Use For Anchors?
Use a drill bit matching the anchor’s diameter. This ensures a tight fit and proper anchor expansion in the wall.
Conclusion
Installing a towel rack with drill anchors is simple and effective. It keeps towels secure and walls undamaged. Just follow the steps carefully for a strong hold. Use the right tools and anchors for your wall type. Take your time to measure and mark spots clearly.
This project adds convenience and tidiness to your bathroom. Now, enjoy a neat space with your new towel rack.