Are you looking to boost your home’s security with a video doorbell but don’t know where to start? Setting up your video doorbell might seem tricky, but with the right steps, you can do it quickly and easily.
Imagine knowing exactly who’s at your door, even when you’re not home. In this guide, you’ll discover simple instructions that make hooking up your video doorbell a breeze. Stick with me, and soon you’ll enjoy peace of mind and control right from your phone.
Let’s get started!
Credit: ring.com
Choosing The Right Video Doorbell
Choosing the right video doorbell is important for home security. It protects your home and helps you see visitors. Picking the best one means thinking about your needs and home setup. This guide covers the key points to help you decide.
Features To Consider
Look for clear video quality. Night vision helps see visitors in the dark. Two-way audio lets you talk through the doorbell. Motion detection alerts you to movement. Some models offer cloud storage for video clips. Choose features that match your safety needs.
Compatibility With Your Home
Check if the doorbell fits your existing door frame. Some need wiring, others work on batteries. Make sure your Wi-Fi signal reaches the doorbell location. Consider your home’s electrical setup to avoid extra work. Choose a doorbell that matches your home’s tech.
Budget Options
Video doorbells come in many price ranges. Basic models cover the main features well. Mid-range options add better video and extra functions. Premium ones offer advanced tech and cloud storage. Pick one that fits your budget and needs.
Gathering Necessary Tools
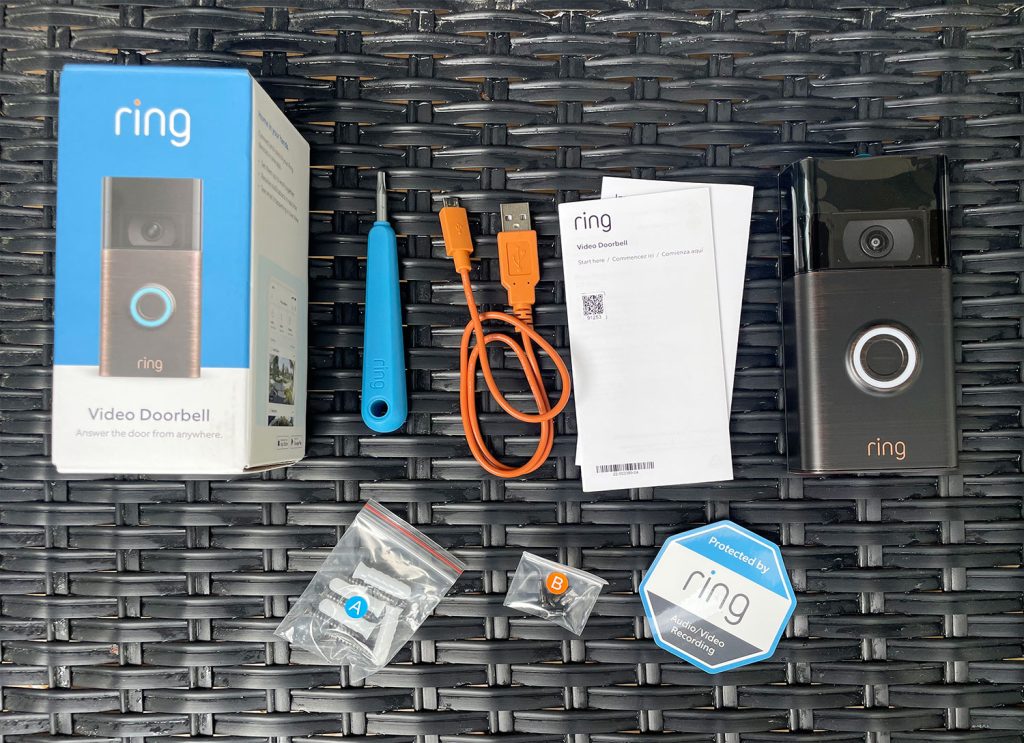
Before installing your video doorbell, prepare all the necessary tools. Gathering tools first saves time and avoids interruptions during installation. It also helps the process go smoothly and safely. Knowing what you need ensures no last-minute trips to the store.
Tools Checklist
Have a drill ready for making holes in walls. Use a screwdriver to secure screws firmly. A level tool helps keep the doorbell straight. Wire strippers are important if you connect to existing wiring. Keep a tape measure handy to position the doorbell correctly. Also, have the video doorbell kit and instructions nearby.
Safety Precautions
Turn off power at the circuit breaker before working with wires. Use insulated tools to avoid electric shocks. Wear safety glasses to protect your eyes from dust and debris. Work in daylight or have good lighting to see clearly. Check your ladder is stable if you need to reach high spots. Take your time to avoid mistakes and accidents.
Preparing The Installation Site
Preparing the installation site is an important step to hook up a video doorbell. Proper preparation ensures the device works well and stays secure. It also helps you get the best view for your doorbell camera.
First, decide where to place the doorbell. Then, mark the spots for drilling. Careful preparation will make the installation easier and faster.
Selecting The Best Location
Choose a spot near your front door, about 4 feet off the ground. This height captures clear video of visitors. Avoid areas with direct sunlight or strong shadows. These can affect video quality.
Check for a power source nearby if your doorbell needs wiring. The location should cover your main entrance and part of the porch. Make sure the Wi-Fi signal is strong at this spot.
Marking And Drilling
Hold the mounting bracket against the wall. Use a pencil to mark the drill holes through the bracket. Double-check the marks to keep the bracket level.
Choose the right drill bit size for the screws and wall type. Drill carefully on the marked points. Insert wall anchors if needed for a secure hold. Avoid drilling into wires or pipes behind the wall.
Wiring And Power Setup
Setting up the wiring and power for your video doorbell is an important step. It ensures the doorbell works smoothly and stays powered all the time. Some video doorbells use wires while others rely on batteries. Each option has its own way of setup and power source. Understanding these options helps you pick the best one for your home.
Wired Vs. Wireless Options
Wired video doorbells connect to your home’s electrical system. They usually need a transformer for power. Wired models offer constant power and do not require charging. Wireless doorbells run on batteries. They are easy to install and can be placed anywhere. Battery life varies but many last months before recharge. Choose wired for steady power and wireless for easy setup.
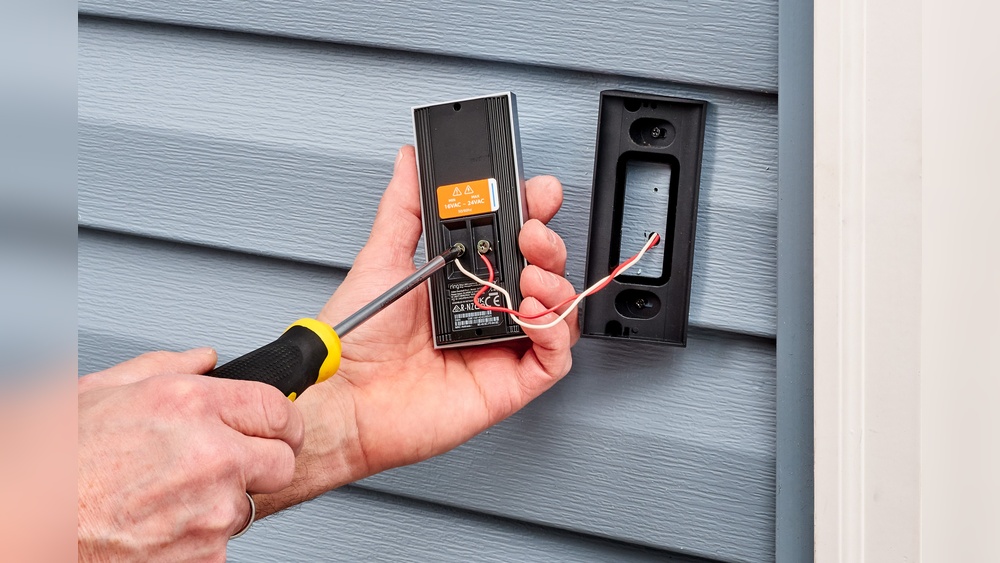
Connecting To Existing Doorbell Wiring
Many wired video doorbells use your old doorbell wiring. First, turn off power at the breaker to stay safe. Remove your old doorbell and find the two wires. Connect the wires to the new doorbell’s terminals. Secure the doorbell on the wall or door frame. Turn power back on and test the doorbell. This method saves you from running new wires.
Battery Installation
Some video doorbells run only on batteries. Open the battery compartment carefully. Insert the batteries following the positive and negative signs. Close the compartment tightly to protect from weather. Check your doorbell app to see battery status. Recharge or replace batteries when power runs low. Battery models are simple but need regular attention.
Mounting The Video Doorbell
Mounting the video doorbell correctly is key to its performance. A well-mounted device captures clear video and detects visitors effectively. The process involves attaching the bracket and securing the device. Both steps need care to ensure stability and proper function.
Attaching The Bracket
Start by choosing the right spot near your door. The bracket holds the doorbell firmly against the wall. Use a pencil to mark the screw holes on the wall. Drill holes where you marked. Insert wall anchors if needed for extra support. Screw the bracket into place using the screws provided. Check that the bracket is level and tight. A loose bracket can cause the doorbell to tilt or fall.
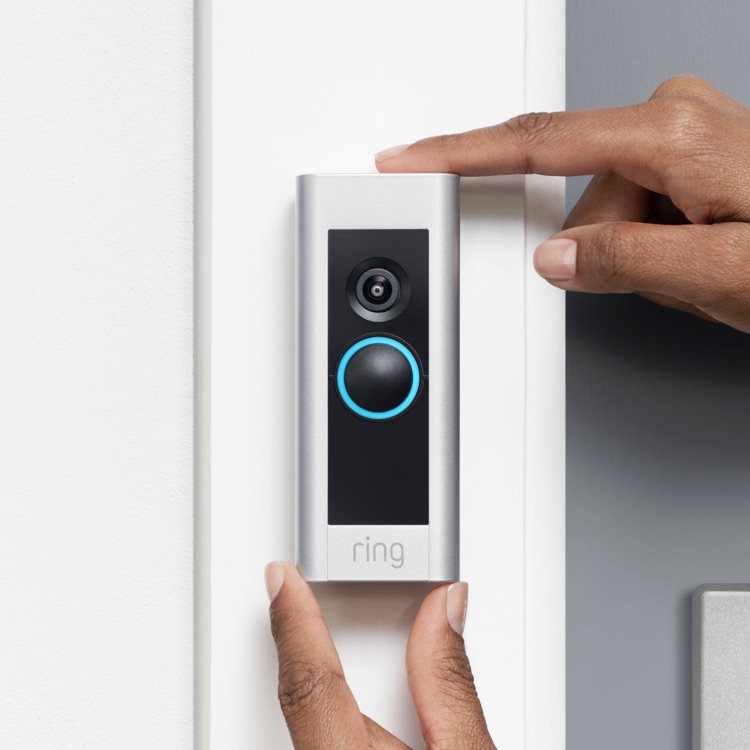
Securing The Device
Once the bracket is ready, attach the video doorbell to it. Align the doorbell with the bracket slots. Slide or snap the doorbell into place as per instructions. Some models require tightening small security screws. These screws prevent theft and keep the doorbell stable. Double-check that the device does not wobble. Proper securing ensures the doorbell works smoothly every time.
Configuring The Device
Configuring your video doorbell is the next step after installation. This process helps you control the device easily. It also ensures you get alerts on time. Setting up the device correctly improves your home security.
Downloading The App
Start by downloading the official app for your video doorbell. You can find it in the Apple App Store or Google Play Store. Search for the brand name of your device. Download and install the app on your smartphone or tablet. This app will allow you to manage settings and view live video.
Connecting To Wi-fi
Open the app and follow the instructions to connect your doorbell to Wi-Fi. Make sure your phone is near the doorbell during setup. Choose your home Wi-Fi network and enter the password carefully. A strong Wi-Fi signal helps your doorbell work smoothly. Wait until the app confirms the connection is successful.
Setting Notifications
Go to the app’s notification settings to customize alerts. Turn on notifications to get instant updates when someone rings the doorbell. You can also set alerts for motion detection. Adjust the sound and vibration settings to your preference. Proper notifications keep you informed without missing important events.
Testing And Troubleshooting
Testing and troubleshooting your video doorbell ensures it works properly. This step confirms clear video and audio. It helps find and fix problems early. A smooth setup means better security and ease of use.
Checking Video And Audio Quality
Start by watching the live video feed on your phone or device. The image should be clear and sharp. Check the lighting in different times of the day. Make sure the camera angle covers your door well.
Test the audio by speaking through the doorbell. Listen for clear sound without delay or noise. Adjust the volume settings if needed. A good microphone and speaker make communication easy.
Common Issues And Fixes
Video doorbells may face common issues like poor video quality or no sound. Check the Wi-Fi connection strength first. A weak signal causes lag or drops in video and audio.
Restart the doorbell and your router to refresh the connection. Clean the camera lens if the video looks blurry. Remove dirt and smudges gently with a soft cloth.
If the audio does not work, verify the microphone and speaker are not blocked. Update the doorbell’s firmware using the app. Firmware updates fix bugs and improve performance.
Reset the device to factory settings if problems persist. Reinstall it following the setup instructions carefully.
Credit: www.younghouselove.com
Maintaining Your Video Doorbell
Maintaining your video doorbell keeps it working well and extends its life. Regular care helps avoid problems and ensures clear video and sound. Simple steps can protect your device from weather and dirt. Follow these tips to keep your video doorbell in top shape.
Regular Cleaning
Clean your video doorbell every few weeks. Use a soft cloth to wipe the lens and body. Avoid harsh chemicals that may damage the surface. Dirt and dust can block the camera view or motion sensors. Keep the device dry and clear for the best performance.
Firmware Updates
Check for firmware updates often. Updates fix bugs and improve security. Use the app connected to your doorbell to find updates. Installing updates keeps your doorbell running smoothly. It also adds new features and protects against hackers.
Battery Replacement
Replace the battery when the doorbell shows low power. Some models have rechargeable batteries, others use replaceable ones. Follow the manual to safely remove and install batteries. A fresh battery ensures your doorbell works without interruptions. Check battery health regularly to avoid sudden power loss.
Credit: www.youtube.com
Frequently Asked Questions
How Do I Connect A Video Doorbell To Wi-fi?
To connect, power your video doorbell and access its app. Follow prompts to select your Wi-Fi network and enter the password. Ensure your Wi-Fi signal is strong near the doorbell for a stable connection.
Can I Install A Video Doorbell Without Professional Help?
Yes, many video doorbells come with DIY installation guides. Use a screwdriver, drill, and the provided mounting kit. Follow instructions carefully for wiring and mounting to ensure proper setup and functionality.
What Tools Are Needed To Hook Up A Video Doorbell?
Common tools include a drill, screwdriver, wire stripper, and voltage tester. Check the installation manual for specific requirements. Having these tools handy simplifies the installation process and ensures safety.
How Do I Power My Video Doorbell?
Video doorbells can be powered by existing doorbell wiring or batteries. Hardwired options offer continuous power, while battery-powered ones need periodic recharging. Choose based on your home’s wiring and convenience preferences.
Conclusion
Setting up a video doorbell is easier than you think. Follow the steps carefully for best results. Test the device to ensure it works properly. A working video doorbell adds safety to your home. Enjoy the convenience of seeing visitors anytime.
Keep your device updated for smooth performance. Simple tools and clear instructions make the job quick. Stay aware and protect your home with this smart device.