Are you ready to upgrade your home security with the Ring Video Doorbell Pro? Installing it with a power adapter might sound tricky, but it’s easier than you think.
In this guide, you’ll find simple, step-by-step instructions that anyone can follow. By the end, your doorbell will be set up, powered, and ready to keep you connected to every visitor. Keep reading, and you’ll discover how to do it quickly and safely—no technical skills needed!
Tools And Materials Needed
To install the Ring Video Doorbell Pro with a power adapter, gather all necessary tools and materials first. Having everything ready makes the installation smooth and quick.
This section lists the essential items needed for the setup. Each tool plays a key role in ensuring the doorbell works properly and stays secure.
Ring Video Doorbell Pro
This is the main device to install. Make sure it is the Pro model compatible with a power adapter.
Power Adapter
The power adapter supplies electricity to the doorbell. Use the one that comes with the device or a compatible model.
Screwdriver Set
A screwdriver is needed to attach the mounting bracket and secure the doorbell. A Phillips head screwdriver usually works best.
Drill And Drill Bits
Drilling holes into the wall or door frame helps mount the bracket firmly. Select drill bits that match the screws’ size.
Mounting Bracket And Screws
The bracket holds the doorbell in place. Use the screws provided with the Ring kit for a strong fit.
Level Tool
A level ensures the doorbell mounts straight. This helps the camera capture the best view.
Wire Stripper
Use a wire stripper to prepare the power wires if needed. This tool exposes the wire ends safely.
Voltage Tester
A voltage tester checks if the power wires are live. This step is important to avoid shocks during installation.
Prepare Your Doorbell Location
Preparing the right spot for your Ring Video Doorbell Pro is key to getting clear video and easy access. The location affects how well your doorbell works and how easy it is to install. Spend time to pick the best place before starting.
Check the wiring and height to make sure everything fits perfectly. This helps avoid problems during installation and keeps your doorbell powered all the time.
Check Existing Doorbell Wiring
Look at your current doorbell wires carefully. Make sure they are in good shape and ready to connect to the Ring Video Doorbell Pro. Old or damaged wires might cause problems. Use a voltage tester to check power. The Ring Doorbell Pro needs a low voltage power supply. Confirm your wires match the needed power. This step saves time and prevents damage later.
Choose Installation Height
Pick a spot about 48 inches from the ground. This height captures faces clearly and works well with motion detection. Avoid placing it too high or too low. The right height keeps your video clear and helps the doorbell detect visitors easily. Think about your front door and how people approach it. Find a place with a good view and easy wiring access.
Turn Off Power Safely
Turning off power safely is the first step before installing your Ring Video Doorbell Pro. It protects you from electric shock and prevents damage to your device. Always take this step seriously to ensure a smooth installation process.
Power must be completely off before handling any wiring. This step keeps you safe and helps avoid costly mistakes. Follow each step carefully for a safe setup.
Locate The Circuit Breaker
Find your home’s main electrical panel. This panel controls the power supply to different areas of your home. Look for the breaker labeled for your doorbell or front door area.
Switch Off The Correct Breaker
Flip the breaker switch to the off position. This stops the flow of electricity to your doorbell wiring. Confirm the power is off before proceeding.
Test The Power Is Off
Use a voltage tester or a non-contact voltage detector. Check the doorbell wires to ensure no electricity is running through them. Never skip this safety check.
Wear Protective Gear
Put on insulated gloves and safety glasses. These protect you from accidental shocks or sparks. Safety gear is important even if power seems off.

Credit: www.advancedresources.com
Mount The Power Adapter
Mounting the power adapter for your Ring Video Doorbell Pro is an important step. It ensures your doorbell has constant power. This section guides you through mounting the adapter safely and correctly.
Locate Transformer
First, find your home’s doorbell transformer. It is usually near the main electrical panel or inside a utility closet. The transformer changes high voltage to low voltage for the doorbell. Make sure the power is off before you touch anything. Use a voltage tester to confirm no current flows.
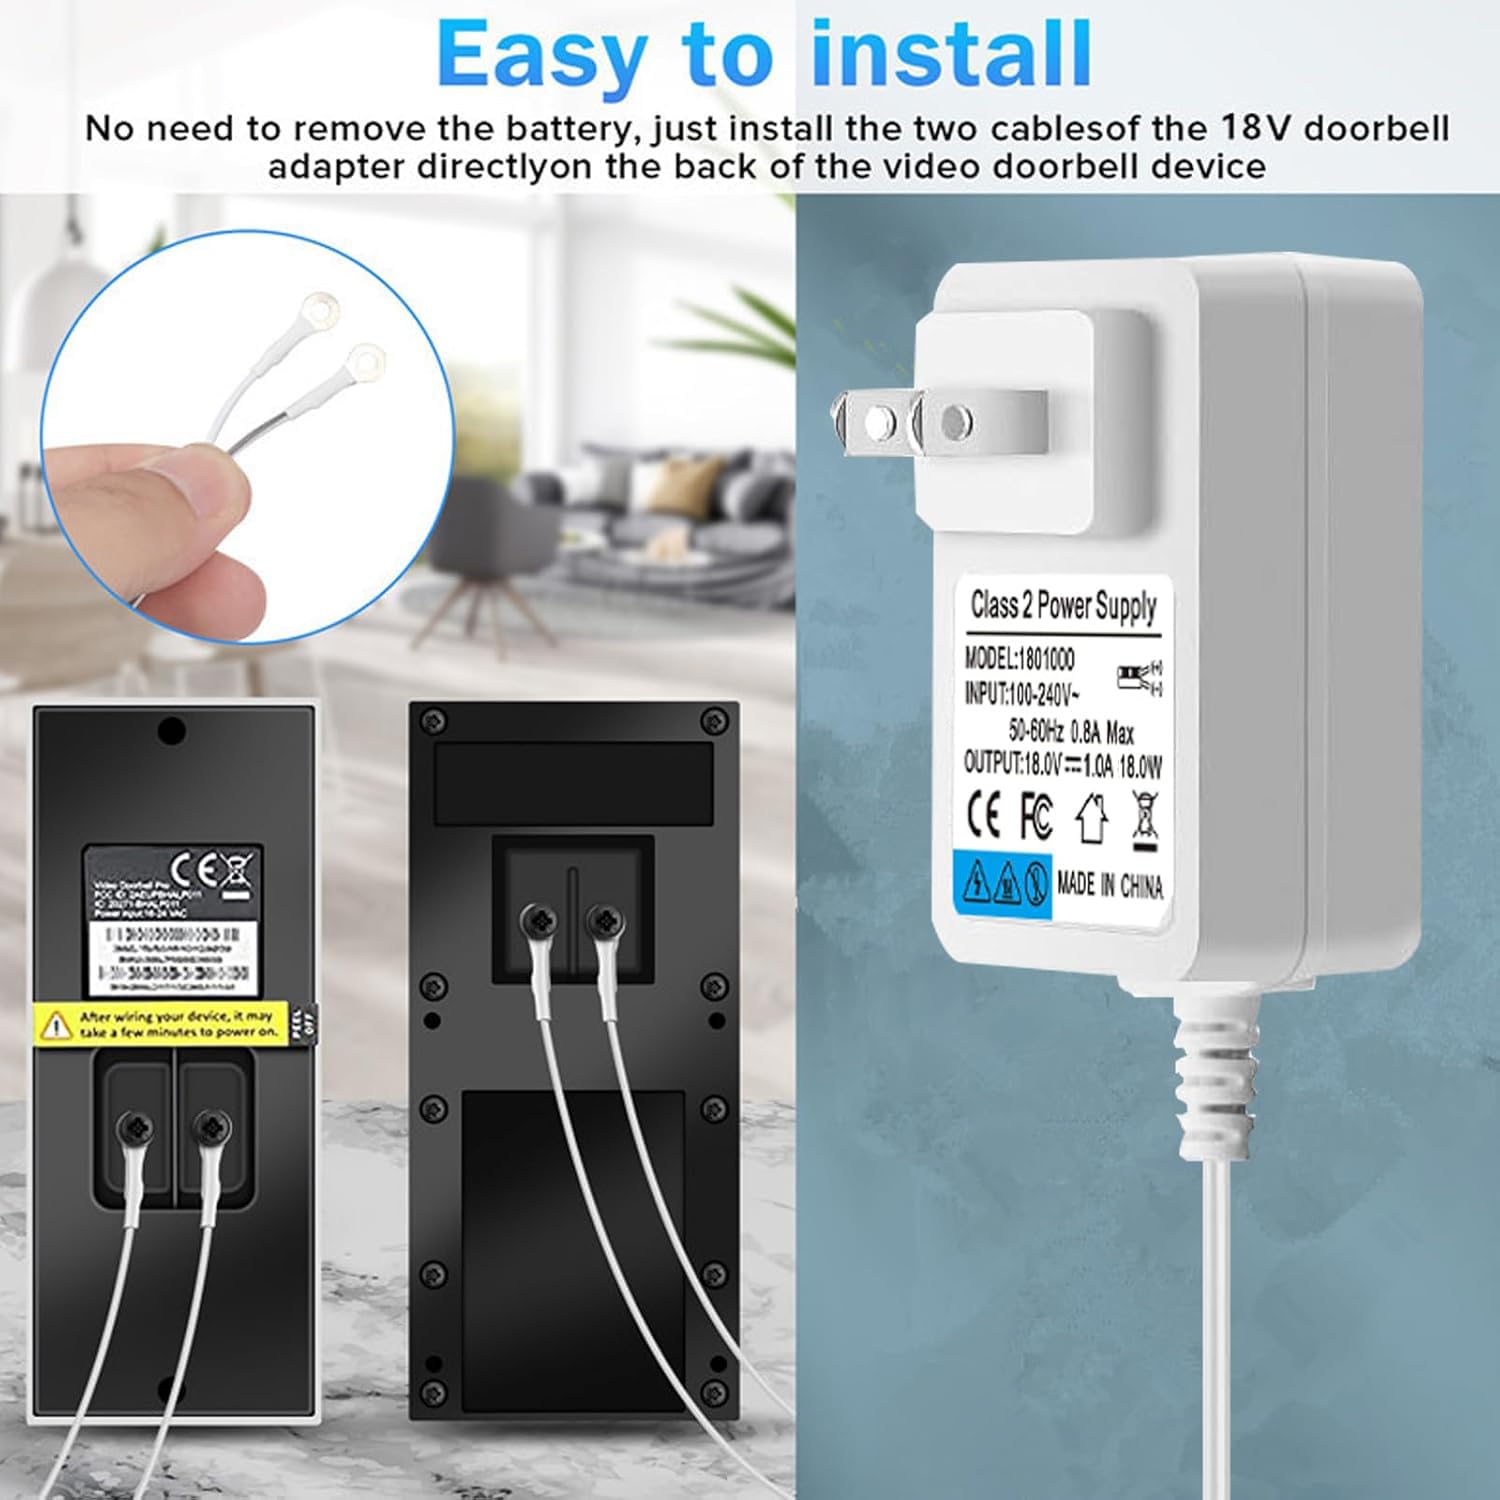
Connect Adapter To Transformer
Next, connect the power adapter wires to the transformer terminals. Match the wires by color or label. Tighten the screws securely to hold the wires in place. Avoid loose connections to prevent power loss. After connecting, turn the power back on. Test the adapter by checking if the doorbell powers up correctly.
Install The Doorbell Pro
Installing the Ring Video Doorbell Pro is a simple process. This section explains how to place and connect the doorbell using the power adapter. Follow the steps carefully to ensure a secure setup. Proper installation helps the doorbell work smoothly and last longer.
Attach Mounting Plate
First, hold the mounting plate against the wall near your door. Use a level to make sure it is straight. Mark the screw holes with a pencil. Drill holes at the marked spots if needed. Insert wall anchors for extra support on drywall or brick. Screw the mounting plate tightly to the wall. Make sure it does not move or wobble.
Connect Wires To Doorbell
Turn off power at the breaker to avoid shocks. Locate the existing doorbell wires in your wall. Strip about half an inch of insulation from each wire end. Attach the wires to the screws on the back of the Ring Doorbell Pro. It does not matter which wire goes to which screw. Tighten the screws to hold the wires firmly. Check that no bare wire touches other parts. Turn the power back on after connecting wires.
Secure The Doorbell Unit
Securing the Ring Video Doorbell Pro unit is a key step in installation. It keeps your device safe and working well. A firmly attached doorbell avoids damage or theft. Follow simple steps to make sure the unit stays in place and functions properly.
Position The Doorbell On The Mounting Bracket
Place the Ring doorbell on the mounting bracket carefully. Align the holes on the back of the doorbell with the screws on the bracket. The doorbell should sit flat and snug against the wall. Avoid gaps to keep it stable and secure.
Tighten The Security Screws
Use the included screwdriver to tighten the security screws. These screws lock the doorbell to the bracket. Make sure they are firm but do not over-tighten. Over-tightening can damage the device or bracket.
Check The Doorbell Stability
After tightening, gently shake the doorbell. It should not move or wiggle. If it moves, adjust the screws or bracket. A stable unit ensures clear video and sound quality. It also prevents accidental falls or tampering.
Test The Doorbell Function
Press the doorbell button to test it. Verify the chime sounds inside your home. Check the video feed on your phone app. Confirm the doorbell works before finalizing the installation.
Restore Power And Test
Restoring power and testing your Ring Video Doorbell Pro is the final step of installation. This step ensures your doorbell works well and connects to your home’s power.
Power needs to return safely to your doorbell so it can operate correctly. Testing confirms the device receives electricity and functions as expected.
Turn On Circuit Breaker
Find the circuit breaker for your doorbell in the main panel. Switch it back to the ON position. This action restores electricity to the doorbell system.
Wait a few seconds after turning on the breaker. This pause lets the power flow steadily to the doorbell. Avoid flipping the breaker rapidly on and off.
Check Doorbell Functionality
Press the button on your Ring Video Doorbell Pro. Listen for the chime sound inside your home. The sound means the doorbell is powered properly.
Open the Ring app on your phone. Check the live video feed from the doorbell camera. The app should show a clear image without delay.
Test the motion alerts by walking near the doorbell. Your phone should receive notifications quickly. This confirms the device is connected and working well.
Credit: www.flumidieselbosch.com.br
Set Up The Ring App
Setting up the Ring app is a key step after installing your Ring Video Doorbell Pro with a power adapter. The app lets you control your doorbell from anywhere. It sends alerts and lets you see visitors on your phone. The setup is simple and quick.
Start by downloading the Ring app from the App Store or Google Play. Open the app and create an account or log in. Follow the on-screen steps to link your doorbell. The app guides you through connecting the device to your home network.
Connect To Wi-fi
Connect your Ring Video Doorbell Pro to your Wi-Fi network. Choose your Wi-Fi name in the app and enter the password. The doorbell needs a strong and stable connection. This ensures fast video streaming and instant alerts.
If the connection fails, move closer to the router and try again. The app will confirm once the doorbell is online. This step is crucial for proper device function.
Customize Settings
Adjust the settings to fit your needs. Set motion zones to focus on specific areas. This reduces false alerts from irrelevant movements. You can also change notification preferences. Choose how and when you get alerts on your phone.
Set up privacy zones to block parts of the camera view. This protects your neighbors’ privacy. Explore other options like video quality and light settings. Tailoring these helps improve your doorbell’s performance.
Troubleshooting Tips
Troubleshooting your Ring Video Doorbell Pro with a power adapter can solve many common issues. Problems with power and connectivity are the most frequent. This guide helps you quickly find and fix these problems.
Power Issues
Check the power adapter is plugged in tightly. A loose connection can stop the doorbell from working. Make sure the adapter matches the voltage needs of your doorbell.
Inspect the power cable for damage. Worn or broken cables cause power loss. Replace any damaged parts immediately.
Reset the doorbell by pressing the reset button. This can fix minor power glitches. Wait a few minutes after resetting to see if the device powers on.
Connectivity Problems
Ensure your Wi-Fi signal reaches the doorbell location. Weak signals cause poor video and delays. Move your router closer or add a Wi-Fi extender if needed.
Verify your Wi-Fi password is correct in the Ring app. Wrong passwords block connection. Re-enter the password to be sure.
Restart your router. This often clears network issues. Power off the router, wait 30 seconds, then turn it back on.
Update the Ring app and device firmware. Outdated software can cause connection failures. Check for updates regularly.

Credit: www.esseg.eu
Frequently Asked Questions
How Do I Install Ring Video Doorbell Pro With Power Adapter?
First, turn off your doorbell circuit breaker. Connect the power adapter to your existing doorbell wires. Mount the Ring Pro, then restore power and complete setup in the Ring app.
What Power Adapter Is Compatible With Ring Doorbell Pro?
Use a Ring Power Kit specifically designed for the Ring Video Doorbell Pro. It ensures proper voltage and prevents chime issues for optimal performance.
Can I Install Ring Video Doorbell Pro Myself?
Yes, installation is DIY-friendly. Basic electrical knowledge and tools are needed. Follow the Ring app instructions for a safe, step-by-step setup.
How Long Does The Ring Doorbell Pro Installation Take?
Installation typically takes 20 to 30 minutes. It depends on your wiring experience and home setup complexity.
Conclusion
Installing the Ring Video Doorbell Pro with a power adapter is simple and quick. Follow each step carefully for a smooth setup. Use the right tools and check your wiring before starting. Test your doorbell after installation to ensure it works well.
Enjoy better security and convenience at your doorstep. This guide helps you get started with confidence. Your home will feel safer with this easy upgrade.