Are you ready to upgrade your bathroom with a sleek Moen towel rack but don’t know where to start? Installing it yourself can save you time and money, and it’s easier than you might think.
This guide will walk you through every simple step, so you can hang your towel rack securely and quickly. By the end, you’ll have a stylish, sturdy spot for your towels—and the confidence to tackle similar projects on your own.
Let’s get started!

Credit: www.youtube.com
Tools And Materials Needed
Gathering the right tools and materials makes installing your Moen towel rack easy. Proper preparation saves time and avoids frustration.
Below is a clear list of what you need to complete the job smoothly.
Essential Tools
- Drill with drill bits
- Screwdriver (Phillips and flathead)
- Level
- Measuring tape
- Pencil for marking
- Wall anchors (if mounting on drywall)
- Stud finder
Moen Towel Rack Components
- Towel rack bars or rings
- Mounting brackets
- Screws and wall anchors
- Installation manual
Choosing The Right Location
Choosing the right location for your Moen towel rack is key to its use and look. Place it where towels dry quickly and are easy to grab. Think about space around the rack to avoid crowding. The right spot keeps towels neat and your bathroom tidy.
Ideal Height And Position
Set the towel rack at a height everyone can reach. Usually, 48 inches from the floor works well. Place it near the sink or shower for easy access. Keep it away from direct water spray to avoid wet towels. Think about how many towels you need to hang.
Wall Surface Considerations
Check the wall type before installing the rack. Drywall needs anchors for strong support. Tile walls require special drill bits and care. Avoid weak or damaged walls that can’t hold weight. A solid wall ensures your rack stays secure over time.
Preparing The Wall
Preparing the wall is the first step to install a Moen towel rack. A smooth and stable surface ensures the rack holds well. Taking time to prepare the wall makes the installation easier and safer.
Clear the area where the towel rack will go. Remove any old fixtures or nails. Clean the wall surface to remove dust and dirt. A clean wall helps the rack stick better and last longer.
Marking Drill Points
Use the towel rack as a guide to mark drill points. Hold it against the wall at the height you want. Use a pencil to mark the holes on the wall through the rack’s mounting holes. Check the marks twice for accuracy. Correct placement prevents the rack from being crooked.
Checking For Studs
Use a stud finder to locate studs behind the wall. Studs provide strong support for the towel rack. Mark the stud locations near your drill points. If no studs are available, use wall anchors for better hold. Installing into studs or anchors prevents the rack from falling.
Credit: www.homedepot.com
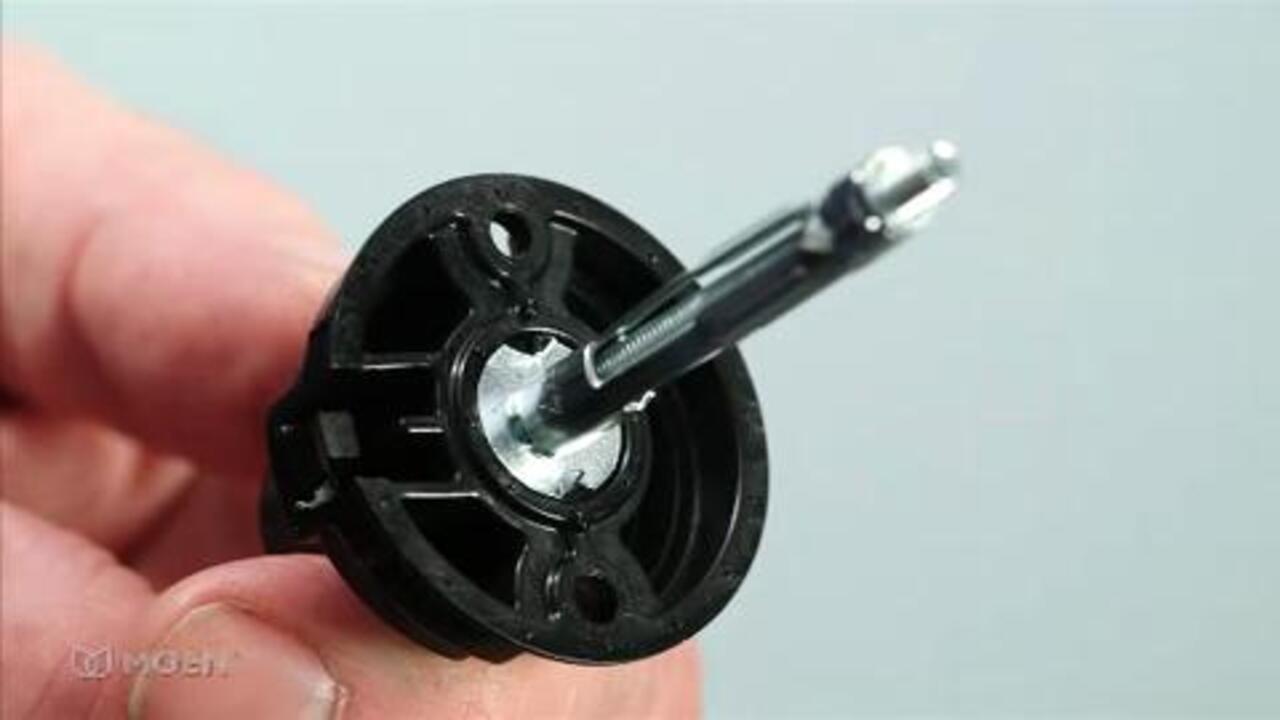
Installing Mounting Brackets
Installing mounting brackets is the key step for a sturdy Moen towel rack. These brackets hold the rack firmly on the wall. Proper installation keeps your towel rack safe and balanced. Follow the steps carefully to place the brackets correctly and ensure a neat look.
Drilling Holes
Mark the spots where the brackets will go. Use a level to keep them straight. Choose the right drill bit size for your wall type. Drill holes gently to avoid wall damage. Clean any dust from the holes before moving on.
Securing Brackets
Align the brackets with the drilled holes. Insert anchors if your wall needs extra support. Use screws to fasten the brackets tightly. Double-check the brackets for firmness. Loose brackets can cause the towel rack to fall.
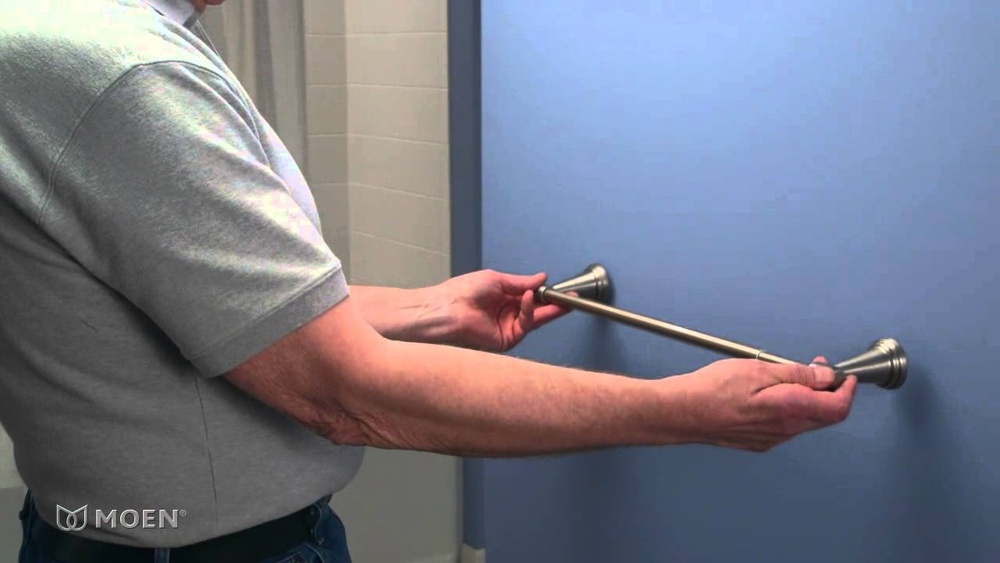
Attaching The Towel Rack
Attaching the towel rack is a key step in your installation process. It ensures the rack stays secure and looks great. Follow these simple steps to attach your Moen towel rack properly. Take your time and focus on alignment and tightening.
Aligning The Rack
Start by positioning the towel rack on the wall. Use a level to check if it is straight. Make sure the mounting brackets match the wall anchors. Adjust the rack until it sits evenly and flush against the surface. Proper alignment prevents wobbling and keeps towels in place.
Tightening Screws
Once the rack is aligned, insert the screws into the mounting holes. Use a screwdriver to turn each screw clockwise. Tighten them evenly to avoid tilting the rack. Stop tightening when the rack feels firm and stable. Do not overtighten, as this can damage the wall or the rack itself.
Final Adjustments And Tips
After installing your Moen towel rack, some final checks help ensure it works well. Small adjustments improve its look and strength. This step keeps the rack safe and lasting longer.
Ensuring Stability
Check that the towel rack feels firm on the wall. Gently wiggle it to test its hold. Tighten any loose screws with a screwdriver. Use a level to confirm it hangs straight. A stable rack prevents accidents and damage.
Maintaining The Rack
Clean the towel rack regularly with a soft cloth. Avoid harsh cleaners that can damage the finish. Dry the rack after cleaning to stop water spots. Check screws every few months and tighten if needed. Proper care keeps the rack looking new and working well.

Credit: awatage.com
Frequently Asked Questions
How Do I Install A Moen Towel Rack Securely?
Start by marking wall studs or use anchors for drywall. Drill pilot holes, insert anchors if needed, then screw the mounting brackets firmly. Attach the towel rack to the brackets and tighten all screws for a secure hold.
What Tools Are Needed For Moen Towel Rack Installation?
You will need a drill, screwdriver, level, measuring tape, pencil, and wall anchors. Having a stud finder helps locate studs for better support. These tools make the installation process easier and more precise.
Can I Install A Moen Towel Rack On Tile Walls?
Yes, you can install it on tile walls. Use a carbide-tipped masonry drill bit to make holes. Be gentle to avoid cracking tiles. Use anchors designed for tile to ensure a strong hold.
How Do I Ensure My Moen Towel Rack Is Level?
Use a spirit level to mark horizontal lines on the wall before drilling. Double-check measurements and adjust brackets if necessary. Ensuring level installation prevents towels from sliding off and improves appearance.
Conclusion
Putting up a Moen towel rack is simple and quick. Follow the steps carefully for best results. Use the right tools and check measurements twice. Secure the rack firmly to avoid accidents. Enjoy a neat and organized bathroom space. Small effort, big difference.
You can do this yourself and save money. Just take your time and work safely. Now your towels have a perfect spot. A tidy bathroom feels great every day.