Looking to add a simple yet powerful upgrade to your bathroom? Installing a towel rack is one of the easiest ways to keep your space organized and stylish.
Imagine stepping out of the shower and reaching for your towel without any hassle. Sounds great, right? In this guide, you’ll discover step-by-step how to install a towel rack quickly and securely—even if you’re not a DIY expert. By the end, you’ll have the confidence to transform your bathroom with a neat, functional touch that makes your daily routine smoother.
Let’s get started!

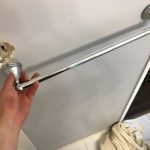
Credit: diy.stackexchange.com
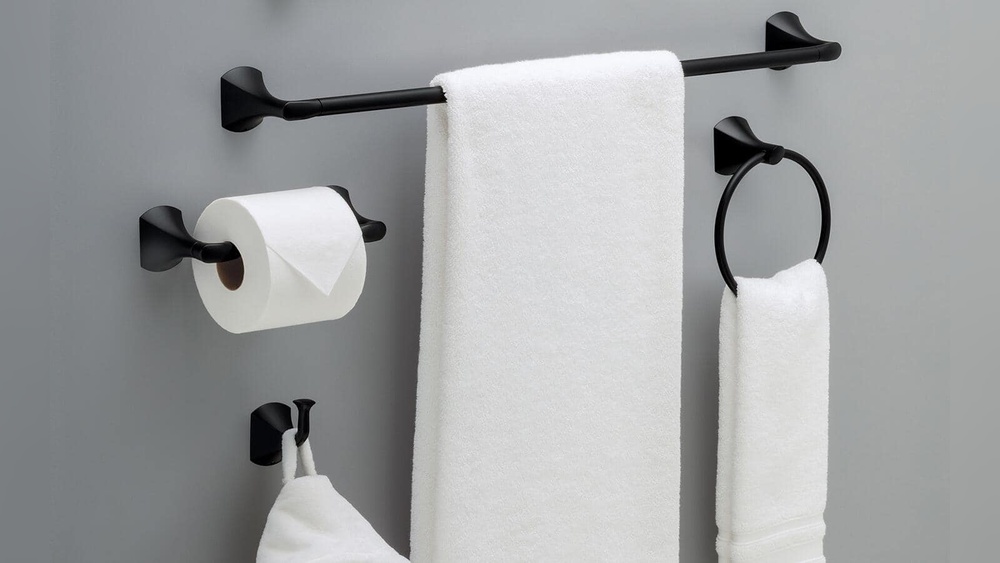
Choose The Right Towel Rack
Choosing the right towel rack is key to a neat and functional bathroom. It helps keep towels dry and within easy reach. Selecting a towel rack involves considering style, size, and material. This ensures it fits your bathroom’s look and your needs perfectly.
Types Of Towel Racks
Towel racks come in many styles. Wall-mounted racks save space and keep towels visible. Freestanding racks offer flexibility in placement. Over-the-door racks fit easily without drilling. Heated towel racks add warmth and comfort.
Material And Finish Options
Towel racks come in metal, wood, and plastic. Metal racks are strong and often rust-resistant. Wood adds warmth but needs protection from moisture. Plastic racks are lightweight and affordable. Finishes like chrome, brushed nickel, or matte black affect style and durability.
Size And Capacity Considerations
Consider how many towels you need to hang. Small racks fit one or two towels. Larger racks hold multiple towels and washcloths. Measure your bathroom space to avoid crowding. Choose a rack size that suits daily use and space.

Credit: www.youtube.com
Select The Ideal Location
Choosing the right spot for your towel rack is key. It affects how easy and safe it is to use. A good location keeps towels dry and close to where you need them. Think about who will use it and how often. This helps pick a place that works best for everyone.
Height And Accessibility
Place the towel rack at a height that suits all users. About 48 inches from the floor is a common choice. Make sure children and shorter people can reach it easily. Keep it close to the shower or sink. This reduces water dripping on the floor and keeps towels handy.
Wall Material Assessment
Check the type of wall before drilling holes. Drywall needs anchors for strong support. Tile walls require a special drill bit and extra care. Avoid weak or crumbly surfaces. Secure mounting prevents the rack from falling and keeps towels safe.
Avoiding Moisture And Heat
Do not place the towel rack too close to heat sources. Avoid spots near heaters or steam vents. Moisture can damage the rack and towels. Choose a dry area with good air flow. This keeps towels fresh and extends the rack’s life.
Gather Necessary Tools And Materials
Before installing a towel rack in your bathroom, gather all the tools and materials. This step saves time and avoids interruptions. Having everything ready makes the process smooth and safe. Let’s check what you need.
Basic Tools Checklist
- Electric drill or screwdriver
- Measuring tape
- Level
- Pencil or marker
- Stud finder
- Wall anchors and screws
- Hammer
Safety Equipment
- Safety goggles to protect your eyes
- Work gloves to protect your hands
- Dust mask to avoid inhaling dust
Additional Supplies
- Cleaning cloth to wipe dust
- Painter’s tape to mark spots
- Silicone sealant for waterproof sealing
Mark Mounting Points
Marking mounting points is a key step for installing a towel rack. It helps ensure the rack is secure and straight. Taking time here saves effort later. Accuracy in marking prevents mistakes and keeps the rack level. Follow these steps to mark the points correctly.
Measuring And Leveling
Measure the desired height for the towel rack. Use a tape measure for exact length. Next, hold the rack against the wall. Use a level to check if it is straight. Adjust the rack until it is perfectly horizontal. Mark the edges lightly with a pencil.
Marking Drill Spots
Find the holes on the towel rack brackets. Place the rack back on the wall. Use a pencil to mark each hole’s position. These marks show where to drill the holes. Make the marks clear but small to avoid errors.
Double-checking Alignment
Before drilling, check the marks once more. Use the level to confirm the marks are straight. Compare the distance between marks on both sides. Make sure the marks line up perfectly. Adjust if needed to keep the rack balanced and secure.
Drill Holes And Insert Anchors
Drilling holes and inserting anchors is a key step for a secure towel rack installation. This process holds the rack firmly on the bathroom wall. Doing it right prevents the rack from falling or loosening over time. Pay close attention to details for a strong hold.
Choosing The Right Drill Bit
Select a drill bit that matches the wall anchors. Use a bit slightly smaller than the anchor width. This ensures a tight fit and strong grip. For drywall, a standard twist bit works well. For tile or concrete, choose a masonry bit. The right bit reduces wall damage and improves anchor support.
Drilling Techniques
Mark the spots for drilling carefully. Use a level to keep holes straight. Start drilling slowly to avoid slipping. Apply steady pressure without forcing the drill. Drill straight into the wall for clean holes. Remove dust from holes before inserting anchors.
Installing Wall Anchors
Push anchors into the drilled holes gently. Tap lightly with a hammer if needed. The anchor should sit flush with the wall. Do not force anchors too deep. Anchors expand inside the wall for a solid grip. This step keeps your towel rack stable and safe.
Attach The Towel Rack
Attaching the towel rack securely is key to a neat and functional bathroom. This step ensures your rack stays in place and holds your towels safely. Take your time to align, screw, and check stability for the best results.
Aligning The Rack
Hold the towel rack against the wall at the desired height. Use a level to check that it is straight. Mark the screw holes with a pencil for accuracy. Proper alignment keeps the rack balanced and visually pleasing.
Securing With Screws
Drill pilot holes where you marked the screw spots. Insert wall anchors if the wall is drywall or plaster. Screw the rack brackets firmly into the wall anchors or studs. Tight screws prevent the rack from loosening over time.
Ensuring Stability
Give the towel rack a gentle shake to test strength. Check that it does not wobble or shift. Tighten screws again if the rack feels loose. A stable rack supports towels without damage or falling off.
Final Touches And Maintenance
After installing your towel rack, the final touches and regular care keep it looking great. Proper maintenance extends the rack’s life and keeps your bathroom tidy.
Simple habits help your towel rack stay clean and strong. Follow easy steps to protect it from damage and rust.
Cleaning And Polishing
Use a soft cloth to wipe dust and water spots. Mild soap mixed with warm water works well. Avoid harsh chemicals that can harm the finish. Polish metal racks with a gentle polish to keep shine. Dry the rack fully after cleaning to stop water marks.
Routine Checks
Check screws and brackets monthly to ensure they are tight. Loose parts can cause the rack to fall or tilt. Look for any cracks or damage on the rack or wall. Early fixes prevent bigger problems and keep the rack safe.
Preventing Rust And Damage
Keep the rack dry by wiping it after showers. Good ventilation in the bathroom reduces moisture buildup. Use rust-resistant racks or apply a protective coating. Avoid hanging wet heavy items that strain the rack. These steps protect your towel rack from rust and wear.

Credit: www.youtube.com
Frequently Asked Questions
How Do I Choose The Right Towel Rack For My Bathroom?
Select a towel rack based on bathroom size, style, and wall material. Consider durability and ease of installation for best results.
What Tools Are Needed To Install A Bathroom Towel Rack?
You’ll need a drill, level, measuring tape, screws, anchors, and a screwdriver for towel rack installation.
How High Should I Install A Towel Rack?
Install the towel rack 48 to 52 inches above the floor for easy reach and optimal drying.
Can I Install A Towel Rack On Tile Walls?
Yes, use a masonry drill bit and anchors designed for tile to securely mount the rack.
Conclusion
Installing a towel rack in your bathroom is simple and quick. Follow the steps carefully to ensure a secure fit. Choose the right spot for easy reach and convenience. Use proper tools to avoid damage to walls. A well-installed towel rack keeps towels organized and dry.
Enjoy the neat and tidy look it brings to your space. Small projects like this improve your bathroom’s function and style. Give it a try—you’ll feel proud of your work.