Installing a towel rack on ceramic tile might seem tricky, but with the right steps, you can do it yourself quickly and confidently. Imagine having a sturdy place for your towels, keeping your bathroom neat and organized.
You don’t need special skills or expensive tools to get it right. This guide will walk you through each simple step, so you avoid common mistakes and make your bathroom look great. Keep reading to discover how easy it is to add this useful feature to your space!
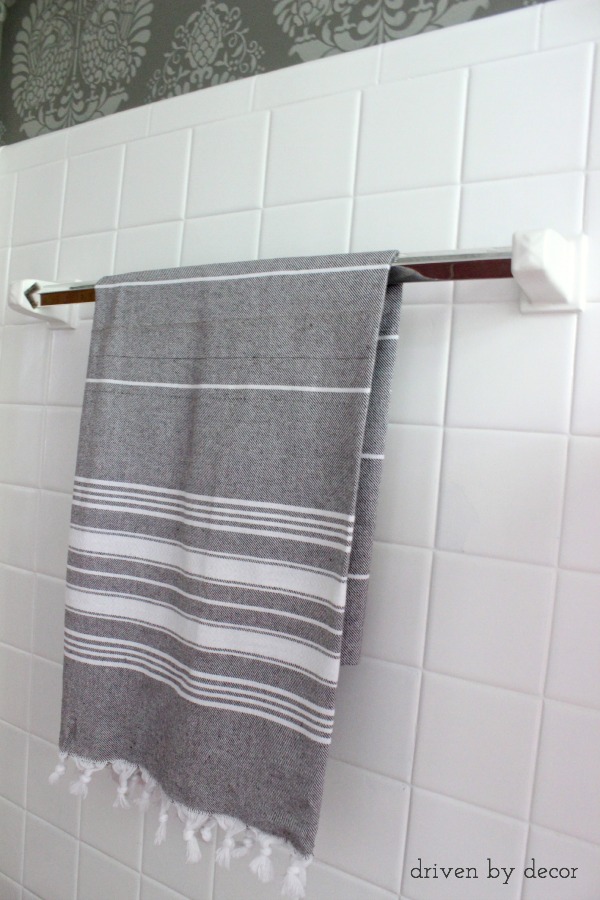
Credit: www.drivenbydecor.com
Tools And Materials Needed
Installing a towel rack on ceramic tile needs the right tools and materials. Prepare these first for a smooth process. Having everything ready saves time and avoids mistakes.
Using the correct tools helps protect your tiles from damage. It also makes the installation strong and secure. Below is a list of what you will need.
Drill With A Carbide-tipped Masonry Bit
A drill with a masonry bit is needed to make holes in the tile. The carbide tip cuts through the hard surface without cracking it. Choose a bit size that matches the wall anchors.
Wall Anchors For Tile
Wall anchors hold screws tightly in ceramic tile. They prevent the towel rack from coming loose. Use anchors made for tile or masonry walls.
Screwdriver
A screwdriver helps to tighten screws into the wall anchors. Use a screwdriver that fits the screw heads. This avoids stripping the screws.
Measuring Tape And Pencil
Measuring tape ensures the towel rack is placed evenly. Use a pencil to mark where holes will go. Accurate marks make installation easier.
Level
A level keeps the towel rack straight on the wall. Check both horizontal and vertical alignment. This prevents a crooked towel rack.
Masking Tape
Masking tape helps protect the tile surface while drilling. Place tape over the drilling spot to stop the drill bit from slipping. It also reduces tile cracks.
Towel Rack And Screws
Choose a towel rack that fits your bathroom style. Include screws that come with the rack or ones that fit the anchors. Match materials to avoid rust.
Choosing The Right Location
Choosing the right location for your towel rack on ceramic tile is important. It ensures easy reach and keeps towels dry. A good spot makes your bathroom look neat and organized.
Think about the space near the sink or shower. These areas are convenient for grabbing a towel quickly. Avoid placing the rack too far from where you usually need a towel.
Check the wall surface. The tile should be flat and strong enough to hold the rack. Avoid spots with cracks or loose tiles. These can cause the rack to fall.
Consider the height too. The rack should be at a comfortable level for all users. Not too high or too low. It should hold towels without dragging on the floor.
Measure The Space Carefully
Use a tape measure to find the perfect spot. Measure the width and height of the area. Make sure the rack fits well without crowding other items.
Avoid Obstructions
Keep the rack away from light switches and outlets. Also, avoid placing it near doors or windows. This prevents damage and keeps towels dry.
Check For Studs Behind Tiles
Studs provide strong support for heavy racks. Use a stud finder to locate them. If no studs are available, use special anchors for tiles.
Marking The Drill Points
Marking the drill points on ceramic tile is a key step before installing a towel rack. Accurate marks help avoid mistakes and tile damage. Take time to measure and mark carefully. This ensures the towel rack fits properly and stays secure.
Gather Your Tools
Start by collecting a pencil, measuring tape, level, and masking tape. Masking tape protects the tile surface and helps see the marks clearly. Use a pencil with a soft tip for easy removal later.
Measure The Placement
Measure the height and width where the towel rack will go. Use the level to keep the marks straight. Mark the general area lightly on the masking tape first.
Mark The Exact Drill Points
Hold the towel rack against the wall. Align it with the initial marks. Use the pencil to mark the screw holes precisely on the tape. Double-check the spacing before drilling.
Check The Marks
Step back and review the marks. Confirm they are level and spaced correctly. Adjust any marks if needed. Perfect marks prevent cracking the tiles during drilling.

Credit: www.amazon.com
Drilling Into Ceramic Tile
Drilling into ceramic tile needs care and the right tools. Tiles are hard and can crack easily. You must drill carefully to avoid damage. Use the right drill bit and follow simple steps. This helps secure the towel rack properly. Protect the tile surface during drilling.
Using A Tile Drill Bit
Use a tile drill bit designed for ceramic tiles. These bits have a sharp, pointed tip. They cut through the hard surface without slipping. Avoid regular drill bits as they can crack the tile. Start drilling slowly to keep control. Keep the drill steady and straight for best results.
Preventing Cracks And Chips
Place masking tape on the tile to protect the surface. The tape stops the drill from slipping. Drill slowly and don’t press too hard. Use water to cool the drill bit and tile. Cooling prevents overheating and tile damage. Check progress often to avoid going too deep.
Installing Wall Anchors
Installing wall anchors is a key step for mounting a towel rack on ceramic tile. Tiles are hard and brittle. Screws alone can crack or damage them. Wall anchors give strong support without harming tiles.
They hold the screws firmly in place. This keeps the towel rack steady and secure. Using the right wall anchors prevents the rack from falling off. It also protects your bathroom walls.
Choosing The Right Wall Anchors
Select wall anchors made for ceramic or tile walls. Plastic anchors are common but may not hold well on tile. Metal anchors or toggle bolts offer better grip. Check the weight limit of the anchors. Pick ones that can support the towel rack and towels.
Use a pencil to mark where the towel rack holes will go. Measure carefully to keep the rack level. Double-check the marks before drilling. Accurate marks help avoid mistakes and tile damage.
Drilling Holes In Ceramic Tile
Use a drill with a carbide-tipped or diamond drill bit. Start with a small pilot hole for better control. Drill slowly and gently to avoid cracking tiles. Keep the drill bit cool by spraying water while drilling.
Inserting The Wall Anchors
Push the wall anchors into the drilled holes. Tap them lightly with a hammer if needed. Make sure anchors sit flush with the tile surface. This ensures the towel rack will mount evenly.
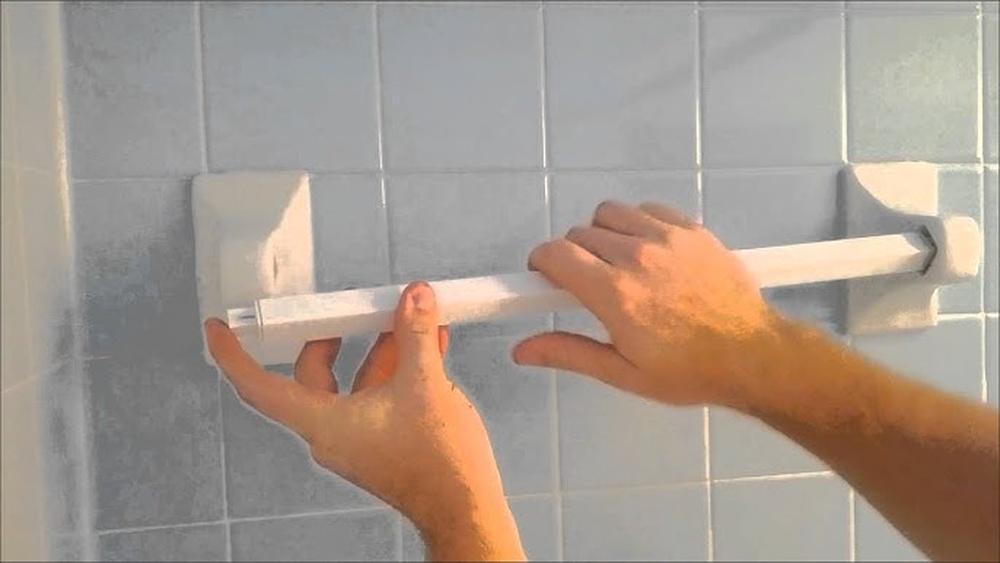
Screwing In The Towel Rack
Align the towel rack with the wall anchors. Insert screws through the rack holes into the anchors. Tighten screws firmly but do not overtighten. Over-tightening can crack the tile or strip the anchor.

Credit: www.multimet.com.pl
Mounting The Towel Rack
Mounting a towel rack on ceramic tile needs care and the right tools. Ceramic tile is hard and can crack if drilled incorrectly. This section guides you through the steps to mount your towel rack safely and firmly.
Gather The Right Tools And Materials
Start by collecting a drill with a carbide-tipped bit. Get wall anchors made for tile and screws that match your rack. Have a tape measure, pencil, level, and masking tape ready. These tools help you drill accurately and protect the tile.
Mark The Drill Points On The Tile
Measure where the rack will hang. Use a pencil to mark spots for the screws. Place masking tape over the marks to stop the drill bit from slipping. Check the marks with a level to keep the rack straight.
Drill Carefully Into The Tile
Put on safety glasses before drilling. Start drilling slowly on the marked points. Use light pressure to avoid cracking the tile. Drill straight and stop after going through the tile surface.
Insert Wall Anchors And Attach The Rack
Push the wall anchors into the holes. Tap gently with a hammer if needed. Align the towel rack with the anchors. Screw the rack firmly but do not over-tighten. Check the rack is secure and straight.
Final Adjustments And Checks
After installing the towel rack on ceramic tile, final adjustments and checks ensure safety and durability. These steps help confirm the rack stays secure and looks good. Take time to review each detail carefully. A well-finished installation adds convenience to your bathroom space.
Check The Stability Of The Towel Rack
Gently pull the towel rack to test its hold. It should not move or wiggle. If it feels loose, tighten the screws again. Stability prevents accidents and keeps towels safe.
Align The Towel Rack Properly
Look at the rack from different angles. Make sure it is straight and even. Use a level tool if needed. A crooked rack looks unprofessional and may cause towels to slide off.
Inspect The Tile Surface For Damage
Check the tile around the rack for cracks or chips. Small damage might get worse over time. Seal any cracks with tile filler to protect the surface. This step keeps the wall strong and clean.
Clean The Installation Area
Remove any dust or debris from the mounting area. Use a soft cloth to wipe the tiles and rack. Clean surfaces improve grip and appearance. A tidy finish makes your bathroom look fresh.
Test The Towel Rack With Towels
Hang a towel or two to see how the rack holds up. Make sure it supports the weight without shifting. This practical test confirms your installation success. Ready for daily use.
Tips For Maintaining Your Towel Rack
Maintaining your towel rack keeps it looking good and working well. Regular care prevents rust, loosening, and damage. Simple steps help your towel rack last longer on ceramic tiles. These tips keep your bathroom neat and tidy.
Clean Your Towel Rack Regularly
Use a soft cloth and mild soap to clean the rack. Avoid harsh chemicals that can damage the finish. Wipe away water spots to prevent stains and rust.
Check For Loose Screws
Inspect screws every few weeks to ensure they stay tight. Loose screws can cause the rack to fall or wobble. Use a screwdriver to tighten any loose parts carefully.
Dry The Rack After Use
Wipe the towel rack dry after showers. Moisture can cause rust or weaken the wall mount. A dry rack stays strong and clean longer.
Avoid Overloading The Rack
Hang only the recommended weight on your towel rack. Too much weight can pull it off the tile or damage the wall. Use multiple racks if needed to hold all towels.
Protect The Tile Around The Rack
Check the tile for cracks or chips near the rack. Small damage can grow if ignored. Use tile-safe sealant to protect the edges and keep the rack secure.
Frequently Asked Questions
How Do I Drill Into Ceramic Tile Safely?
Use a carbide-tipped masonry drill bit and a low drill speed. Mark the spot, use masking tape to prevent slipping, and drill gently without applying too much pressure. This prevents cracking and ensures a clean hole for your towel rack installation.
What Tools Are Needed To Install A Towel Rack On Tile?
You need a drill with a masonry bit, screwdriver, level, measuring tape, wall anchors, screws, and masking tape. These tools help you drill safely, secure the rack firmly, and ensure it is aligned properly on the ceramic tile wall.
Can I Install A Towel Rack Without Drilling Holes?
Yes, you can use adhesive mounting strips or suction cup towel racks. However, these options may not support heavy towels and are less durable than drilled installations on ceramic tile.
How To Prevent Tile Cracks When Installing Towel Racks?
Always use the correct drill bit and low speed. Apply masking tape over the drilling spot to reduce slipping. Drill slowly and avoid applying excessive pressure to prevent tile cracks during installation.
Conclusion
Installing a towel rack on ceramic tile is simple with the right steps. Use the proper tools and measure carefully. Drill slowly to avoid cracking the tiles. Secure the rack tightly for safety. Take your time and stay patient throughout the process.
Enjoy a neat, functional bathroom space after the installation. This small project adds convenience and style to your home. You can do it yourself with confidence and ease.