Are you ready to boost your home’s security with a video doorbell but unsure where to start? Fitting a video doorbell might seem tricky, but with the right steps, you can do it yourself quickly and easily.
Imagine seeing who’s at your door from anywhere, anytime—giving you peace of mind like never before. In this guide, you’ll discover simple, clear instructions that make installation straightforward, even if you’re not tech-savvy. Keep reading, and you’ll be one step closer to a smarter, safer home today.
Choosing The Right Video Doorbell
Choosing the right video doorbell is key to a successful installation. The right model fits your home, works with your system, and meets your power needs. This guide helps you pick a video doorbell that suits your doorway and lifestyle.
Types Of Video Doorbells
Video doorbells come in several types. Wired models connect to your existing doorbell wires. Battery-powered ones are easy to install anywhere. Some have advanced features like motion detection or two-way audio. Choose a type that matches your needs and home setup.
Compatibility With Your Doorway
Check the size and shape of your doorway before buying. Some video doorbells need a flat surface for mounting. Others fit narrow or curved areas. Also, consider your Wi-Fi signal strength near the door. Strong signal ensures clear video and fast alerts.
Power Options
Power options affect installation and maintenance. Wired doorbells draw power from your home’s electrical system. Battery models need recharging or battery replacement. Some offer both wired and battery power for flexibility. Pick a power option that fits your home’s wiring and your routine.
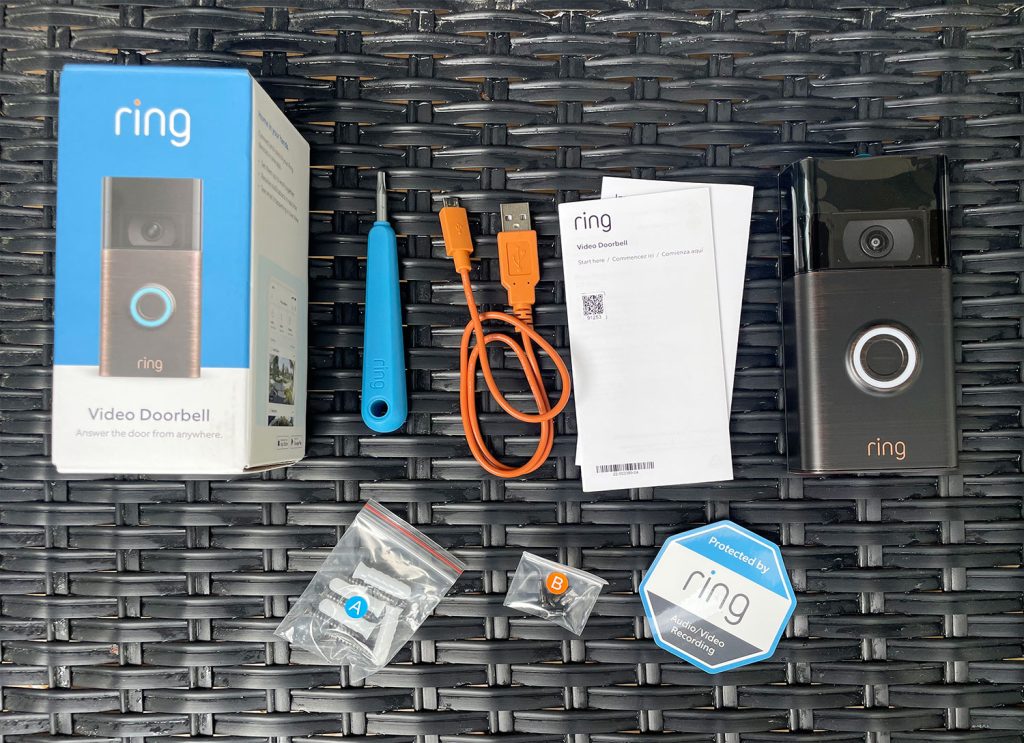
Tools And Materials Needed
Fitting a video doorbell is easier with the right tools and materials. Having everything ready saves time and avoids frustration. Prepare your workspace and check all items before starting.
Essential Tools
- Drill with bits for making holes
- Screwdriver, preferably both flathead and Phillips
- Measuring tape to mark correct positions
- Level to keep the doorbell straight
- Wire stripper for handling electrical wires
- Voltage tester to ensure safety
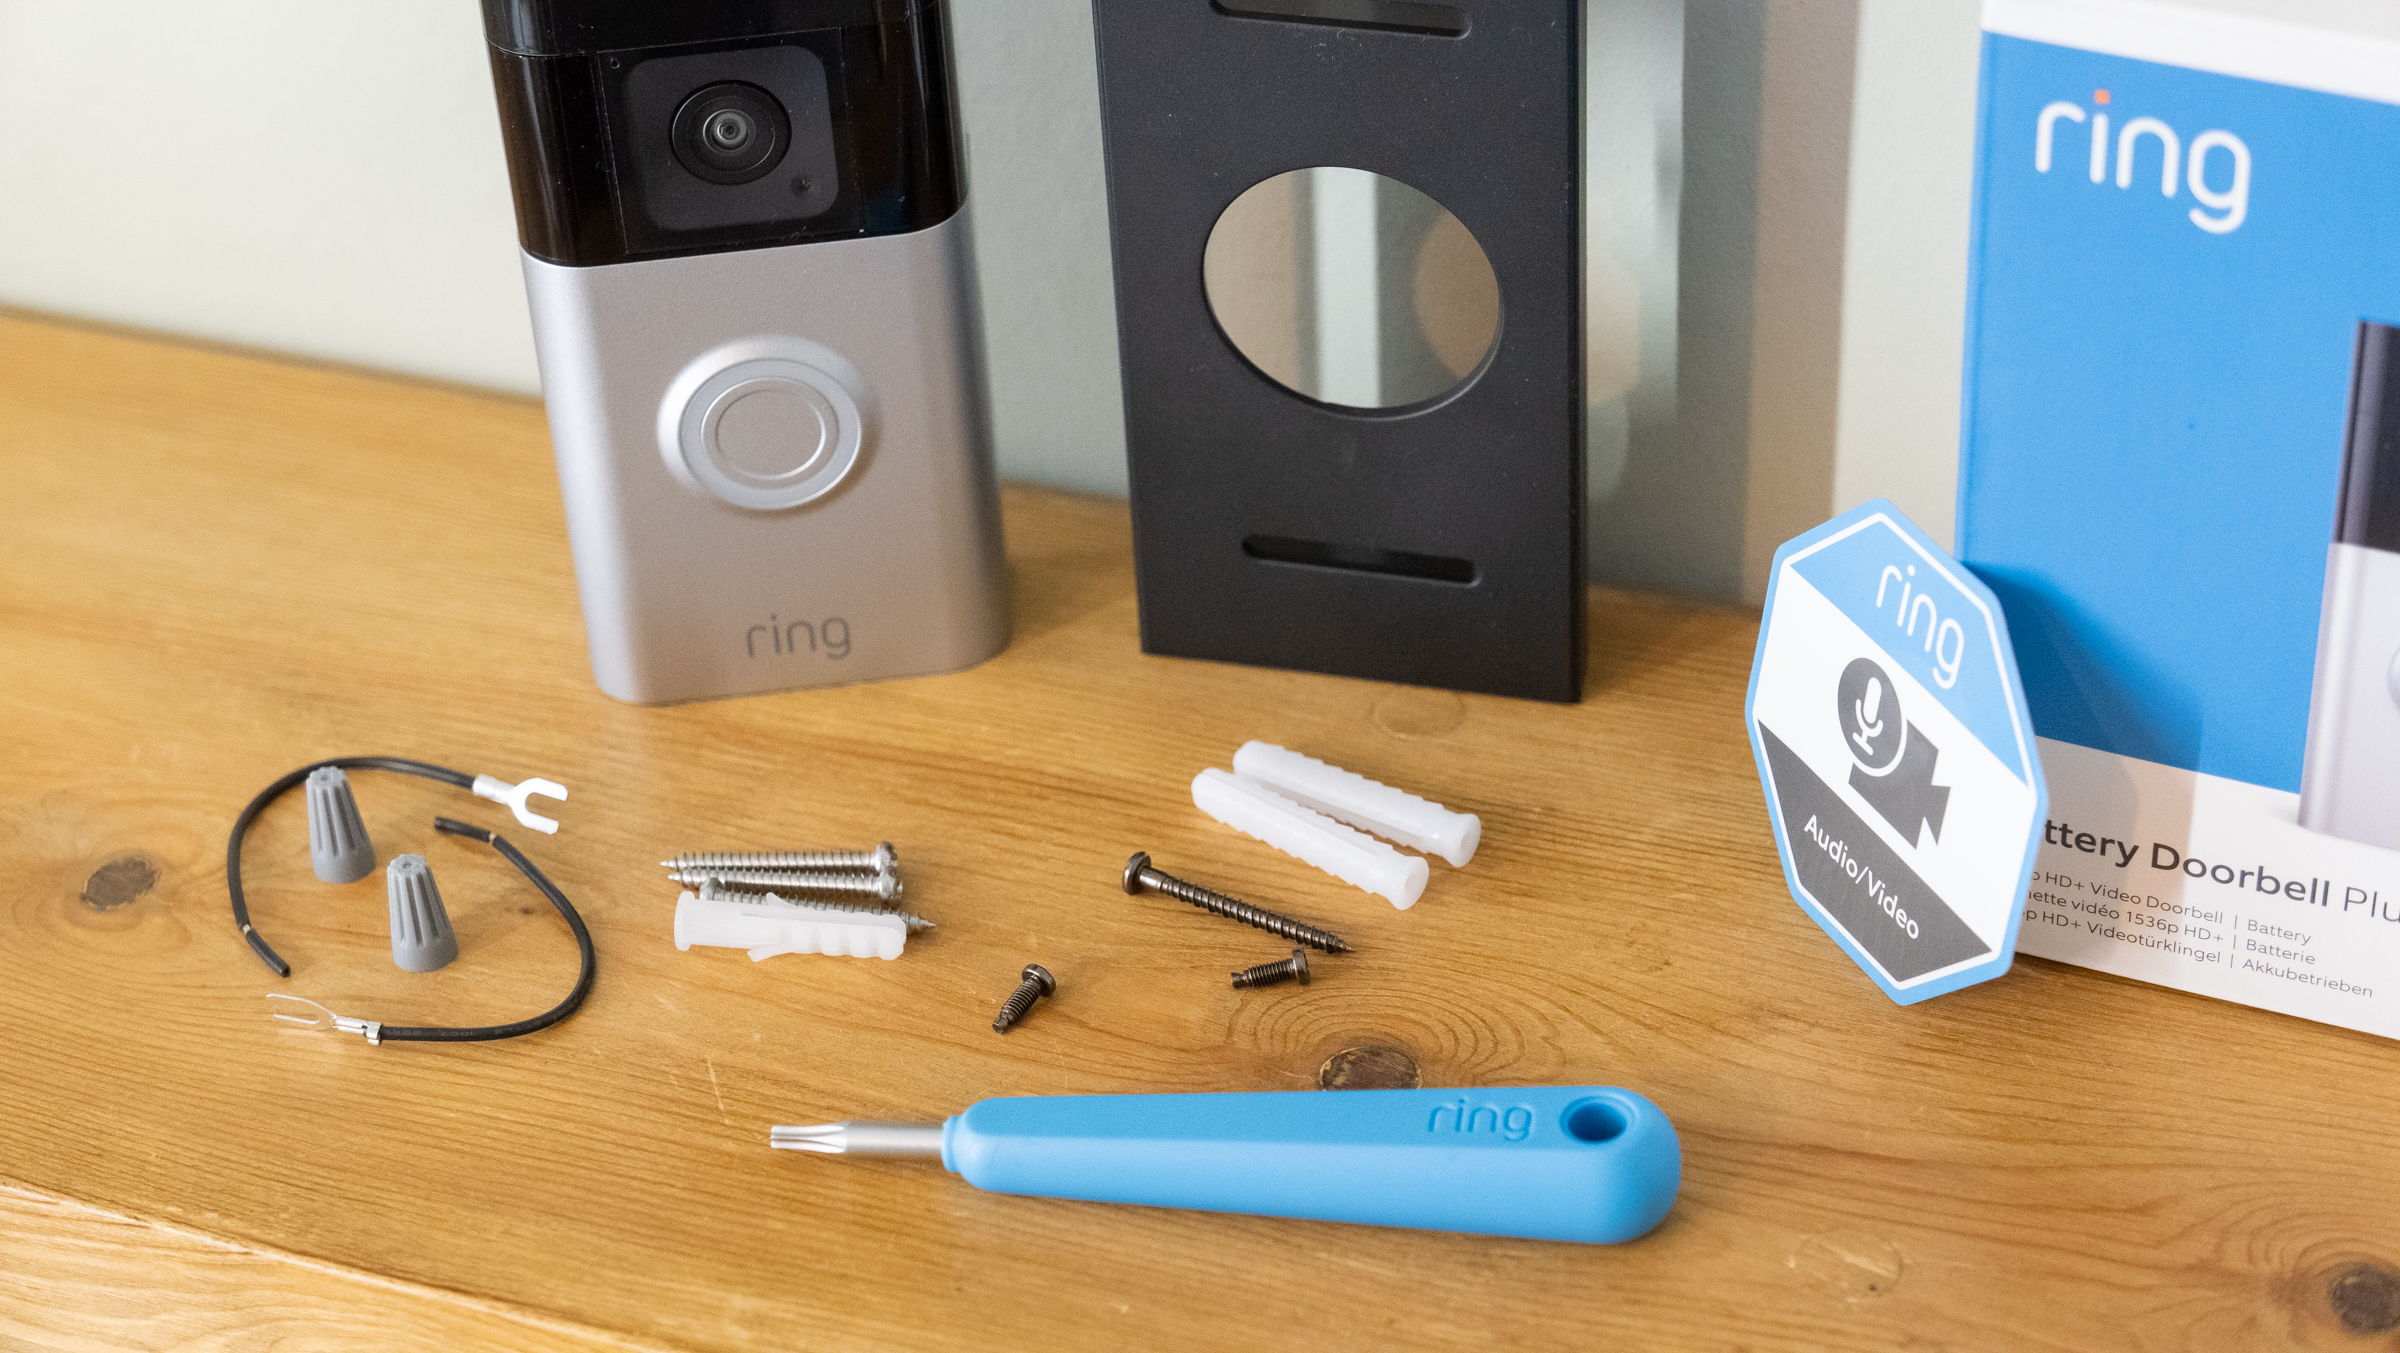
Additional Supplies
- Mounting bracket, usually included with the doorbell
- Wall anchors for secure installation on drywall or masonry
- Electrical tape for insulating wires
- Extension wires if the existing wiring is too short
- Sealant to protect connections from weather
- Notebook and pen to note wire colors and positions
Preparing The Installation Site
Preparing the installation site is the first step to fit a video doorbell. It ensures the device works well and stays safe. Taking time now saves effort later.
Selecting The Mounting Location
Choose a spot near your front door. Make sure the camera has a clear view. Avoid places blocked by plants or decorations. The doorbell should be easy to reach for visitors.
Checking Wi-fi Signal Strength
Test the Wi-Fi signal where you plan to install the doorbell. A strong signal is important for video and alerts. Use your phone to check signal bars. Move closer to the router if needed.
Turning Off Power
Safety is key. Turn off the power at your home’s breaker box. This prevents shocks during installation. Use a tester to confirm power is off before starting work.
Credit: www.younghouselove.com
Installing The Mounting Bracket
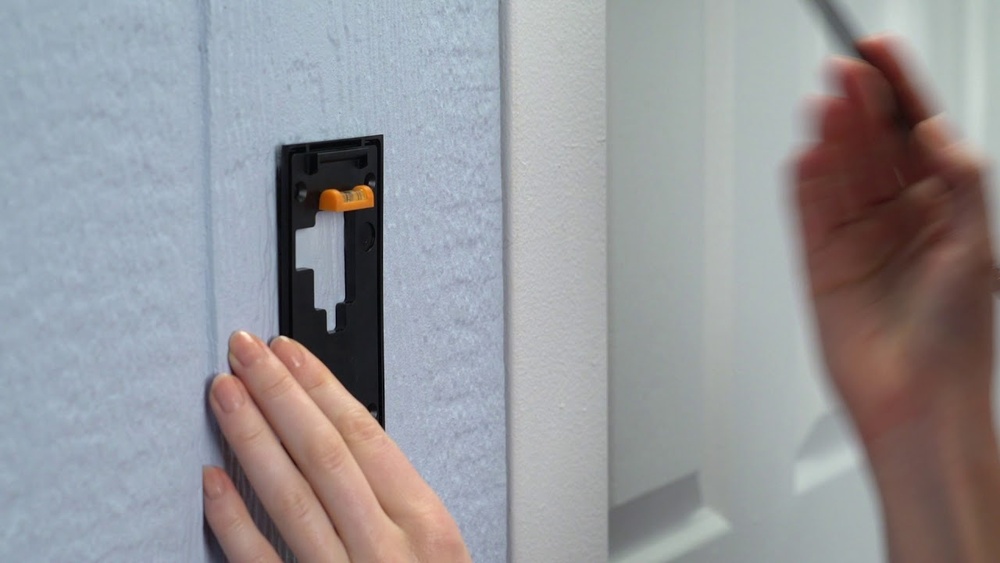
Installing the mounting bracket is a key step in fitting a video doorbell. The bracket holds the doorbell securely on your wall or door frame. A steady bracket means your doorbell works well and stays in place. Follow these steps carefully for a strong, safe setup.
Marking Drill Points
Hold the mounting bracket where you want to place the doorbell. Use a pencil to mark the holes on the wall through the bracket’s holes. Check the marks twice to ensure they line up straight. Proper marks help make drilling easier and accurate.
Drilling Holes
Select a drill bit that fits the size of the screws or anchors. Drill holes at the marked points on the wall. Drill slowly and keep the drill straight to avoid damage. Clean out dust from the holes to get a good fit for screws or anchors.
Securing The Bracket
Insert wall anchors if your wall needs extra support. Place the mounting bracket over the drilled holes. Use screws to fasten the bracket tightly to the wall. Check the bracket is firm and does not move. A tight bracket holds the doorbell safely for daily use.
Wiring The Doorbell
Wiring the video doorbell is an important step for proper installation. It connects the device to your home’s power supply. This ensures your doorbell works smoothly and responds quickly. Careful wiring keeps you safe and protects your doorbell from damage.
Connecting Wires Safely
Turn off the power at the circuit breaker before starting. This stops any risk of electric shock. Use a voltage tester to confirm no power is running. Identify the existing doorbell wires coming from your wall. Strip about half an inch of insulation from wire ends. Attach the wires to the doorbell terminals firmly. Match the wires correctly, usually labeled as “trans” and “front”. Avoid touching wires with bare hands. Use electrical tape or wire nuts for secure connections. Double-check all wires are tight and not loose.
Using The Included Adapter
Some video doorbells come with a power adapter. This adapter helps convert your home’s voltage safely. Connect the adapter to your doorbell’s wires following the manual. Plug the adapter into a nearby power outlet. This setup can be easier if your wiring is old. Make sure the adapter matches your doorbell’s power needs. Keep the adapter dry and away from weather. Secure any loose wires to avoid hazards. Test the doorbell after wiring to confirm power flows correctly.
Credit: www.techradar.com
Attaching The Video Doorbell
Attaching the video doorbell is a key step in the installation process. It ensures the device stays in place and works well. Proper attachment keeps the doorbell stable and secure against weather and daily use.
Follow the instructions carefully to attach your video doorbell correctly. Take your time aligning and securing the device for best results.
Aligning The Device
Start by holding the video doorbell against your chosen wall or door frame. Check the position so the camera covers the main entrance well. Make sure the device is straight and level. Use a small spirit level if needed. Mark the spots for screws with a pencil. This step prevents the doorbell from being crooked or facing the wrong way.
Securing With Screws
Use the screws provided with your video doorbell kit. Insert them into the marked spots carefully. Tighten the screws firmly but do not over-tighten. Over-tightening can crack the mounting plate or wall. Ensure the doorbell feels solid and does not wobble. Double-check the alignment once screws are in place. This step holds the device safely and protects it from theft or falling off.
Setting Up The Software
Setting up the software for your video doorbell is a simple step. It lets you control and monitor your doorbell from your phone. Follow clear steps for a smooth start.
Downloading The App
First, download the official app of your video doorbell. Visit the App Store or Google Play Store. Search using the doorbell brand name. Tap the download button and wait for installation. Open the app after it installs.
Connecting To Wi-fi
Next, connect your doorbell to your home Wi-Fi. The app will guide you through this process. Choose your Wi-Fi network and enter the password. Make sure the signal is strong near the doorbell. A good connection ensures clear video and alerts.
Configuring Notifications
Set up notifications to stay updated. Choose how you want to receive alerts. Options include push notifications, emails, or sounds. Adjust settings for motion detection and doorbell rings. This helps you respond quickly to visitors.
:strip_icc()/BHG-how-to-install-video-doorbell-6833360-part-02-step-05-418dcd0ead7b415181d36f311ff079be.jpg)
Credit: vicentetorns.com
Testing And Adjustments
After fitting your video doorbell, testing and making adjustments are key steps. These steps ensure your device works correctly and captures clear video and sound. Small changes can improve the overall security and user experience. Follow these simple checks to get the best results.
Checking Video And Audio
Start by viewing the live video feed on your phone or tablet. Look for sharp images and clear details. Speak near the doorbell to test the microphone. Listen to the playback for clear sound without static. Check the speaker by sending a test message from your app. Confirm the video and audio work well together.
Adjusting Camera Angle
Look at the doorbell’s field of view through the app. Make sure it covers the entryway and nearby areas. Tilt or rotate the camera gently to adjust the angle. Avoid pointing it at direct sunlight or bright lights. A slight downward angle usually works best. Lock the camera in place once the view is perfect.
Troubleshooting Common Issues
If the video is blurry, clean the camera lens carefully. Weak Wi-Fi signals can cause lag or disconnection. Move your router closer or use a Wi-Fi extender. Restart the doorbell and app to fix minor glitches. Check the device’s battery or power supply for problems. Contact support if issues continue after these steps.
Maintenance Tips
Keeping your video doorbell in good shape helps it work well for a long time. Regular care ensures clear video and smooth operation. Small efforts can prevent bigger problems later. Here are some easy maintenance tips to follow.
Cleaning The Camera Lens
Dust and dirt can blur the camera lens. Use a soft, dry cloth to wipe the lens gently. Avoid harsh chemicals or rough materials. Clean the lens regularly to keep video clear. A clean lens shows every visitor clearly.
Updating Firmware
Firmware updates improve your doorbell’s features and security. Check for updates in the app often. Install updates as soon as they are available. Updated firmware fixes bugs and adds new functions. This keeps your device working at its best.
Battery Replacement
Battery life affects how long your doorbell runs without charging. Monitor battery levels in the app. Replace the battery when the power runs low. Use the recommended battery type for your model. Timely replacement avoids unexpected power loss.
Frequently Asked Questions
How Do I Install A Video Doorbell Step-by-step?
First, turn off power at the breaker. Remove old doorbell and mount the bracket. Connect wires to the new doorbell. Secure the device and restore power. Finally, set up the doorbell on your smartphone app for full functionality.
What Tools Do I Need To Fit A Video Doorbell?
You will need a drill, screwdriver, wire strippers, level, and mounting screws. Also, have a voltage tester for safety. These tools ensure a secure and accurate installation without damaging your home or the device.
Can I Install A Video Doorbell Without Wiring?
Yes, many video doorbells offer battery-powered options. These models are easier to install and don’t require existing doorbell wiring. However, battery life varies, and wired models provide continuous power without needing recharging.
How Do I Connect My Video Doorbell To Wi-fi?
Use the manufacturer’s app to connect your video doorbell to Wi-Fi. Ensure your router is nearby with a strong signal. Follow in-app instructions for network selection and password entry to complete the setup efficiently.
Conclusion
Fitting a video doorbell is easier than it seems. Follow each step carefully to avoid mistakes. Use the right tools and check your connections well. Test the device before finishing the installation. A working video doorbell adds safety and convenience to your home.
Take your time, and you will do fine. Enjoy the peace of mind that comes with your new doorbell. Simple steps lead to great results.