Are you tired of constantly opening the door for your pet? Imagine giving your furry friend the freedom to come and go whenever they want—without compromising your home’s design.
Installing a pet door that fits perfectly with your door’s look isn’t as hard as you might think. In this guide, you’ll discover simple steps to install a pet door that blends seamlessly with your home. Keep reading, and you’ll learn how to make your pet’s life easier while keeping your door stylish and secure.
Choosing The Right Pet Door
Choosing the right pet door is a key step for a smooth installation. The right door fits your pet’s size and your home’s style. It also keeps your home safe and comfortable. Consider different types, sizes, and materials before buying. This helps you pick the perfect pet door for your needs.
Types Of Pet Doors
There are several types of pet doors to choose from. Manual doors are simple and affordable. Electronic doors open only when your pet wears a special collar. This stops other animals from entering. Sliding glass pet doors fit into existing glass door tracks. Wall-mounted doors work well for homes without doors nearby.
Size And Placement Considerations
Measure your pet’s height and width before buying a door. The door should be slightly bigger than your pet. Place the door where your pet feels safe and comfortable. Avoid busy or noisy areas. Make sure the door is easy for your pet to reach and use. Correct placement helps your pet adapt quickly.
Material And Security Features
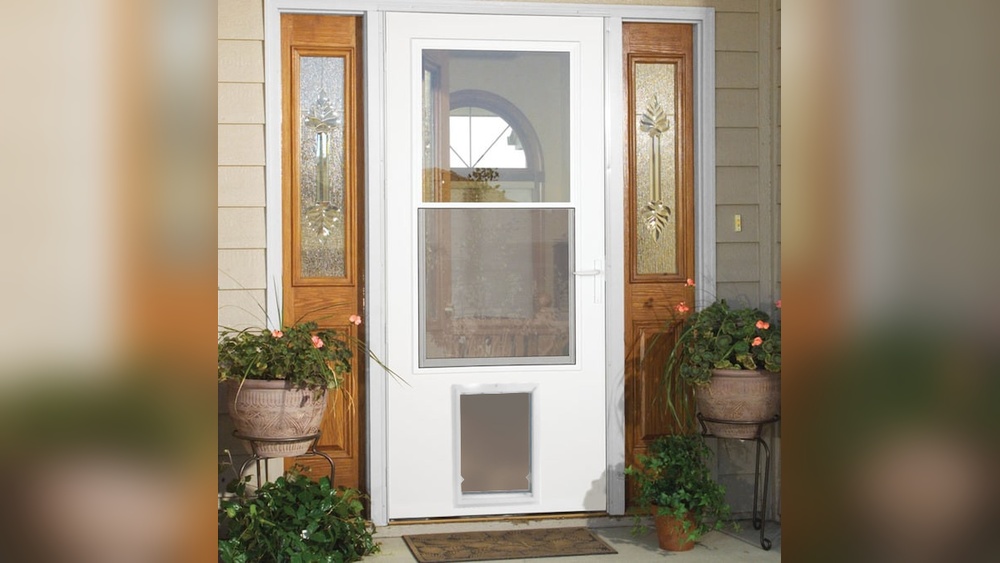
Choose strong materials like durable plastic or metal frames. Look for doors with weatherproof seals to keep out cold air. Security features like locking panels prevent unwanted entry. Some doors have built-in alarms for extra safety. A good pet door protects your home and keeps your pet safe.
Credit: www.petdoors.com
Tools And Materials Needed
Installing a pet door needs the right tools and materials. Using proper items makes the process smooth. It also ensures the door fits well and works safely. Gather everything before starting. This saves time and avoids mistakes.
Essential Tools
You need some basic tools to install a pet door. A drill helps make holes for screws. A jigsaw cuts the door opening. A screwdriver tightens screws firmly. A measuring tape ensures correct placement. A pencil marks the cutting lines. A level keeps the door straight. These tools help create a neat, secure fit.
Recommended Materials
Choose good materials for durability and style. The pet door frame should match your door’s material. Plastic frames are light and easy to clean. Aluminum frames offer strength and weather resistance. Weather stripping keeps cold air out. Screws and anchors hold the door firmly. Sealant prevents water leaks around edges. Pick materials that suit your home’s design.
Safety Equipment
Safety matters during installation. Wear safety glasses to protect your eyes from dust. Use ear protection if the drill is loud. Gloves protect your hands from sharp edges. Dust masks stop you from breathing sawdust. Keep pets away while cutting and drilling. Safety gear helps avoid injuries and accidents.
Preparing The Door
Preparing the door is an important step before installing a pet door. It helps ensure a clean fit and a smooth operation for your pet. Taking time at this stage reduces problems later. Follow these simple steps to get the door ready.
Measuring And Marking
Start by measuring your pet’s size accurately. Measure height and width from the floor or ground. Use these numbers to find the right pet door size. Mark the door carefully with a pencil. Draw the outline where you will cut. Double-check the marks to avoid mistakes.
Removing Door Panels If Needed
Some doors have removable panels. Removing them makes cutting easier and safer. Use a screwdriver or similar tool to take off panels. Keep all screws and parts safe for reassembly. If your door does not have panels, skip this step. Work slowly to avoid damage.
Ensuring Structural Integrity
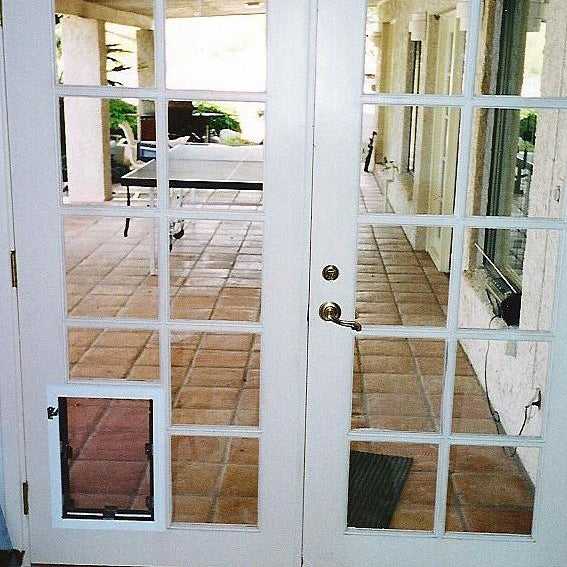
Check the door’s strength before cutting. Look for cracks or weak spots. Reinforce weak areas with wood or metal supports. This helps keep the door sturdy after installing the pet door. A strong door lasts longer and works better. Be careful not to weaken the door during preparation.
Credit: www.homedepot.com
Cutting The Door Opening
Cutting the door opening is a key step in installing a pet door. It requires care and precision to ensure a perfect fit. The right tools and technique make this task easier and safer. Follow clear steps to cut a clean opening in your door.
Selecting Cutting Tools
Choose tools suited for your door type and thickness. A jigsaw works well for wood and hollow doors. Use a drill to make starter holes. Sandpaper or a file helps smooth edges later. Always pick tools that feel comfortable and safe to use.
Step-by-step Cutting Guide
Start by measuring and marking the pet door outline clearly. Drill holes at each corner inside the marked area. Insert the jigsaw blade into one hole and cut along the lines. Take slow, steady strokes to avoid splintering. Remove the cut piece carefully and check the fit of the pet door.
Smoothing Edges
Use sandpaper or a file to smooth rough edges. Pay attention to corners and any splinters. This step prevents injury to pets and helps the door fit better. Clean dust and debris from the cut area before installing the pet door frame.
Installing The Pet Door Frame
Installing the pet door frame is a key step in adding a pet door to your door. The frame holds the flap in place and creates a smooth opening for your pet. This step needs care to ensure the door works well and lasts long.
Follow these clear steps to fit the frame perfectly. You need the right tools and a steady hand. The right fit keeps the pet door strong and secure.
Fitting The Frame
Place the pet door frame into the cut opening of the door. Check that it fits snugly without gaps. Align the frame so it sits evenly on all sides. Adjust the frame until it is level and straight. Use a pencil to mark screw holes on the door.
Securing With Screws
Use the marked holes to drill pilot holes carefully. Place the frame back and insert screws into the holes. Tighten screws steadily to hold the frame firmly. Avoid overtightening to prevent damage to the door. Confirm the frame is stable and does not move.
Sealing And Weatherproofing
Apply weatherproof sealant around the edge of the frame. Sealant prevents water and air from entering through gaps. Smooth the sealant to cover all edges evenly. Check the sealant has no cracks or holes. This step protects your door and keeps your home insulated.

Credit: www.youtube.com
Design Enhancements
Design enhancements improve both the look and function of pet doors. They help the door match your home’s style. They also make the door easier for pets to use. Small changes can create a big difference in appearance and comfort.
Customizing Flap Styles
Choose flap materials that suit your pet’s size and weather conditions. Soft vinyl flaps offer flexibility and quiet use. Hard plastic flaps provide durability and insulation. Clear flaps help pets see outside, reducing hesitation. You can select colors to blend with your door or wall.
Adding Decorative Elements
Add trims or frames around the pet door for a polished look. Wooden frames match traditional homes well. Metal frames add a modern touch. Decorative decals or patterns on the flap add personality. These elements make the pet door feel like part of your home.
Integrating Smart Features
Smart pet doors use sensors to control access. They open only for your pet’s microchip or collar tag. This keeps other animals out. Some models connect to your phone for easy monitoring. You can track when your pet enters or leaves. These features add safety and convenience.
Testing And Adjustments
After installing a pet door, testing and adjustments are key. These steps ensure the door works well and your pet feels comfortable. Proper testing prevents damage and keeps your pet safe. Adjustments help fix any problems and improve door function.
Checking Door Operation
Open and close the door several times. Make sure it swings smoothly without sticking. Check if the flap seals tightly to keep out drafts. Watch for any gaps or loose parts. Confirm the locking mechanism works properly. Adjust hinges or screws if needed. A properly working door lasts longer and saves energy.
Training Your Pet
Show your pet how to use the door gently. Use treats to encourage them to go through. Practice several times in a calm environment. Be patient and positive with your pet. Praise them each time they use the door correctly. Training helps your pet feel safe and confident. It also reduces accidents or fear around the door.
Troubleshooting Common Issues
If the door sticks, check for dirt or obstructions. Tighten or loosen screws to fix alignment. If your pet hesitates, try using more treats or toys. Noise from the door may need lubricant on hinges. Drafts might require adding weather stripping. If problems persist, review the installation steps again. Small fixes improve your pet door’s performance quickly.
Maintenance Tips
Keeping your pet door clean and in good shape helps it last longer. Regular care prevents problems and keeps it working smoothly. Simple steps make a big difference in maintenance.
Cleaning The Pet Door
Use a soft cloth to wipe the door daily. Remove dirt and dust from the flap and frame. Clean with mild soap and water every week. Avoid harsh chemicals that can damage the material.
Check for pet hair stuck around the edges. Clear it gently to keep the flap moving freely. Clean the sensors if your pet door has electronic parts.
Inspecting For Wear And Tear
Look at the flap for cracks or holes often. Check the frame for loose screws or parts. Tighten screws if they feel loose or wobbly. Replace worn parts quickly to avoid bigger damage.
Test the flap movement by pushing it open and closed. It should move smoothly without sticking. Watch for signs of rust or fading on metal parts.
Seasonal Care Advice
In winter, add weather stripping to keep cold air out. Clear snow and ice around the door to avoid blockages. In summer, check for sun damage or warping. Keep the area shaded to protect the door.
Adjust the door settings if your pet’s needs change with seasons. Regular seasonal checks help maintain comfort and safety for your pet.
Frequently Asked Questions
What Tools Are Needed To Install A Pet Door In A Door?
You need a drill, jigsaw, measuring tape, screwdriver, and safety gear. These tools help ensure precise cutting and secure installation of the pet door.
How Do I Measure For The Perfect Pet Door Size?
Measure your pet’s height and width accurately. Add extra space for comfort and ease of access when choosing the door size.
Can I Install A Pet Door On Any Door Type?
Most pet doors fit wooden, metal, and glass doors. Check the pet door specifications to confirm compatibility with your door material.
How Do I Ensure A Pet Door Is Energy Efficient?
Choose a pet door with insulated flaps and weatherproof seals. This reduces drafts and maintains your home’s temperature effectively.
Conclusion
Installing a pet door in your door adds freedom for your pet. Choose the right design for your door type and pet size. Measure carefully to ensure a perfect fit. Follow the steps to cut and install the door flap securely.
Check for any sharp edges to keep your pet safe. A well-installed pet door saves time and lets pets go outside easily. Enjoy the convenience and watch your pet explore happily. Simple tools and clear steps make the process easy for anyone.
Your pet will thank you for this small change.