Imagine waking up each morning and seeing the weather, news, and your daily schedule right on your bathroom mirror. Sounds futuristic, right?
But what if you could build this smart mirror yourself using a Raspberry Pi? You don’t need to be a tech expert or spend a fortune. In this guide, you’ll discover simple steps to create your own smart mirror that blends seamlessly into your home.
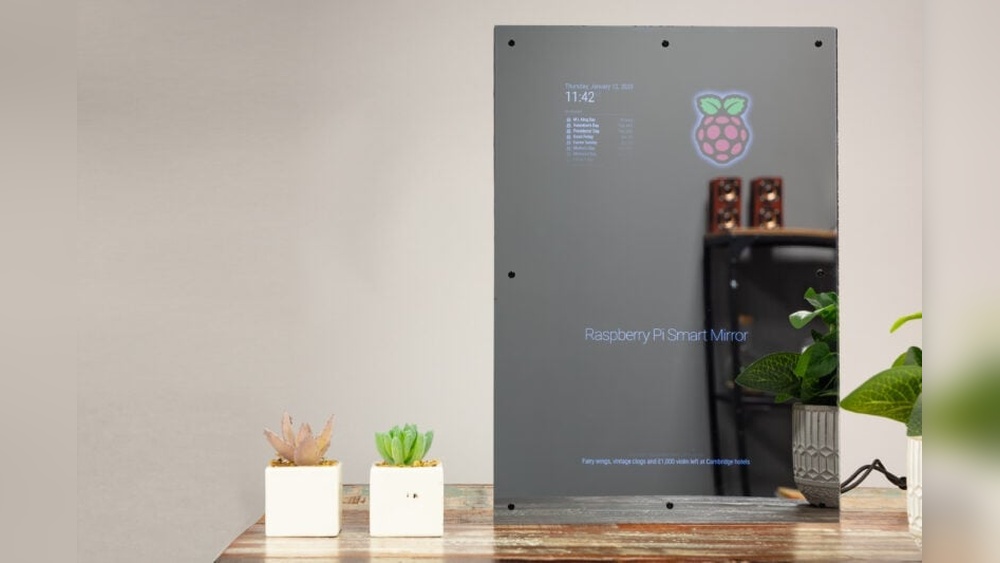
Ready to turn a regular mirror into a powerful, personalized assistant? Keep reading, and let’s make it happen!

Credit: all3dp.com
Choosing The Right Raspberry Pi
Choosing the right Raspberry Pi is the first step to build a smart mirror. The right model ensures smooth performance and easy setup. It also affects the speed and features of your smart mirror. Not all Raspberry Pi models work the same for this project. Knowing the differences helps you pick the best one.
Comparing Raspberry Pi Models
The Raspberry Pi 4 is popular for smart mirrors. It has a fast processor and enough memory. It comes with 2GB, 4GB, or 8GB RAM options. More RAM means better multitasking and faster responses.
The Raspberry Pi 3 is cheaper but slower. It works for simple smart mirrors with fewer features. It has less memory and a slower processor. This can cause delays or lag in the display.
The Raspberry Pi Zero is very small and low-cost. It uses less power but has limited speed. It is good for basic projects but not ideal for complex smart mirrors.
Necessary Accessories
Besides the Raspberry Pi, you need a few key accessories. A microSD card stores the operating system and apps. Choose at least 16GB with good speed.
A power supply that matches your Raspberry Pi is vital. The Pi 4 needs a 5V 3A USB-C charger. Older models use micro USB chargers.
A monitor or screen is required. A touchscreen adds interactivity but is not mandatory. Use HDMI cables to connect the screen.
Finally, a case protects your Raspberry Pi. It keeps dust out and helps with cooling. Some cases come with fans for better heat control.
Gathering Materials And Tools
Building a smart mirror with a Raspberry Pi starts with gathering the right materials and tools. Each part plays a key role in your project’s success. Prepare carefully to avoid delays or extra costs.
Mirror Types And Displays
Choose a two-way mirror for the best effect. It shows reflections and lets light through. This mirror works well with screens behind it.
For the display, use an LCD or LED monitor. Pick one that fits the mirror size. A thin display helps keep the mirror slim. Check for good resolution and brightness. This ensures clear text and images on your smart mirror.
Additional Components
Besides the mirror and display, gather a Raspberry Pi board. The latest model is faster and more reliable. Include a microSD card to hold the software. A power supply is necessary to run the Pi and display.
Other tools include a frame or case for the mirror. Use a keyboard and mouse during setup. A Wi-Fi adapter or Ethernet cable provides internet access. Don’t forget cables, connectors, and mounting hardware to assemble everything safely.
Setting Up The Raspberry Pi
Setting up the Raspberry Pi is the first step in building your smart mirror. This process prepares the device to run the smart mirror software smoothly. It involves installing the operating system and configuring basic settings.
Taking time to set up the Raspberry Pi correctly helps avoid issues later. The device needs the right software and network connection to work properly. Follow the steps carefully for the best results.
Installing The Operating System
Start by downloading the Raspberry Pi OS image from the official website. Use a tool like Raspberry Pi Imager or Balena Etcher to write the image to a microSD card. This card acts as the Pi’s storage and boot device.
After writing the image, insert the microSD card into the Raspberry Pi. Connect a keyboard, mouse, and monitor to the Pi for initial setup. Power on the device and follow the on-screen instructions to complete the OS installation.
Configuring Network And Settings
Once the OS is installed, connect the Raspberry Pi to the internet. Use Wi-Fi or Ethernet depending on your setup. A stable network connection is important for software updates and remote access.
Next, adjust basic settings like language, time zone, and keyboard layout. These settings make the device easier to use and match your location. Enable SSH if you want to control the Pi remotely via another computer.
Lastly, update the Raspberry Pi software to ensure it runs smoothly. Open the terminal and type commands to upgrade all packages. Keeping the system updated improves security and performance.

Credit: www.youtube.com
Installing Smart Mirror Software
Installing the smart mirror software is the key step in turning your Raspberry Pi into a smart mirror. This software controls the display and shows useful information like weather, news, and calendar events. Choosing the right platform and installing it properly ensures your mirror works smoothly and looks great.
Some platforms offer simple setups and strong community support. Others come with many features but need more skills to install. Understanding your options helps you pick the best fit for your project.
Popular Smart Mirror Platforms
MagicMirror² is the most popular choice. It is open-source and easy to customize. You can add modules for weather, news, and more. The community offers many free plugins.
Another option is HomeMirror. It focuses on home automation integration. It works well with smart home devices.
MirrorMirror is simpler and designed for beginners. It has basic features and a clean interface. Good for those who want a quick setup.
Step-by-step Installation
First, prepare your Raspberry Pi with the latest Raspberry Pi OS installed. Connect it to the internet.
Next, open the terminal and update your system by typing sudo apt update and sudo apt upgrade.
For MagicMirror², install Node.js with curl -sL https://deb.nodesource.com/setup_16.x | sudo -E bash - and sudo apt install -y nodejs.
Clone the MagicMirror² repository using git clone https://github.com/MichMich/MagicMirror. Navigate to the folder with cd MagicMirror.
Install dependencies by typing npm install. After installation, start the mirror with npm start.
Adjust your configuration file to add modules and personalize your mirror. Save changes and restart the software.
Customizing Display Modules
Customizing display modules is key to creating a smart mirror that fits your needs. It lets you show useful information right on the mirror. This makes your daily routine easier and more organized.
You can choose what types of information appear. Weather updates, news headlines, calendar events, and notifications are popular options. Each module can be adjusted to match your style and preferences.
Adding Weather And News
Start by adding weather updates to your smart mirror. Use a weather API to get real-time data. Show temperature, humidity, and forecast for the day. This helps you dress right before leaving home.
Next, add a news module. Pick news sources that interest you. Display headlines or short summaries. Update the news regularly so you stay informed without checking your phone.
Integrating Calendar And Notifications
Connect your calendar to the smart mirror to see daily events. It reminds you of meetings, appointments, and tasks. This feature keeps you on track throughout the day.
Notifications from apps or emails can also appear on the mirror. Choose which alerts are important. This way, you won’t miss urgent messages while getting ready.
Assembling The Smart Mirror
Assembling the smart mirror is the step where all parts come together. It needs care and patience. You will attach the display to the mirror and manage the wires carefully. Proper setup ensures the mirror works well and looks great.
Follow these clear steps to build a strong and neat smart mirror. Each part must fit perfectly for the best result.
Mounting The Display Behind The Mirror
Place the display directly behind the two-way mirror. Use strong tape or brackets to hold it firmly. Make sure the screen covers the mirror’s center. Avoid gaps that let light escape. The display should be flush and stable. This helps the mirror show images clearly and evenly.
Check the display angle. It must face straight out for the best view. Avoid tilting or shifting during use.
Ensuring Proper Wiring And Ventilation
Connect the Raspberry Pi and display with tidy wires. Use cable clips to keep them organized. Avoid loose or tangled cables. This prevents damage and keeps the mirror clean.
Leave space for air to flow around the Raspberry Pi. Ventilation stops overheating and keeps the parts safe. Small holes or vents in the frame help air move freely. Check the temperature occasionally to ensure cool operation.
Enhancing With Voice Control
Adding voice control makes your smart mirror easier to use. You can speak commands instead of touching the screen. This hands-free feature helps you get information faster. It also makes your mirror feel more modern and tech-savvy.
To add voice control, you need to set up a microphone and speaker. These parts let your mirror listen and talk back. After that, you can connect voice assistant software. This software understands your voice and responds with answers.
Setting Up Microphone And Speaker
Choose a USB microphone that works well with Raspberry Pi. Test the microphone to ensure it picks up your voice clearly. Connect the microphone to one of the USB ports on the Pi.
Next, select speakers that fit your space. USB or Bluetooth speakers work well for most smart mirrors. Connect the speakers to the Raspberry Pi’s audio output. Adjust the sound settings to get clear audio output.
Run simple tests to check the microphone and speaker functions. Speak into the microphone and listen for sound from the speakers. Fix any issues before moving to the next step.
Integrating Voice Assistants
Choose a voice assistant compatible with Raspberry Pi, like Google Assistant or Mycroft. Install the assistant’s software using guides from official sites. Follow the setup instructions carefully for proper configuration.
Grant necessary permissions for the software to access the microphone and speaker. Train the assistant to recognize your voice commands. Test simple commands like asking the weather or time.
Customize commands to control mirror features. For example, ask the mirror to show news or calendar events. This makes your smart mirror more interactive and useful every day.
Troubleshooting Common Issues
Building a smart mirror with Raspberry Pi is exciting. But some common issues may slow down the process. Troubleshooting helps fix these problems quickly. It saves time and frustration.
Knowing what to check first makes troubleshooting easier. Most problems come from display errors or connectivity issues. This guide covers these two areas to help you get your smart mirror running smoothly.
Display And Software Glitches
Screen not showing anything? Start by checking power supply. A weak power source can cause the display to flicker or go black.
Check your HDMI cable connection. Loose or damaged cables often cause display problems.
Software glitches can freeze the interface. Restart the Raspberry Pi to clear temporary errors.
Update the smart mirror software regularly. Outdated software may cause bugs and slow performance.
Verify the configuration files. Errors in settings can stop modules from loading correctly.
Connectivity Problems
Wi-Fi issues are common with Raspberry Pi smart mirrors. Confirm the Wi-Fi credentials are correct in your settings.
Restart your router and Raspberry Pi to refresh connections.
Check network signal strength near the mirror. Weak signals cause slow or dropped connections.
Use an Ethernet cable if Wi-Fi is unstable. Wired connections are more reliable for constant data flow.
Firewall settings may block the smart mirror from accessing the internet. Ensure necessary ports are open.
Expanding Your Smart Mirror
Expanding your smart mirror turns a simple project into a powerful tool. You can add features that make daily life easier and more fun. Small upgrades can bring big changes to how you use your mirror.
Adding new parts and connecting devices lets your mirror do much more. Customizing your setup helps match your needs perfectly. Here are some ways to expand your smart mirror using a Raspberry Pi.
Adding Sensors And Cameras
Sensors make your smart mirror aware of its environment. Motion sensors can detect when you approach. This lets the mirror light up or show information automatically.
Cameras can add face recognition or video chat features. They also help track your mood or health status. Choose sensors and cameras that work well with Raspberry Pi for smooth integration.
Integrating Smart Home Devices
Connect your smart mirror to other smart home gadgets. Control lights, thermostats, or security cameras from the mirror screen. Use compatible apps and protocols like MQTT or Home Assistant.
This link creates a central control point. You save time and effort managing devices around your home. It also makes your smart mirror a true hub for your smart lifestyle.

Credit: www.instructables.com
Frequently Asked Questions
What Components Are Needed For A Raspberry Pi Smart Mirror?
You need a Raspberry Pi, two-way mirror glass, a monitor, frame, and power supply. Additional sensors and software enhance functionality.
How Do I Install Software On A Smart Mirror Raspberry Pi?
Install Raspbian OS on the Pi. Use MagicMirror² software, which is open-source and customizable for smart mirror features.
Can I Add Voice Control To My Smart Mirror?
Yes, integrate voice assistants like Google Assistant or Alexa using compatible microphones and software modules for hands-free control.
How Do I Connect The Raspberry Pi To The Monitor?
Use an HDMI cable to connect the Raspberry Pi to the monitor. Ensure the monitor supports the Pi’s resolution.
Conclusion
Building a smart mirror with Raspberry Pi is fun and rewarding. It combines technology and creativity in a simple project. You learn basic coding, hardware setup, and design skills. The mirror shows useful information like time, weather, and news. It fits well in any home or office.
Start small, then add features as you go. This project improves your tech skills step by step. Give it a try and enjoy your smart mirror every day!